Vintage Emulation; Recreating That “Old Photo” Look In The Digital Age Page 2
In any case, slow lenses made selective focus difficult, and with faster lenses, neutral density filters were needed to allow wide apertures in daylight: the vast majority of cameras offered top speeds of only 1⁄300 sec, or 1⁄500 or 1⁄1000 at most, unlike today’s 1⁄4000 and above.
Of course there were exceptions, most notably in portraiture, and (once again) the most reliable way to recreate the Hollywood 8x10” look is with an 8x10” camera and real film. Otherwise, you need a reasonably fast, reasonably long lens for anything but the most frame-filling large head portraits. But as a general rule, for the vintage look, you need to stop down.
8. Grain. This is the film equivalent of noise and is an artifact of enlargement. Until the 1930s it was anathema to most photographers, and long after that, many did their utmost to avoid it, though this taboo declined greatly in the 1960s. To this day, any fast film gives grain, especially if overexposed and developed in a speed-increasing developer.
Grain “filters” for simulating grain electronically generally work OK for color but for black and white I have generally found it more successful to desaturate the image; add quite a lot of noise (rather than grain); and then desaturate again to lose the color of the noise. With digital, just turn the ISO up. For still more noise, underexpose and dig out the shadow detail in post-processing.
 |
|
|
9. Paper. My 1968 Kodak Master Darkroom Dataguide has 11 different black-and-white paper samples, all of which look and feel different—and there were plenty of other paper manufacturers. There has never been quite such a wide choice at any one time in color, but there have still been plenty of surfaces and paper weights. Some, such as “silk,” are simply impossible to replicate with inkjet papers, but it is worth looking hard at the surfaces and weights that you can get in inkjet, and choosing papers that most closely resemble old prints in the family album or elsewhere. For color, this is usually a not-too-shiny gloss on a heavyweight paper, though for black and white, the choice is much more varied.
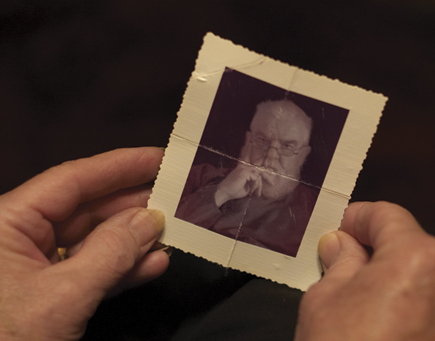
Until comparatively recently, prints were normally made with white borders, so you don’t want borderless prints if you are trying to recreate the vintage look. For the real finishing touch, try to find a deckle-edged trimmer. They’re thin on the ground nowadays, but nothing recreates the look of the 1920s to the 1950s more convincingly.
Before the 1920s, photo prints were often very thin and mounted on thicker backing boards. Backing boards from portrait studios were often minor works of art in their own right, replete with engraving and gold blocking, but this is probably more trouble than most people want to go to.
 |
|
|
10. Age. The effects of age can be divided into fading and mechanical damage. The former is a swine to replicate exactly in color, but most prints tend to fade toward cyan (remove about equal quantities of magenta and yellow, or add cyan) or toward magenta (remove cyan and some yellow, or add magenta). In monochrome, in the wet darkroom, try bleaching (photographic bleach, not household!).
The easiest way to inflict mechanical damage is to sandwich the print between two pieces of clean white paper (to stop it getting dirty); place it on a gravel path; and stand on it. Twist or otherwise move your foot if need be. For folding and dog-earing, fold repeatedly in both directions, and scrape lightly at the image side (when folded) with a fingernail to accentuate the damage. Add scratches with sandpaper or a rough stone wall, pressing fairly lightly.
To sum up, you can quite easily take your wonderful multi-megapixel image and successfully negate all its advantages via a combination of electronic and physical abuse, so that you end up with a picture which looks as if it were taken 60 years ago by your grandfather with a Box Brownie, then neglected and maltreated since. Ain’t technology wonderful?
- Log in or register to post comments


