HDR: High Dynamic Range For Expanded Contrast
HDR stands for High Dynamic Range. What this refers to is the digital sensor’s ability (or lack of ability) to render good detail in both the highlights and the shadows in a photograph.
Our eye/brain combination is extremely sophisticated, and as we look at a contrasty scene (such as a landscape in noon sunlight) the detail in the shadows and in the bright sunny areas is quite clear to us. A photograph will not look the same as we see it. If you expose correctly for the highlights, which is normally what we want to do, the shadows will be very dark or even black with a complete loss of texture and detail. If you expose for the shadows, the highlights will be grossly overexposed—washed out—and there will be a loss of texture and detail in those areas. If you compromise the result won’t be very appealing. The highlights will be too light and the shadows will be too dark. You’ll have detail in both areas (for the most part), but you won’t like the image.
The Technique
What the HDR technique does is address this problem. The procedure is easy to do—it’s nothing more than bracketing, really. You take several images of the scene from a tripod and each photo is one f/stop apart. You can also do this with a two f/stop exposure differential between shots, but for the smoothest gradation of tone and the highest quality HDR image, I prefer to make my exposures just one f/stop different.
It is important to note that the same lens aperture is used for all the pictures to maintain the same depth of field. Only the shutter speed varies, so bracket using shutter speed and not aperture settings. The number of pictures you take depends on how much contrast there is in the scene (the more contrast, the more photos are required), but figure 4-8 pictures. Set the camera to Manual Exposure mode, choose the lens aperture, and then change the shutter speed in one f/stop increments. An easy way to do it is to take a light reading on the scene and then take three pictures that are lighter than that reading and three pictures that are darker, each with a one f/stop difference between the pictures. You can do this in Manual Exposure mode, though many cameras offer automatic bracketing options, which means that the camera will take the set for you with one push of the shutter release, or with three or more successive shots.
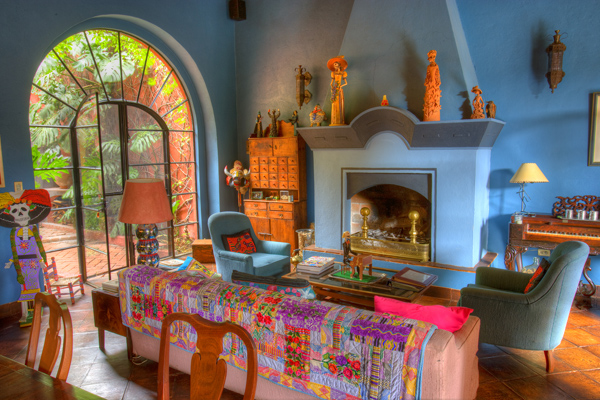
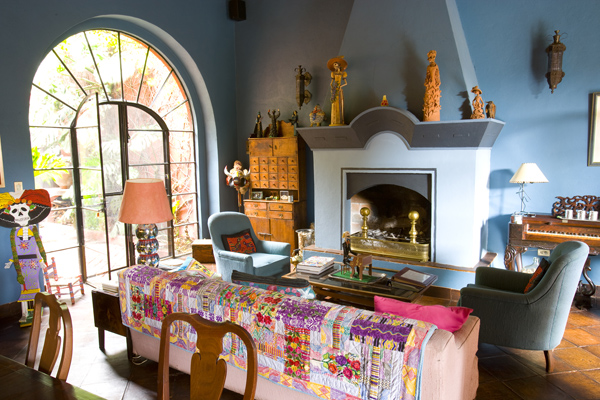
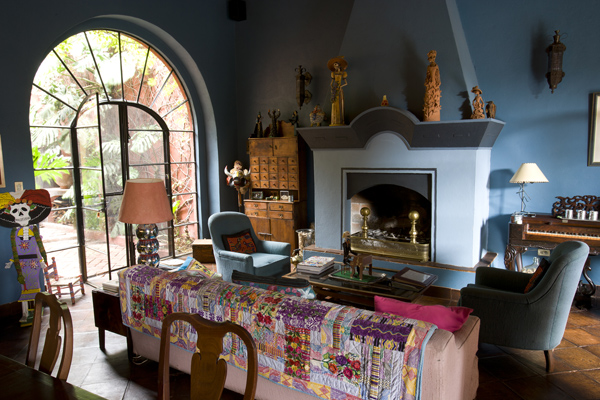
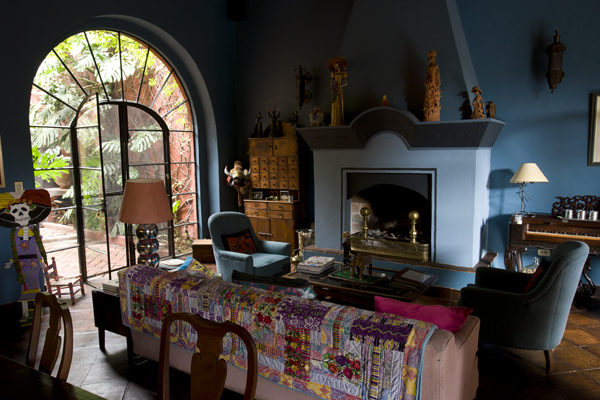
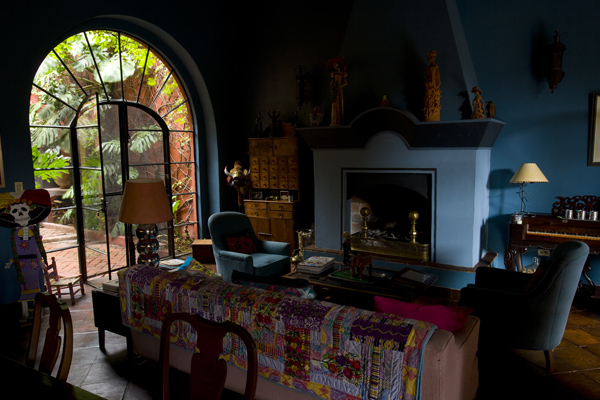
The colorful living room with a door leading to an outdoor patio (#1), is a classic example of where HDR is necessary if you want to show good detail in the outdoor patio as well as in the shadow areas of the room. Note that the patio was not lit by direct sunlight. It was overcast, but it was so much brighter than the shadows in the room that it seems excessively bright. Using a tripod, I took only four shots of this composition in one f/stop increments (#2, #3, #4 and #5). I always shoot in Raw, and when I processed each of the images I did not do any tweaking with respect to color, contrast or exposure. I simply opened them in Photoshop as I took them, gave them a number and put them on my desktop.
All Photos © Jim Zuckerman
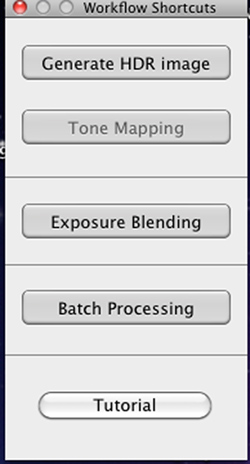
The software program I recommend for assembling the bracketed photos is Photomatix from HDRsoft. You can download a free trial at www.hdrsoft.com. When the program opens, you will see a very simple dialog box, figure A, and when you click Generate HDR image you browse for the pictures on the desktop. Once the program does its magic, you will then have many self-evident sliders to tweak the color, contrast, saturation, luminosity, white point, black point, gamma—and other factors that you have seen many times before. It’s not difficult at all, and once you do it a couple of times it will be a piece of cake.
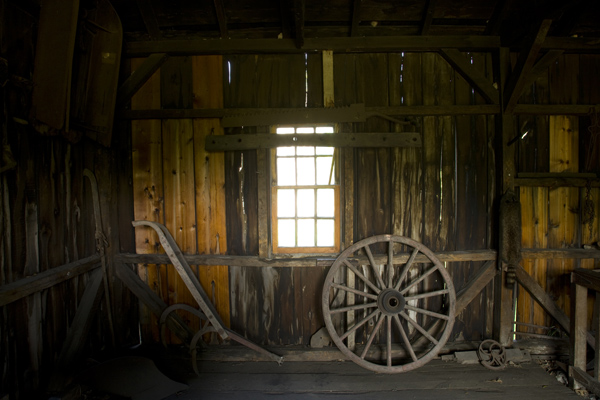
In an old barn in Missouri, I used HDR to expose correctly for the very dark interior as well as the sunny exterior. Compare (#6) the original photo with no manipulation at all, and the HDR image (#7). The difference is dramatic. The HDR image actually simulates what I could see with my eyes but the digital sensor couldn’t capture it that way.
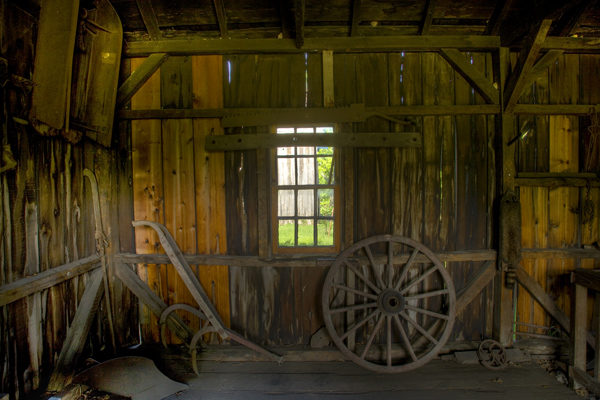
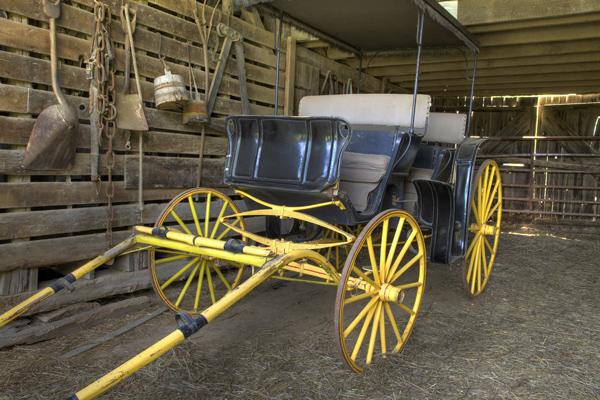
You can see the same remarkable comparison in the shot of the old wagon, (#8 and #9). Look at the detail in the rear of the barn in the original, and compare that with the HDR image. In the latter we can see all the detail our eyes could see. Many Photoshop techniques allow us to create artistic interpretations of reality, but Photomatix recreates reality in contrasty situations because digital technology is not able to show us the detail that is really there.
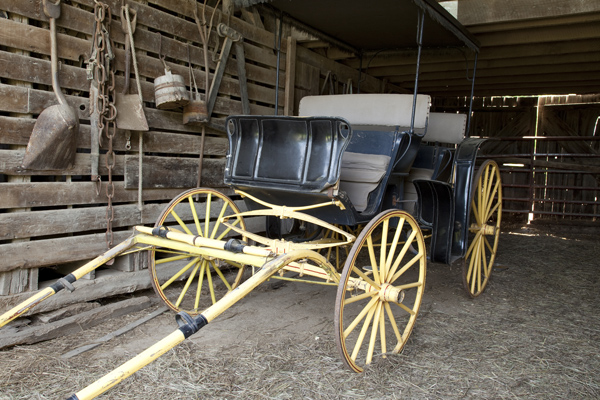

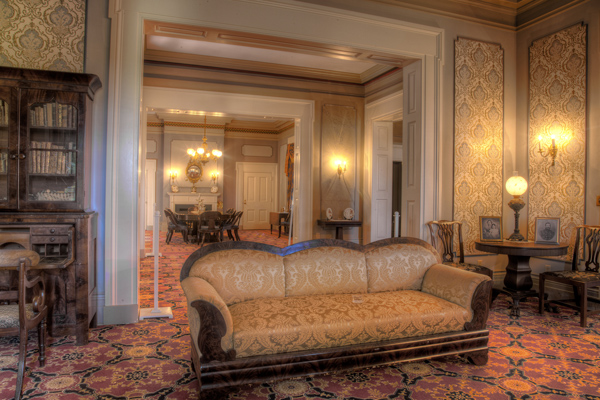
You don’t need extreme contrast to warrant the use of the HDR technique. For example, the beautiful living room in the antebellum plantation house, RippaVilla in Spring Hill, Tennessee was illuminated uniformly to the eye, but a single-frame photograph would show discrepancies in the corners, under tables and around the lamps. I used HDR (#10), and the result reveals every possible detail precisely as my eye saw it.
Notice that in all of these pictures, there are no elements that are moving. There are no people, and the wind isn’t a factor. When an element has moved from one frame to another, Photomatix tries to extrapolate and align the mismatched portion of the picture, but there are limits to what it can do. If the leaves of a tree are blowing, for example, you won’t end up with a sharp composite.
- Log in or register to post comments


