I swear that it looks good in the camera that you are using. Good shots even if that it is just normal pictures. - Wes Upchurch
Build A 3D Photo Viewer: Print Viewer For Paired Images
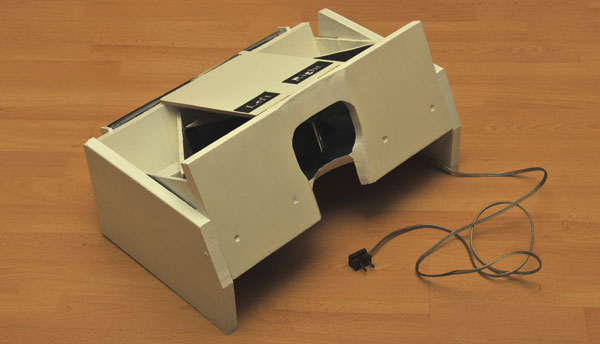
As I got older, and began to practice photography as a profession, I always wondered about what I could do to produce my own stereo images. I remembered the viewer from grade school, but realized it wouldn’t really work well for me, as my eyes were changing, and I was beginning to rely on reading glasses. Then I got to thinking about binoculars, and telescopes, and how they use mirrors to reflect light, and I thought about building a simple viewer using that principle. My dad, who was also a photographer, and scientist, pointed out that I would need to use “first surface” mirrors, which have the reflective coating on the outside surface of the mirror. Normal mirrors produce a second image, when viewed at on an angle, because the reflective coating is on the back side of the glass.
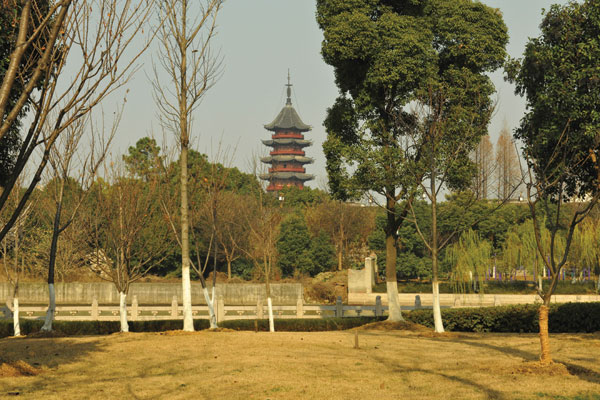
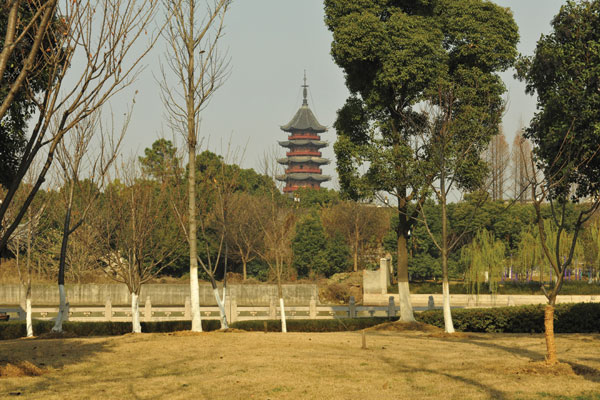
All Photos © Salisbury Photography
My dad guided me to Edmund Optics, where I could buy first surface mirrors for a reasonable cost. Once I had the mirrors, I could build the viewer, but the challenge was to place the mirrors at the correct angle in that viewer, so that I could get a 3D image. The plans that I offer include the correct placement of those mirrors, and the 5x7 holders, which are both critical parts of the viewer. I chose to use 5x7s because of the great detail that is possible, and yet keep the viewer reasonable in size. My first viewer was built mostly from plywood.
For 10 years, I have enjoyed taking many 3D photos. In 2009, my wife and I visited China. There, I took about 100 stereo pairs and was amazed at the beauty. My technique for taking stereo images is quite simple. In the beginning, I shot all of my stereo images with a pair of Bronica 645 cameras mounted side by side on a piece of oak, and I would simply push both shutters at the same time. This technique works well with people who can be still for a 1⁄4 sec or so, although you can’t really hit both shutters at exactly the same time, so it is not good for action shots. (With a stereo camera that has two lenses and coordinated shutters in the same camera body, action shots would be possible, although I have never owned one.)
Later, I used just one camera, and would simply shoot my first photo from the left, and then move 4” to the right, and shoot again. I just keep the subject centered in both images. Of course, you could use a tripod and level the camera for each shot.
Since I now shoot 100 percent digital, I shoot far more stereo images than ever before and I print only the best shots. When you put the (two) 5x7s in the viewer, if you have put them in the wrong way, you will be able to tell immediately that the 3D effect is not right. I always label the back of each photo as either left or right once I have determined which way is correct.
Another technique that works well is to do 3D shots from an aerial perspective, such as from an aircraft. When you think about looking at an elaborate train set, for example, it is amazing how three dimensional that subject looks. If you think about it, you realize that if you were really the big human looking at this small subject, your eyes might be 100 feet apart (to scale). So, if you are shooting a real subject, like a mountain or a village from an airplane, you will want to take the photos about 100 feet apart, and the stereo image you produce will look amazingly three dimensional.

Ideally, you should be flying about 1000 feet above the ground, and shoot the photos at 100 feet apart, again keeping your subject centered in both shots. In a small plane or helicopter, you will need to shoot the two images about 3⁄4 of a second apart. It is also important to shoot straight out the side of the aircraft so you are perpendicular to the subject. The hints I have given are basic guidelines, from my experience, and you will probably find that the interval between shots is not critical. The critical thing is to keep the subject centered in both photos, or crop later to achieve that.
Another important point to realize in viewing images in my viewer is that because of the mirrors, the stereo image will be backward. The way to correct for this in the darkroom would be to turn the negative upside down (emulsion up) when printing. If you are shooting digitally, you can reverse the images in Photoshop. Of course, remember to do this to both stereo images, or you will really get a headache looking into the viewer.
Editor’s note: Author Salisbury offers plans for $10. Contact him via e-mail at: clarksalisbury@hotmail.com or call: (435) 752-6665.
- Log in or register to post comments

