Uncolor My World; Techniques To Get Beautiful Black And White Images From Color Originals Page 2
 |
 |
 |
Desaturate
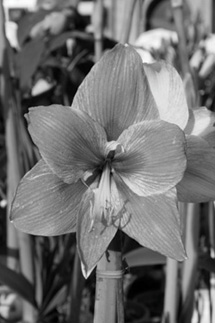
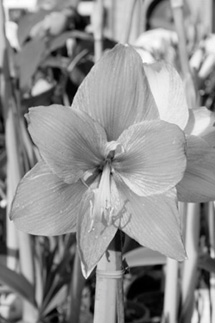
Another easy way to convert to black and white is to open your color file and
select Image>Adjustments>Desaturate. Note that for this flower, Desaturate
reveals more separation, detail, and contrast in the petals than the Image>Mode>Gray
scale method did, although the Gray scale conversion shows more detail in the
pistils. But beware, this example doesn't mean Desaturate is always better.
Try several different methods on any given photo to find the one that works
best for that particular image. In spite of the black and white tones, Desaturate
maintains your photo in the RGB color mode, and maintains the original file
size. In Elements, you can get this effect with Enhance>Adjust Color>
Remove Color.
 |
 |
Contact
Adobe Systems Inc.
345 Park Ave., San Jose, CA 95110
800-833-6687
www.adobe.com
- Log in or register to post comments


