Photographing Artwork Digitally; Setting, Shooting, And Post-Processing Page 2
Position your camera so the work fills the frame, keeping the camera perpendicular to the wall, with the sensor parallel to the art. This is more difficult than it sounds, as photographers usually compose their pictures by intuitively pointing the camera, but any deviation will cause perspective distortion in copy work. Use a bubble level to check that the artwork is true, then check and level the camera using the front of the lens or camera back. Move the tripod side to side, and elevate until your art is square in the frame. Remember to keep the zoom at its most distortion-free focal length.
With the camera set on manual, bracket your exposures, giving the subject a range of exposures above and below the "correct" exposure that your camera suggests. Light artwork can be easily underexposed, and dark artwork can fool the camera into overexposing, but by shooting several frames with more and less exposure you will be sure to get one right on. Don't rely on your camera's LCD alone to proof your shots; the brightness of the image on it relative to the room you're in can easily mislead you. The more you can get correct in camera, the less post-processing will be necessary and the higher the quality of the resulting image.
 |
|
|
Three-dimensional art presents a much greater photographic challenge, as angle,
composition, and lighting must all work together to tell the story of the object.
For small items we use the Lowel Ego digital imaging light. Window light is
a possibility; it can have a wonderful wrapping quality. The big problem with
natural window light is it will change by the hour, and is totally dependent
on the weather. Use reflectors to fill your shadows where you need detail, and
use a custom white balance to compensate for the shifting color balance.
Once you have good shots you need to begin the post-process. Always begin your
digital darkroom session by copying your files to at least two different folders.
One set can be safely archived while the other goes in a working folder. Evaluate
the exposures and choose the best shots. If you shot raw files this is the time
to select the precise color balance, sharpening, saturation, and contrast that
will most closely match the artwork. If you shot JPEGs save them as TIFFs or
in another lossless file format as soon as you open them. Never re-save an image
file as a JPEG unless you are finished working on it and have already saved
the same file in an uncompressed format.
If you are photographing for a juried art show the images you make will often
be projected in front of a panel of judges. Most digital cameras create files
in the sRGB color space. That's a good thing for digital projection because
they are more accurate when projected in the sRGB color space than in Adobe
RGB. More advanced digital cameras also may give you the option of the Adobe
1998 RGB color space. Either is OK for capture as long as you convert your digital
file to the sRGB color space before creating the JPEG image for jury submission.
A calibrated monitor is required for any serious color work. Now that inexpensive
devices like the Pantone huey are available for under $100, it's quick
and easy to adjust your monitor so you can see what really needs changing. Compare
the images you see on the monitor with the actual artwork. Hopefully you will
only need minor tweaks. If major shifts are required you might consider analyzing
where the shot went wrong.
Great results will please both the artist and all those who see your rendition
of the artist's vision.
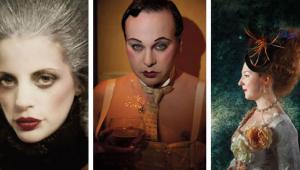
Thanks to Jane Petitjean for providing the artwork featured in this article.
To see more of Petitjean's work, visit her website at: www.janepetitjean.com.
Larry Berman and Chris Maher are photographers, writers, and web designers,
specializing in image intensive photography sites. For more information, visit
their websites at: www.BermanGraphics.com
and www.InfraredDreams.com.
- Log in or register to post comments


