Shooting And Assembling Panoramas; A Stitch In Time—The Sequel
Last year I wrote about one of my favorite software programs, Panorama Maker
3. The folks at ArcSoft have unveiled an updated Version 4 ($39.99 new, $24.99
upgrade), so I thought I'd give it a try.
Version 4 is more intuitive than Version 3, and that's really saying something.
The first couple of panoramas I tried went together easily, but I noticed that
the Fine-Tune tool had been eliminated. I wondered, "What were these people
thinking?" I heard that the program was more powerful but surely you'll
need to tweak the images on occasion?
So, I set out to show them just how foolish I thought they were. A couple of
images that I processed last year required serious tweaking due to blunders
I made when I shot. Inadequate leveling of the camera resulted in mismatches
in the final stitched images. However, I was able to correct them using the
now-missing tool. Well, I brought the first set of the images into Version 4,
clicked the "stitch" command, went to get a cup of coffee, and came
back to...a perfectly composited panorama. OK, so they got lucky the first
time. I tried another. Same deal. Darn thing works every time! The bottom line
is you have to have some seriously screwed up photos for Panorama Maker 4 to
fail.
There are a number of changes in the interface, and Panorama Maker 4 now has
its own browser. It will even automatically select and group the images for
you.
For more information, contact ArcSoft, Inc., 46601 Fremont Blvd., Fremont, CA
94538; (510) 440-9901; www.arcsoft.com.
Let's put together an image and see how simple it is.
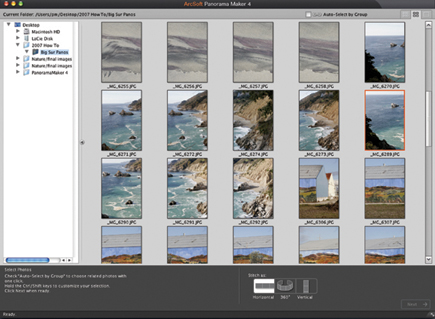
On opening Panorama Maker 4, the browser will appear on the left but can be
hidden when it's not wanted. In the browser I have selected the file Big
Sur Panos (#1).
 |
|
|
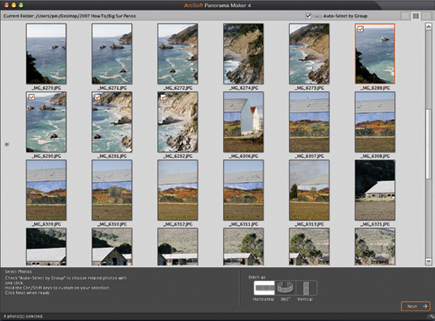
After hiding the browser, I checked Auto-Select by Group and clicked on the first photo; the rest were automatically chosen and confirmed by a small check box in each (#2). This automation can be overridden if desired. This is also where you specify the type of panorama you want: Horizontal, 360Þ, or Vertical.
 |
|
|
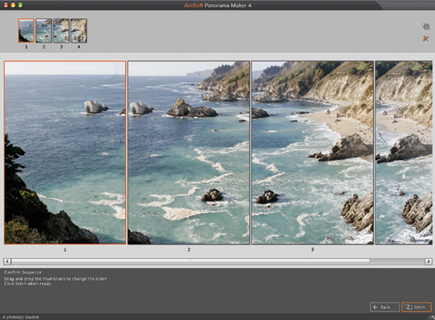
Clicking Next at the bottom right of the screen moves you to the Confirm Sequence screen. The upper set of thumbnails show the order and you merely drag and drop them to reorder them if necessary (#3). If you need to add or delete images simply return to the previous screen.
 |
|
|
- Log in or register to post comments


