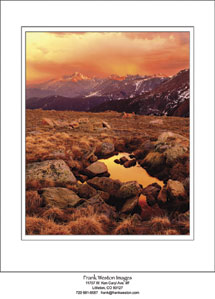
Double Mattes, Digital Style; Add A Touch Of Class To Your Online Photos
It’s easy to create a very sharp, realistic looking double matte to give your online photos an artistic presentation. All it takes is some very basic Photoshop skills and less than 10 minutes—the first time you try it. All you will need to create these double mattes is to have your Tool Palette and Layers Palette open.
 |
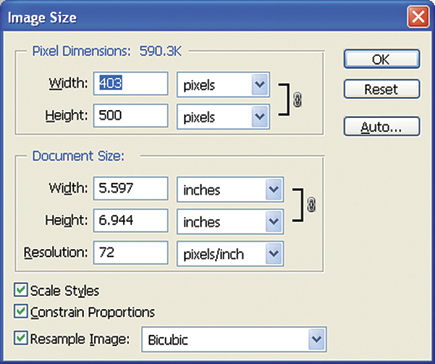
1. Select your image and size it to the size you want the final image to be, Image>Image Size. I’ve chosen 500 pixels high and I let Photoshop determine the width.
 |
2. We need to duplicate the layer with the image, the background layer, so we can work with it separately from the canvas which forms the matte. Duplicate the background layer with the Layer>Duplicate Layer command. Since this is a temporary layer, we can accept the default name of Background Copy by clicking OK.
 |
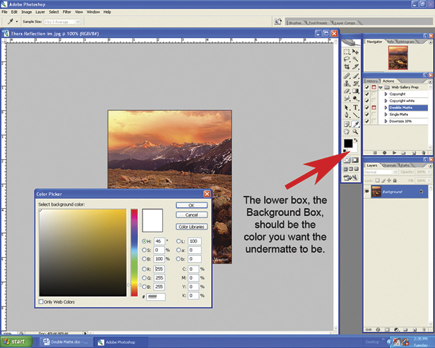
3. Before we start, we must select the color that we want to use for the under matte. To keep things simple for this exercise we’re going to create a double white matte. So we need to set the background color to white. In the Toolbox, double click the lower of the two overlapping boxes near the bottom. The upper box shows the selected Foreground Color and lower box shows the selected Background Color. Double click the lower box to open the Color Picker window to change the Background Color. Set the background color to white (R: 255, G: 255, B: 255).
 |
4. We’ll begin by increasing the size of the canvas by clicking the Image>Canvas Size commands. Before you change anything in this dialog box, make sure the Relative check box is selected. To use this on images of various sizes, use the drop-down menu to set the dimension to percent. A height and width increase of five percent is about the right size. Leave the Anchor in the center of the image so that the canvas is expanded uniformly on all sides of the image.
Click OK. A thin white border will appear around the image.
 |
5. To give this border the appearance of a bevel-cut matte board, select the Background Copy layer. If you look closely at the image icon for this layer, you will notice that it lacks the white canvas border we just created. It contains just the image to which we will apply our beveled edge. Click Layer>Layer Style>Stroke. This opens the Layer Style window.
 |
6. The first thing we want to do is select a color for the matte bevel. Typically the interior of a matte board is gray, although matte boards with colored cores are available. Let’s use a simple medium gray color. Double click the color box at the bottom of the Layer Style window to open up the Color Picker window. Move the little circle to the color you want. I’ve chosen a gray with red, green and blue values of 138, respectively. Click OK in the Color Picker window.
7. In the Layer Style window, use the following settings:
Size: 2
Position: Outside
Blend mode: Normal
Opacity: 100 percent
Fill Type: Color
You will notice a narrow gray line now separates the image from the white matte (canvas). Don’t close the Layer Style window just yet. We’re not quite done with it. We’re going to add a little enhancement to this layer to give it a three-dimensional quality.
8. On the left side of the Layer Style window, click on the words “Inner Shadow.” If you only click the little check box to the left of the words, you’ll get the inner shadow effect but you won’t see the controls to adjust the inner shadow.
Set the Blend mode to Multiply with the drop-down menu. Double click the color box to the right of the Blend mode drop-down menu to open the Color Picker. Since we’re going to make a very thin, dark shadow between the matte and the image, choose black (R: 0, G: 0, B: 0).
Move the opacity slider until the Opacity is 75 percent. You can also type 75 in the percent box.
Check the Use Global Light box.
 |
Then click and drag the Angle indicator around the circle until the angle reads about 135?, or type 135 into the degree box.
Set the Distance to 3 px, Choke to 0 percent and Size to 1 px.
Set the Contour to the simple diagonal pattern and Noise to 0 percent.
- Log in or register to post comments


