Ten Steps To Striking Selective Color; Combine A Touch Of Color With Black & White For Unique Visual Drama
Are you looking for a way
to make your digital photos really stand out? Starting with one of your
existing color shots, here's a great way to create a dynamic new
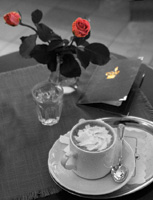
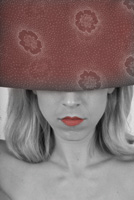
image that will really catch your viewer's eye. By combining a
black and white image with spots of color, you'll add compelling
contrasts and visual drama. Here's how to do it in just 10 steps. |
|||||||
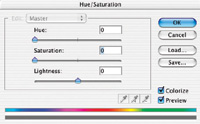
4. In the
Hue/Saturation dialog, tick both the Colorize and Preview check boxes
at the lower right, then move the Saturation slider all the way to the
left. As you do, you'll see that all the color is drained from your
picture. It's now black and white only. |
|||||||
8. Now, we're
going to selectively erase parts of the black and white "Background
copy" layer so that the color from the original image--the
Background in the Layers palette--shows through. The opacity determines
how strong the eraser effect is. For more subtle color, and to work in
stages, use a lower opacity setting, such as 30-50 percent. For the brightest
color to show through with one pass of the eraser brush, use 100 percent.
I recommend using a lower setting and building up color gradually, in
steps, by brushing over an area more than once when you want brighter
color. If you make a mistake, use Undo and try again. For multiple undos,
use the History palette in Photoshop, the Undo History palette in Elements. |
|||||||
10. When you're
satisfied with your work, save two copies of it. Save one in the native
Photoshop and Elements .psd format, which preserves layers, in case you
want to make changes later. For printing or use on the web, make a duplicate
(Image>Duplicate) and flatten it, Layer>Flatten Image, then save
it with a different name so you know which copy has layers and which does
not. |
|||||||
|
|
||||||
|
|
||||||
- Log in or register to post comments


