Personal Project; Modern Pictorialism; Printing Techniques For Smooth Tonality Page 2
Tuscan Trees |
|
 |
|
|
If you choose to photograph a low-contrast scene, you will have great difficulties
with the lower contrast produced by the enlarging diffusion. So choose your
subject matter carefully if you plan to use enlarging diffusion. Additionally,
you may find that film that was exposed with high-contrast filters, such as
a red, may work better with this technique than film exposed using a yellow
filter. I also tend to add contrast to the film image when processing. This
can be done by push processing, which can increase grain, or by the method I
prefer, selenium intensification. This last method enables me to add up to an
N+1 to my film without the grain increase of longer development time.
I have the added advantage of being able to monitor the contrast increase. There
are some risks, though; there is a small possibility of staining or of having
uneven or marbleized densities on the film, so a little reading and experimentation
would be advisable before you try this on your important negatives. Selenium
intensifies a negative by bonding with the silver and forming silver selenide.
The more silver, that is, the denser the area of the negative, the more selenium
is bonded and the denser it gets. This increases contrast in a negative by adding
density to the existing areas of high density in a far greater proportion than
it does to the less dense areas of the negative. On the negative the highlights
get lighter while the shadows hardly change.
Prescott Trees |
|
 |
|
|
One of the characteristics of diffusing the enlarger lens is what is known
as "bloom" in the shadows. "Bloom" is a smearing of
the shadows. It's basically the shadow equivalent of flare. The shadows
will appear to bleed into surrounding tones. The greater the diffusion, the
more the "bloom." For my own work I try to avoid the "bloom,"
which can be a difficult task, while other photographers embrace it and use
it as an integral part of their "look." This is purely a subjective
call but it is also another choice that enables me to cater this effect to my
own vision.
If you plan on experimenting with this process plan to have a fair amount of
paper handy, and maybe start with smaller size prints first because you'll
find that there are many variables that can be adjusted and that the look can
be taken in many directions. Should you then make larger prints you'll
have to recalibrate many of the variables, beyond simply exposure, to achieve
a matching print.
For me the use of this process is very conscious, and while I don't use
it in all of my work, because it's completely the wrong direction to take
sometimes, it is an excellent process to be aware of and to use when appropriate.
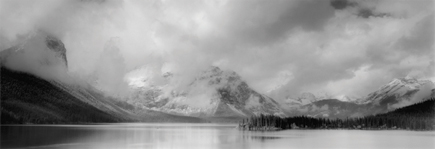
Kananaskis Lake |
|
 |
|
|
For 25 years Brian Kosoff was an advertising and editorial photographer. Then at the end of 2002, he changed the direction of his work from still life to landscape photography and closed his Manhattan studio. He travels extensively seeking images that he finds compelling, particularly as the contours and content of our world rapidly change and many scenes of natural beauty disappear. His black and white silver gelatin prints are available in galleries across America. There is also a book of his work in early production, with an expected release for autumn 2009. To see more of his images, visit www.kosoff.com.
- Log in or register to post comments


