Easy IR (Infrared); Create Your Own From Any Color Image File
You can start with a scan of any color slide, print, or negative you've shot with your film camera or, even easier, with a color file from your digital camera. If you're starting with a print, negative, or slide, scan it in RGB color mode. Once you've got the digital file, open it in Adobe Photoshop CS (or some earlier versions) to follow the steps outlined here. You can also achieve the effect with Adobe Elements 2 or other advanced image-editing programs, but the names of some tools or dialog boxes may be slightly different. Always work on a copy to preserve your original scan. In fact, with this technique, it is a good idea to make two or three copies in order to try different settings in search of the effect you like best. Just follow these steps and you'll be on your way to easy IR.
 |
|
|
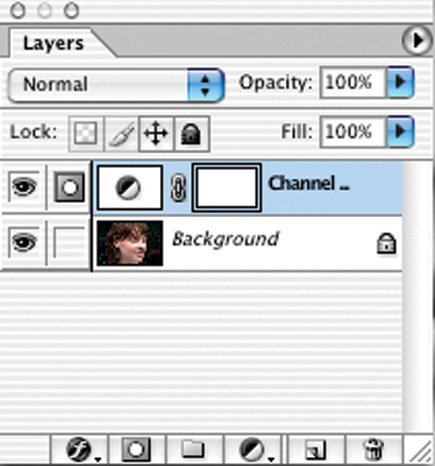
1) Open a copy of your color file in Photoshop #1. First, we'll convert it to black and white. By doing this with an Adjustment Layer, we never change the original pixels and can go back and make further changes as desired at any time. To add an Adjustment Layer, from the menu bar choose Layer>New Adjustment Layer>Channel Mixer, #2. A dialog box appears naming the new layer Channel Mixer 1. Click OK and you'll bring up the Channel Mixer dialog box, #3. This is a powerful tool to make black and white conversions (among other uses).
 |
|
|
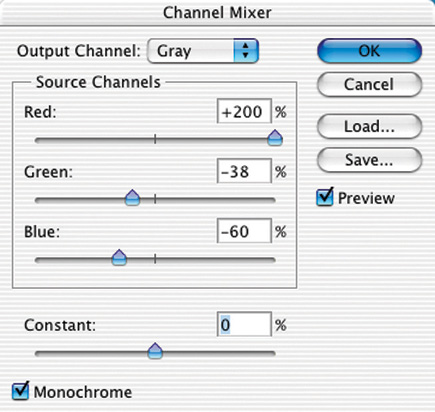
First, check the Monochrome box at the lower left of the Channel Mixer. This will change the Output Channel at the top to "Gray" ("Black" in Photoshop 5), indicating that you are outputting a gray scale black and white image. The Channel Mixer allows you to decide which amounts of the red, green, and blue channels will be used to create a black and white image. Begin with a high setting for red. Don't worry if your screen goes totally white or black during these operations--as you move the other sliders, you'll regain more normal tonalities.
 |
|
|
Try setting the red all the way
to +200, then take the blue down to --60 or --75. The green middle
slider might go from --40 to +30, all depending on the image. Experiment
with many different mixes, and try the sliders throughout their full range.
However, you'll probably want to keep the red at least +100 to +120 minimum.
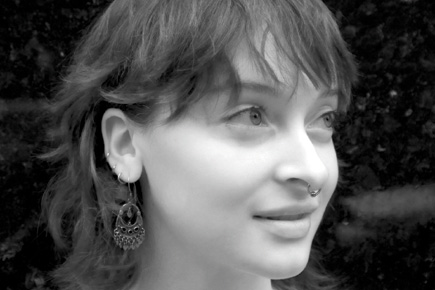
2) For this portrait, I set the red to +200, the green to --38,
and the blue to --60, #4. For a different portrait, +120 red, +32 green,
and --75 blue worked best. As you make the adjustments, you'll begin
to see the IR effect: In theory, you should adjust the percentages so that their
total equals 100 percent. This is not a hard and fast rule, though, and I often
find settings outside this range work well. The Constant slider near the bottom
of the Channel Mixer dialog box changes brightness. While I usually prefer to
leave it at 0, you may find it useful when the final mix of percentages is more
or less than 100 percent.
 |
|
|
Here's a tip:
If you have adjusted the sliders for a look you like, but the image is a bit
dull or low in contrast, try adding a Levels or Curves Adjustment Layer, then
using it to pump up the contrast.
- Log in or register to post comments


