Creative Multiple Exposure; Digital And Film Options Page 2
 |
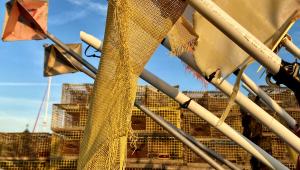
To begin my software multiple, I first saved a copy of the raw file in the native Photoshop .psd format, enabling me to use layers. Do the same if you're starting with JPEG. Next, I decided that I would create the effect of five exposures within a single image. In the Layers palette I dragged the background layer onto the new layer icon at the bottom of the Layers palette to create a new duplicate layer of the background. You can also go to the menu and choose Layer>New>Layer from Background. I repeated this four times to get five copies of the same image, all on top of each other.
 |
Since I am going to be moving the new copies up vertically above the background image, I need to have more room at the upper part of the image. To do this, I chose Image>Canvas Size to bring up the dialog box. My original photo was 4x6". In the Height box, I doubled the height by typing in 8. Then, I moved the Anchor box to the bottom so all the new canvas would be at the top. After clicking OK, you'll see the five images on top of each other at the bottom of the frame.
 |
Next, I clicked off the eye icon in the Layers palette for each of the top three layers, making them not visible. After clicking on the first "background copy" layer in the Layers palette to make it active, I lowered its opacity to about 40 percent with the slider at the top right of the Layers palette. Then I pressed V on the keyboard to activate the Move tool and used the up arrow key to nudge the copy layer upward above the background image. I also experimented with different Blend modes, found in the drop-down menu at the upper left of the Layers palette. The default is normal. I suggest also trying lighten, screen, overlay, darken, multiply, and others. Which works best depends on the image and whether the background is light or dark. I first used normal or lighten as the Blend mode for all the copies. I repeated this procedure for the remaining copy layers, experimenting with different opacities.
 |
 |
Often, the final multiple may look dull with low contrast and poor color saturation. To restore color, vibrance, and contrast, I applied three adjustment layers at the top of the layer stack: Levels, then two Curves layers. In Photoshop CS3, you can also try the new nondestructive version of "brightness/contrast" as an adjustment layer. The final result is a dynamic multiple exposure rendering of a familiar skyline, infusing a static subject with energy and motion.
 |
Among additional options to consider when making multiples are masking each
layer partially, or shooting a series of normally exposed images slightly off
register and then combining them, such as while photographing a flower, rotating
the camera a bit between each shot.
I hope you'll be inspired to try some of these techniques. When you do,
I guarantee that they will enliven your vision and add dynamism to your images.
Howard Millard will be leading workshops this year in the U.S.A. and Italy. In Maryland, Digital Photo Art: April 11th-13th; Photoshop Tools and Techniques: July 11th-13th. In New York City, Gardens of New York: May 31st-June 1st; Travel--Capturing the Spirit of Manhattan: June 7th-8th; through Horizon Workshops (www.horizonworkshops.com, (410) 885-2433). For a week-long photo and culinary adventure in Tuscany, Travel Photography in the Digital Age: May 10th-17th; through Il Chiostro (www.ilchiostro.com, (800) 990-3506).
Sources
Adobe: www.adobe.com
Nikon: www.nikonusa.com
- Log in or register to post comments


