- REVIEWS
Camera Reviews 
More Reviews Mobile Reviews Photography Reviews - GALLERIES
- VIDEOS
- BUYER'S GUIDES
Don't Underestimate These Basic Lightroom Sliders (VIDEO)

This post-processing tutorial explores some of the most useful (and underutilized) sliders in both Lightroom and Lightroom Classic. If you're in the habit of skipping over Lightroom's Classic's Basic panel, or Lightroom's Light and Color panels in search of more advanced tools you'll want to pay close attention to this tutorial with pro Forest Chaput de Saintonge.
Forest is a professional photographer, educator, and the former Director of Rocky Mountain School of photography. He introduces today's 14-minute episode like this: "In my opinion these oft-ignored sliders are among the most important tools in the entire Lightroom ecosystem, as they give us the ability to transform our Raw files into what we saw with our eyes."
Another important topic is the importance of applying these sliders in a specific order because each one builds on the previous adjustment to create a compelling edit with a controlled workflow. It’s a concept we've stressed repeatedly in the past that's definitely worth repeating.

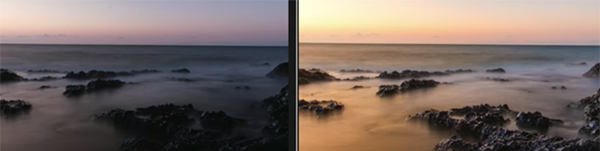
Here's another key consideration: "I really believe that to get the most out of Lightroom or Lightroom Classic you should be shooting Raw." Forest also urges you to remember that Raw files aren’t meant to look amazing straight out of the camera. Or as he says, the job of Lightroom's Basic panel, or Lightroom's Light and Color panels, is to enhance a Raw photo with a realistic look that faithfully represents the scene you witnessed through the viewfinder.
Forest begins with tonal controls for perfecting exposure and contrast. He explains why the first tool he employs in virtually every edit, regardless of subject matter, is the Exposure slider. To demonstrate how this works he recommends dragging the slider to the right and to the left without focusing on a specific area within the frame. Instead, "we're looking for the entire image to appear as properly exposed as possible."
Doing this often means that some areas will initially appear too bright, while others are overly dark. Forest then demonstrates how the Black slider can be employed to quickly refine tonal balance throughout the frame. In essence, this adjustment enables you to determine exactly how dark you want the darkest elements in a photo to appear.
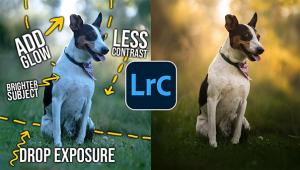
Forest turns his attention to other straightforward tone controls before moving on to simple sliders that enable you to perfect color balance while retaining a natural look. They're all super simple to use and punch far above their weight. So don't fool yourself into thinking that you are too "advanced" to make use of these basic tools.
Once you're done watching head over to Forest's popular YouTube channel where there are many more how-to videos for improving your shooting and post-processing skills.
We also recommend watching a tutorial we featured with another image-editing expert who demonstrates several "must-know" post-processing hacks that will speed up your Lightroom workflow and deliver eye-catching photographs.


![]()
Get the Latest Photo Tips, News & Reviews from Shutterbug!
| Camera Reviews Other Reviews | Mobile Reviews Photography Reviews Columns | News | Features | How-To | Resources |
 © 2025 Shutterbug
AVTech Media Americas Inc., USA
All rights reserved