Sky Swapping Your Way To A Beautiful Landscape
How To Mix And Match Skies To Banish The Blah-Sky Syndrome Page 2
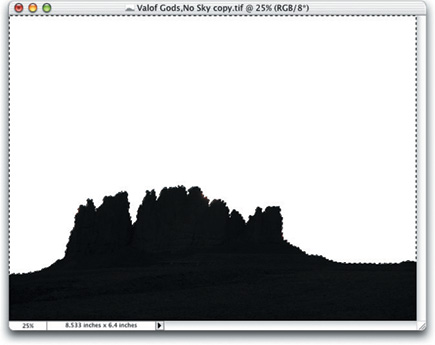
To make the line between sky and foreground seem more natural, feather the selection (Selection>feather) by a few pixels (one to three pixels works well). Also, if you find that you are getting a slight "halo" edge around your foreground, try expanding the sky selection (Selection>modify>expand) by a few pixels so that it bleeds very slightly into the foreground.
Once you've carefully selected the sky, you can hit "delete" to remove the existing sky and see your selection better (this step is optional, however, since you can paste right over the existing sky).
 |
|
 |
|
|
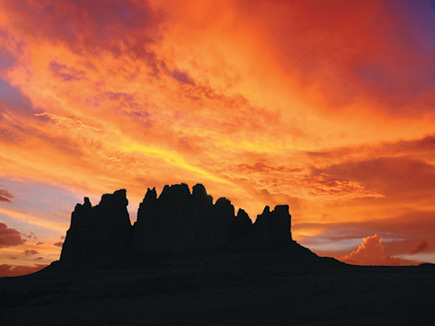
Open the image of the sky that you want to use as your replacement and, using the "select all" command, select the entire image. In this case I chose a sunset that I shot over the Indian River in Florida #3. (My replacement sky is a "sky only" shot but you could, of course, snip a portion of sky from another landscape instead.) Use the "copy" command to copy the sky image into memory.
 |
|
 |
|
|
Return to the original image and click anywhere in the selected sky area then
use the "Paste Into" (Edit>Paste Into) command to place your
new sky into that image. If the opacity is set to 100 percent for the new sky,
the sky in the original scene will be completely replaced.
Once you've pasted the new sky, you can then use the "Move"
tool to slide it around until you find a pleasing composition. I find this is
the most creative part of the exercise--shifting the sky around until it
fits naturally into the scene.
Incidentally, if your new sky doesn't fit into the sky area of the original
scene exactly, or if you want to elongate or change the shape of clouds a bit,
you can use the "Transform" tool (Image> Transform>Free Transform)
to stretch (or shrink) your sky to its new home. Some distortion will occur
if you stretch the sky too much, but it's unlikely to be detectable.
Finally, save the image in its layered form (leaving the layers open) so you
can modify it later if you choose to make additional changes. Then, once you're
satisfied with the image, flatten it to merge the layers and give it a new name.
By giving the flattened image a different name, you will have your layered version
available for future tinkering but also have a final image that you can't
accidentally disturb.
Try several skies to see how different skies can change the look of a given scene. In this combination #5. I matched a sky shot at a beach near my home in Connecticut over the same Utah foreground.
 |
|
 |
|
|
Next time you're out shooting and find a great scene that desperately needs a better sky, or find a sky in need of a new foreground home, keep shooting--you can create the final image in the computer.
Jeff Wignall is a photographer and writer and the author of numerous books on photography. His newest book, "The Joy of Digital Photography" was recently released by Lark Books. The book contains many tips and techniques that will help you enhance your digital photography experience. He is also a former Camera columnist with the "New York Times" and the former technical editor of "Photo District News."
- Log in or register to post comments


