- REVIEWS
Camera Reviews 
More Reviews Mobile Reviews Photography Reviews - GALLERIES
- VIDEOS
- BUYER'S GUIDES
Breathtaking iPhone Panorama Photos Made Easy (VIDEO)

Want to capture stunning ultra-wide photos with your iPhone? Most folks don't understand how to how to use the Panorama mode correctly, but this quick tutorial from the iPhone Photography School explains everything necessary to get the job done with ease.
Today's instructor Emil Pakarklis is founder of the channel and promises that by following his straightforward tips "your shots will look bigger, better, and more immersive than ever." And like with Emil's other tutorials you'll learn why you don't need an expensive mirrorless camera or DSLR to capture jaw-dropping images.
Emil is on location atop a cliff in a beautiful national park looking down on a giant u-shaped riverbend—a perfect vantage point for shooting a breathtaking panorama with a unique perspective. The first step is opening the iPhone camera app that by default is set to a 1X wide-angle view that prevents him from capturing the entire scene in one shot.
Switching to the .5X ultra-wide setting almost solves the problem by encompassing the beautiful sky along with an interesting foreground element. It's a really nice image but Emil laments, "it still doesn't convey everything in the expansive scene." And this is when the easy-to-use Panorama mode saves the day.
You'll see why this technique requires that you rotate the camera to a vertical orientation before proceeding. Then Emil swipes his finder from right to left twice to bring up the Panorama mode. There's another key consideration to understand; namely, determining which of the phone's lenses will deliver optimum results.
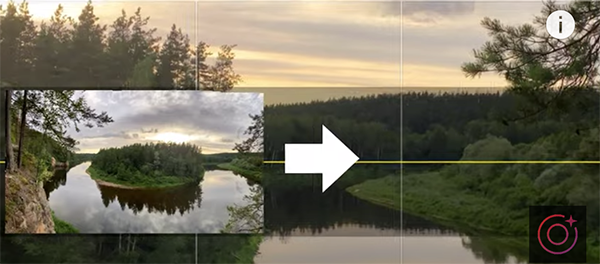
Emil makes this determination by "pre-visualizing the scene while moving the phone from left to right." He also explains how to decide whether you should start shooting from the left or the right. As you'll see, there's a white arrow on the screen for making the choice.
Emil's says, "I like to start where there's more interest or the where the scene is brighter" which is why he begins shooting from the left for this particular image. Then he presses the shutter button and moves slowly and gently from left to right, explaining that "the slower I move, the better it's going to work."
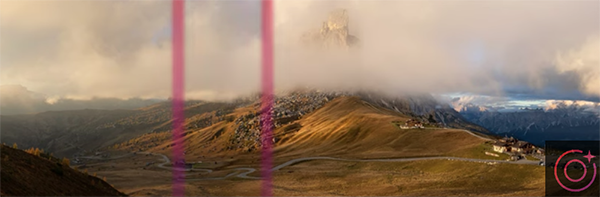
You're goal throughout the capture is to keep the white arrow atop the yellow horizonal line on the screen. Another rule, according to Emil, is to capture your panorama image more than once. That's because the iPhone is stitching a lot of individual photos together and occasionally there may a mistake with one attempt surpassing another.
Emil walks you through a few other important techniques that are super simple to master, and we recommend having your iPhone handy as this helpful lesson proceeds. Then head over to the iPhone Photography YouTube channel many more mobile photography tips and techniques.
- Log in or register to post comments


![]()
Get the Latest Photo Tips, News & Reviews from Shutterbug!
| Camera Reviews Other Reviews | Mobile Reviews Photography Reviews Columns | News | Features | How-To | Resources |
 © 2025 Shutterbug
AVTech Media Americas Inc., USA
All rights reserved