Go With The Flow
Tips For Capturing Great Water Shots
I had been stalking this particular tree for quite some time and finally all the elements were falling into place. The setting sun cast long shadows and warm light on both this beautifully gnarled tree and the gently rolling surf. I was mesmerized by the way the waves rolled in and then swiftly retreated back to the ocean, each time leaving a slightly different pattern of wash lines. I hadn't moved my attention away from the ground glass for several minutes or was it several hours or maybe only a few seconds. Whether it's the lapping of waves on a sandy beach, the tumbling of a small stream over stones and pebbles, or the rhythm of a cascading waterfall, few things have the ability to soothe and captivate one's soul more than water. And few things can exhilarate my soul more than photographing water as it passes by. Photographing moving water requires little in terms of special equipment or exotic techniques. Nice lighting, a sturdy tripod, and a remarkably slow shutter speed are the basic tools. The slower the shutter speed the more each drop of water blends with all the other drops of water to appear as flowing lines and shapes instead of as, well, water. Exactly how slow the shutter speed needs to be depends both upon how quickly the water is flowing and the desired result on the final photo. In general, the slower the water is moving the slower the shutter speed required to create soft flows. |
|||
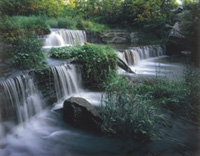
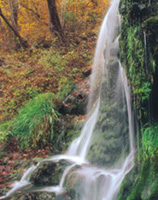
Time Effects Cascading rivers and streams do not require such long shutter speeds and often 1/4 to 1/2 of a sec is long enough when the water is flowing swiftly. Photographically, cascading water appears white--or at least very light--creating a nice contrast to the darker water and rocks it surrounds. Waterfalls will appear as "angel hair" with shutter speeds as short as 1/15 of a sec, especially with high volume or fast flowing waterfalls. However, I often use shutter speeds as long as a full minute to accentuate the flow. The pitfall with long shutter speeds is that fast moving water may appear as burned out white, even if the overall exposure is correct. This detail-less area may or may not be objectionable, but it's hard to know for sure until the film is processed. Shorelines with incoming and receding waves show designs and patterns when photographed at around 1/4 to 1/2 of a sec, and will take on a ghostly appearance when exposures exceed 4 sec. At these long shutter speeds waves are no longer identifiable as such, but rather look like fog surrounding shoreline rocks. Wet rocks and lapping waves reflect the colors of the sky and surrounding terrain and will glow with the reds and oranges of a beautiful sunrise or sunset. |
|||
Lighting Considerations Overcast skies, rain, and fog all create "soft" light; that is, even lighting with little contrast between highlights and shadows. Subtle details that are easily lost under harsh light photograph beautifully under soft light. Rain and fog also make colors appear more saturated giving life to what otherwise may be a dry boring scene (maybe it's no accident the words "dry" and "boring" are interchangeable in casual conversation). As an added benefit, crowds are seldom a problem during a good downpour as I've learned that you can have even the most popular Hawaiian waterfalls all to yourself if it's raining hard enough. A word of caution: the sky photographs white and blah on overcast days and is best omitted from the frame unless there is a specific reason to include it. Several pieces of equipment are essential in making flowing water photographs, and probably the most vital of these is a sturdy tripod. Unless very abstract images are the goal, handheld cameras are out of the question since exposure times are normally in excess of 1/8 of a sec. Another useful tool is a polarizing filter. Even on overcast days water inherently shines and glares. A polarizing filter reduces this glare on all wet surfaces making the colors more saturated and emphasizing the flow lines. Neutral density filters are another way to achieve long shutter speeds, but since polarizing filters reduce the amount of light getting to the film by about 1 and 2/3 stops, they take the place of neutral density filters in my camera bag. The only other filters I use are warming filters. Overcast skies cause a bluish cast that can be quite objectionable and an 81A or 81B will make the scene appear more natural on film. (I must confess I once used an 81D on an amazingly overcast day and it worked in that instance.) Except when I'm using my widest of wide angle lenses, stacking a polarizing filter on top of an 81 series filter has worked well when I need to both remove the bluish cast of overcast and saturate the colors. |
|||
There are really no special requirements for a camera. It is definitely an advantage to be able to control the aperture and shutter speeds in order to control the outcome on the photograph. Since I'm using a tripod and long shutter speeds, ISO 50-100 speed film is a natural choice. My personal choice of film is Fujichrome Velvia (ISO 50) for its color rendition and sharpness. The combination of slow film and f/22 make long shutter speeds easily attainable. Not only did I enjoy that beautiful beach scene with the gnarled tree through the camera lens, but I actually exposed one sheet of film before I found myself drenched from the waist down. Maybe next time I'll watch where I am in addition to where the water is flowing. |
- Log in or register to post comments
