Alternative Processes, Digital Style: Classic Expressions For Your Images

Are you someone who appreciates the richtones, colors and textures of 19th and 20th century alternative photo processes? With onOne Software’s Perfect B&W (www.ononesoftware.com), you can imbue your own images with these classic looks, and you won’t have to spend days in the darkroom to do it. Options include Platinum and Palladium, the warm beige tones and mottled surface of Calotype, the blue hues of Cyanotype, the buff tones of an Albumen print, the velvety reds of a warm Carbon print, even the look of a Tintype and many more.

If these options aren’t enough, Perfect B&W’s toner choices include gold, iron, selenium, sepia, copper, coffee and black tea (no sugar). You can further fine-tune your final effect with controls for Tone Curves, Film Grain, Glow, Vignette, Sharpening, Blend mode and Border Treatment. Perfect B&W works as a standalone program, or as a plug-in for Adobe’s Photoshop, Elements and Lightroom and Apple’s Aperture. As I worked with the program I found Perfect B&W to be perfect for anyone who loves the look of alternate processes, offering myriad choices of effects and an exhaustive collection of controls to tweak and fine-tune them.
Platinum & Palladium
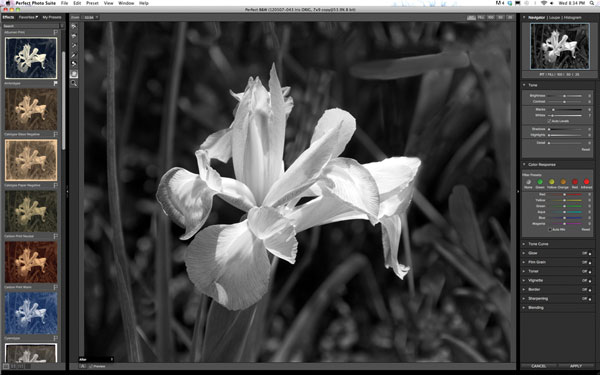
To explore the Perfect B&W alternate routes, I started with my photo of an iris (#1). Opening it in Photoshop CS6, I choose File>Automate>Perfect B&W 1 which brings up the interface seen in (#2). In the left column, I clicked on “19th Century Processes” which presents a column of preview thumbnails of 21 effects applied to my flower. Click on a thumbnail and a full size preview of that effect is generated in the center window. The right hand column provides a wealth of tone and color controls to adjust the effect to your taste.

All Photos © Howard Millard

Working my way down through the rainbow of thumbnail process options, I settled on Palladium for this image (#3). Platinum also looked good, but Palladium both increased detail in the petals and added a subtle warm hue to the image. The border included with this effect adds the kind of realistic brush strokes with which I used to hand coat traditional Platinum/Palladium in the darkroom.


However, the border cut in to the top petal. To adjust this, I went to the Border category in the right column (#4); I clicked “On” and adjusted the position of the border with the double arrows at the bottom.
Blue Note
The Cyanotype process renders your image in subtle bluish/cyan tones that can evoke mood and atmosphere. Starting with a waterfall I’d shot in Mexico (#5), I again perused the 19th Century Processes category and selected Cyanotype. The darkroom process tends to produce a low contrast tonal range, so onOne baked that into the preset. For this image I wanted more punch and sparkle in the water and the rocks. To get it, I simply went to the right column of the interface and chose Tone Curve. As with Curves in Photoshop, I set Control Points on the curve and nudged it into a slight S shape to add the desired contrast. Now in the Cyanotype effect (#6) the shadow areas of the rocks and trees are a deep blue, brought to life by the contrasting highlights in the water. As a finishing touch, I added the frame from scores of choices found under Border.


Flight Of The Butterfly
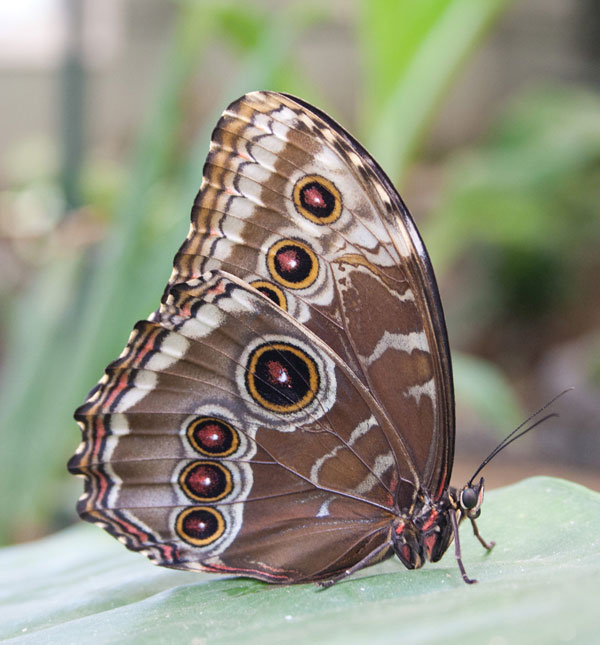
Since this butterfly (#7) possessed brownish tones originally, I selected the deep reddish tones of the Carbon Print Warm option in Perfect B&W. The default included a torn paper texture that I did not want. In the Border box, I chose Antique Round Top and then changed the Blend mode of this border to lighten. The very warm brown tones of the effect enhance the subject nicely, as does the curved top of the frame, (#8) complementing the vintage look.


- Log in or register to post comments


