Interfit’s EXD200 Lighting Kit; Small But Powerful Monolights For The Digital Age Page 2
 |
|
|
There's one really nice feature that you'll discover as you adjust
the lights. Specifically, when you reduce output on the EXD200 head, the internal
microcircuitry automatically dumps the excess energy. Why is that important?
Normally, you would have to pop the strobe once to dump the excess charge to
avoid overexposure on the next frame, since the head would emit the amount of
light from the original setting before it readjusts to the new lower output.
This time-saver also alleviates the frustration over wasting one exposure at
the wrong output level. Continue to adjust the lights downward in phases and
you'll really grow to appreciate this automated feature.
Putting The EXD200 To Work
I always prefer to begin with a tabletop set. This way I can get a feel for
the lights, which then lets me work more efficiently when a model is sitting
in front of the camera. For these shots, I set the camera to Manual mode and
used an incident meter reading, establishing color balance and white and black
points with a PhotoVision One Shot Digital Calibration Target.
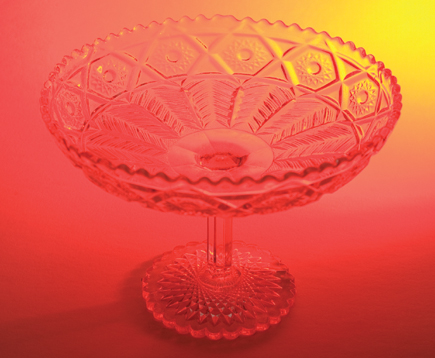
For my first tabletop, I had set up a still life inside a diffusion housing.
The subject consisted of opaque objects (namely, fruit and a small toy lizard),
obviously requiring one lighting approach, and a transparent bowl and glass
figurine, requiring a different approach--essentially some backlighting.
I used both lights raw (just the standard reflector, nothing else on them--some
people mistakenly refer to this as "bare bulb," a lighting approach
without any reflector at all, yielding a sunlit quality). I positioned one head
on a light stand behind the tent and to my left as the main light. The second
light stood in front of the tent and just to my right, and was bounced into
the ceiling for overall fill.
When my lovely model, Falene, arrived for a portrait sitting, I added the square softbox over the key light, which stood to her right (left of camera position), about 61/2-7 ft up. I later repositioned this light so that it faced her at less of an angle. As my backdrop I used a Photek PeoplePopper and aimed the second light at this fabric from my right (to the left of the model). And for a little more fill for the left side of the model's face (to the right of camera), I added a silver reflector (the one that's on the flip side of the 32" PhotoVision Calibration Target--I used the smaller size targets for color balance and black/white point settings). Initial exposure readings were made with the new Sekonic L-758 meter in Incident mode. We went through three changes of wardrobe, with this professional model sitting for one series of shots, standing for the others, and continuously changing poses. I had one eye on the model, the other on the lighting, making sure it wasn't too hot or too contrasty at any point as she moved around.
 |
|
|
Conclusions
The EXD200 proved to be practical with subjects that I normally photograph at
home or in a small studio environment. Output was consistent (to within 0.1
stop with repeated pops) and the lights operated reliably in every situation.
Just as important, I found the lights a pleasure to use. Admittedly, the 60w
modeling lamp was a tad weak and ambient light did interfere with visualizing
the effect produced. But since I was shooting digital, I had it covered--a
quick glance at the camera LCD or my computer monitor told me what I needed
to know. Shooting digital was especially helpful during the portrait session,
since we could review the images on the fly.
If you're just starting out and want to get the feel for studio strobe
lighting or just want to keep the lighting simple and uncomplicated, the EXD200
should be a perfect fit. Once you unpack the lights, you'll be up and
running in no time. I just got a bunch of accessories for the EXD200 and put
some of them to work immediately. That said, I was able to accomplish quite
a lot with just the basic kit.
The basic kit includes the following: two each EXD200 heads/flash tubes/modeling
lamps/stands/fuses/electrical and sync cables; one each small softbox/shoot-through
umbrella/padded case. The street price for this basic kit is $499.99.
Five Reasons To Buy A Monolight
A monolight is a self-contained strobe. Just plug it into an AC outlet and you're
good to go. Okay, you do need to mount it on a light stand first. The only other
thing you'll need for starters is a flash meter, and even that's
not always necessary when shooting digital. Here are five good reasons to buy
a monolight:
1. It's more cost-effective than a comparable power pack
system, and may not cost more than a good shoe-mount flash.
2. Numerous accessories let you modify and shape the light,
opening your eyes to new avenues in lighting unequalled in the world of shoe-mount
flash.
3. The modeling light lets you visualize the lighting in advance,
helping you evaluate areas that are too hot or lost in shadow.
4. It's fairly uncomplicated. In fact, it's not
any more difficult than working with a high-end shoe mount. Some might say easier.
Certainly simpler than working with a power pack system.
5. You can do so much with just one monolight and the possibilities
are virtually endless with a pair of these lights.
Additional Resources
Photek's PeoplePopper--www.photekusa.com
PhotoVision's Calibration Targets--www.photovisionvideo.com
Sekonic's L-758--www.sekonic.com
For more information, contact Interfit Photographic Ltd., 420 Industrial Court
West, Villa Rica, GA 30180; (866) 947-9796; www.interfitphotographic.com.
- Log in or register to post comments


