Wedding & Portraiture
What Do Computers And Portraits Have In Common?

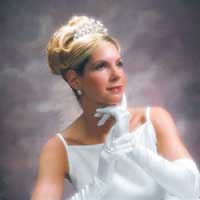
Photo 1.
Photos © 1999, Monte Zucker, All Rights Reserved

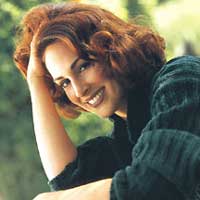
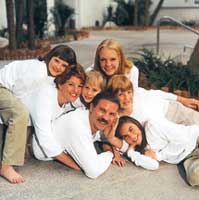
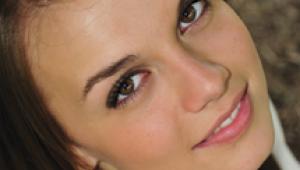
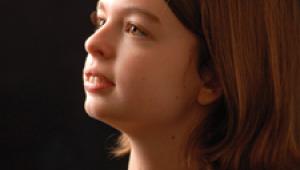
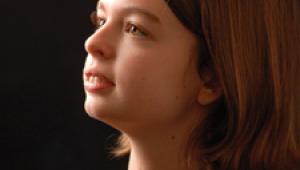
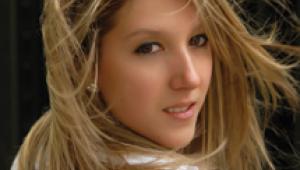
At a glance, one might not think that there is a common denominator with these photographs. A closer look will reveal that lighting is the key. Each one has a very similar lighting pattern on their faces. This may be achieved by different means, but it's there on all of them. Let's take a closer look.

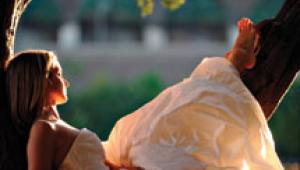
This bridal portrait (Photo 1) shows her face turned toward the light, and that is the key. The light is on the front of her face and the shadowed side is toward the camera. There is direct light from the main source in both of her eyes. Yes, there's another one close to camera (a fill light) that's keeping details in the shadowed area.

There's also a third and fourth light on her hair and the background. All of them, seem to be coming from the same side, keeping the lighter portion of the portrait on the right side, and darker areas on the left.

The lights on all my studio-style portraits are Photogenic lights coming through Westcott Mini-Apollos. I also use a Westcott Monte Illuminator (a silver reflector with black on the opposite side) to help open the shadows or keep light from the lens (in the case of lights placed in profile position).

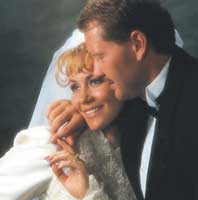
Photo 2.

The ultimate goal is to keep your attention on the front of people's faces. That's why I'm always trying to light the front of the faces, keeping the side closest to the camera in shadow. It is flattering to the subject and creates a three-dimensional effect on the flat piece of photographic paper. A simple plan, but extremely important.

There's another common denominator in these photographs. The placement of the main light is such that it creates a small loop shadow below and slightly to the side of the nose. When that shadow is created it's an indication that the light is placed well for getting light into the subject's eyes and at the same time creating the roundness that we're looking for in our people pictures.

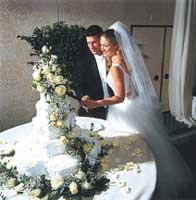
Photo 3.

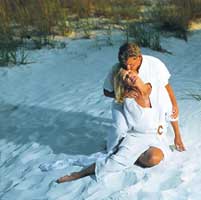
As the face turns, the light moves with it. This keeps the lighting and shadows virtually the same, regardless of which angle of the face that you're photographing. Look at Photo 2, for instance. As she turned her face to profile, the main light moved also. The light pattern is exactly the same on Photos 1 and 2. All the other lights virtually remained intact. It wasn't necessary to move any of them.

A close look at Photo 3 shows that the exact same light pattern is on the bride's face. Since I turn heads in both directions, depending on which side is the most flattering to the camera, I keep identical lights for the main and hairlight. I have them both on Westcott's boom arm stands, so that they are interchangeable. The hairlight in the first two pictures has now become the main light in Photo 3.

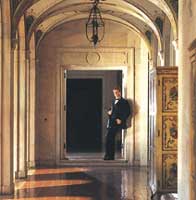
Photo 4.

Now, look at the similarity between Photos 3 and 4. Although they were made under completely different circumstances, I placed my off-camera flash in the cake cutting picture to create the exact same light pattern on the bride and groom's faces. A second light on-camera filled in the shadow detail. Notice, too, how the off-camera flash helped to show cake detail, rather than having a single on-camera flash flatten it out and lose the detail.

In a portrait situation I have my fill light two f/stops less than the main. In my candids I set the off-camera light only one f/stop stronger than my on-camera light.

Photo 5.

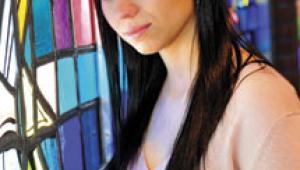
I'm using a window as my main source of light in Photo 5. Similar lighting patterns prevail, however, with one minor change. I'm using the window light to illuminate just the left side of her face. Then, I've added my Monte Illuminator/reflector camera right to pick up the window light and push it around to the shadowed side of her face. The reflector is positioned to--you guessed it--create the same pattern of light and shadow on her face that we've seen in the previous photographs.

We can take it a step further now. In Photo 6 I'm using window light again. This time, however, a bank of windows is 20' or more away from the subject. The light is coming in through all the columns. When I was working in this area I noticed that there was a natural spotlight on the door frame. I positioned my model in the light, split lighting his face. I exposed for the daylight on his face and then added a weak candid flash (two f/stops weaker than the daylight) from behind one of the columns.

Photo 6.

Again, we have the same light pattern on his face. No surprise, huh? The flash was from a Quantum flash unit, triggered by a Quantum radio slave attached to my Hasselblad camera.

Now that we're understanding the basic light pattern that I'm using, look how I achieved the exact same lighting situation in Photo 7, a man with his mother. I'm using daylight coming into an outside pool cabana. The daylight is split lighting her face. My Illumi-nator/reflector is once more camera right, wrapping the daylight onto the shadowed side of her face and lighting his profile beautifully.

Photo 7.

There's no difference here in Photo 8 except that she was outdoors. Late afternoon sunlight was coming from my left. It lit her hair beautifully. There was also light bouncing off a building to my left. I positioned the woman, so that the main light would split light her face. My reflector, camera left, again pushed the light around to the left side of her face.

I created the exact same lighting situation in Photo 9. I positioned her so that the late afternoon light would backlight her hair and fall onto my reflector. I used the reflector as my main source of light to create the same pattern here. Is it becoming repetitive to you? I hope so. That's where technique comes in handy. Once you know the light pattern you're looking for, it's simply a matter of figuring out how you're going to achieve it in different situations.

Photo 8.

Even in Photo 10, the bride and groom exchanging marriage vows, I was able to position myself in a spot where the soft daylight was split lighting her face. The open area all around her helped wrap the light around onto the left side of her face. So, even in a photojournalistic situation like this, it's always better to understand how light works on faces to create this dimensional look. Lighting technique is the same under all given conditions.

Sometimes you can create the light. Other times it's necessary to position the lens, so that you can take advantage of the light as it is. Quite often you combine natural and additional lighting--always to achieve a similar effect. Because it's not the light that's important. It's what it does to the faces in your photographs.

Photo 9.

Even outside in bright sunshine it's possible to create similar light patterns. Look at the group of three in Photo 11. I've positioned them, so that the direct sunshine is split lighting their faces or creating the exact lighting pattern that I always look for. A very bright Quantum flash to my right (almost directly in front of their faces) is opening up the shadows. The flash could have been on-camera, but it would not have achieved the three-dimensional look that's there in this picture.

Then, there's also a time when the late afternoon sun can be used directly on the subject, as it is in the man's portrait (Photo 12). Yes, I could have used a flash there, too, but in this particular case I wanted the strong, deep shadows on the left side of his face. I felt that it was completely in character with the way he was dressed and the manner in which I posed him.

Photo 10.

Photos 13 and 14 are just about the same in every way. Using late afternoon light for both of them it was not bright at all. I could turn their faces toward it and use the sunlight as the main. Then, all I had to do was add a weak flash camera right, two f/stops less than the ambient light. I exposed for the natural light and didn't even take into consideration the amount of light added, it was so insignificant. Still, notice how the faces are always turned toward the source of light.

The last two photos in this series (Photos 15 and 16) emphasize the similarities between all of them. Once again, it's simply a matter of turning the people, so that their faces are receiving a similar lighting pattern. Then, augmenting the natural, ambient light with a flash is a given.

How simple can it be? Does it get boring to you? Not to me. I'm just happy that I'm no longer having to concern myself with lighting. It is there to help me deliver my message. It's the same as sitting down to this computer and typing away. The keys are always the same. The difference is in what you say.

Photo 11.

Photo 12.

Photo 13.

Photo 14.

Photo 15.

Photo 16.

X