- REVIEWS
Camera Reviews 
More Reviews Mobile Reviews Photography Reviews - GALLERIES
- VIDEOS
- BUYER'S GUIDES
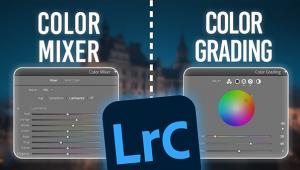
Use LR's Color Mixer to Improve Hue, Saturation & Luminance (VIDEO)
Are you looking for a simple and effective Lightroom technique that will dramatically enhance images as quickly as possible so you can get back out in the field doing what you love most? If so, we've got you covered with today's game-changing tutorial from post-processing impresario Julienne Kost.
Kost is an acclaimed author, educator, workshop instructor, and an expert at all things Adobe. In less than four minutes you'll learn a transformative method for using Lightroom's versatile Color Mixer tools to adjust Hue, Saturation, and Luminance so that your photos are greeted with one word: WOW!
The quick lesson kicks off with this: "In the next few minutes we're going to see how easy it is to change different colors in a photograph using the Mixer options in Lightroom's Color Mixer panel." This straightforward method is all about understanding how to make adjustments within a specific color range to achieve an impressive and realistic look.
Kost notes that there are two ways to view the Color Mixer options. "We can choose to make our adjustments using HSL or Color." HSL provides access to all the color ranges, and there's a choice between making enhancements with Hue, Saturation, or Luminance. You can also click on "All" to reveal all of these options and enhance photos with all three tools simultaneously.
If you decide to employ the Color approach instead, the options for doing so are rearranged. Now you can select any single color range and then adjust Hue, Saturation and Luminance values for that specific range. And by tapping an icon you can view all the ranges at once.
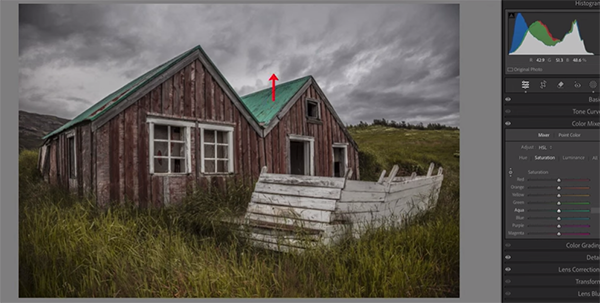
One of the advantages of making enhancements with HSL instead of Color is that you can employ Lightroom's powerful Targeted Adjustment tool to get the job done. Kost returns to the HSL layout and explains how everything works—beginning by modifying Hue. Here the goal is to accentuate green tones in the foreground of her abandoned house image. As you'll see, it's a simple matter of dragging up or down.
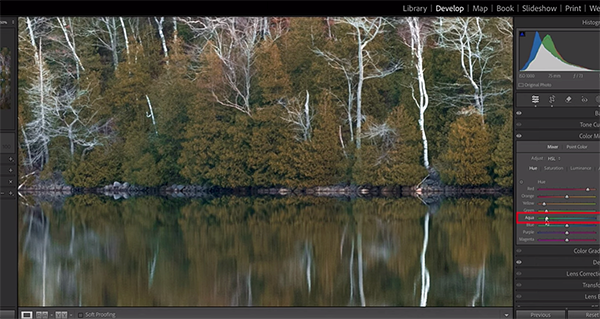
She then moves on to a more complex image to illustrate another effective technique for enhancing and balancing all of the tones until you achieve exactly the look you're after. Kost's instructional YouTube channel has over 50,000 subscribers and 200 helpful videos, so be sure to check it out.
We also recommend watching the tutorial we featured recently with another adept post-process instructor who demonstrates how to use Lightroom's Linear Gradient tool to create attention-grabbing nature, travel, and landscape photographs.
- Log in or register to post comments


![]()
Get the Latest Photo Tips, News & Reviews from Shutterbug!
| Camera Reviews Other Reviews | Mobile Reviews Photography Reviews Columns | News | Features | How-To | Resources |
 © 2025 Shutterbug
AVTech Media Americas Inc., USA
All rights reserved