A Pros Touch
Creative Portrait Backgrounds Using Photoshop 6.0
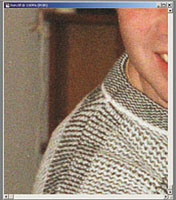
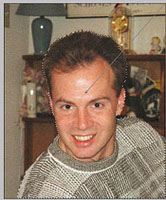
In the "old days" we kept dozens of different backgrounds in our studio. By using different colored lights on them, we could create even more different options for our portrait customers. Today all of that is mostly obsolete. It is now possible to take just about any old snapshot and, by adding a professional looking background, turn it into a great studio portrait. There are hundreds of different types of backgrounds that can be created in Photoshop. In this article I am going to show you an easy way to make a simple but elegant looking background. First, you need a picture of the person you want to use. In this example, I'm using a snapshot of my son, Kris (Figure 1). Next we need to perform a "selection" on the subject. Photoshop offers many ways to select objects. This particular picture has such a busy background that I have chosen to use the Pen Tool (Figure 2). Before starting to use the Pen Tool, you should enlarge the picture so that you will be able to better see what you are doing (Figure 3). |
|||
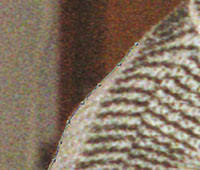
Now, place the tip of the Pen Tool on the edge of the sweater in the lower left corner of the picture and click once with the left key of the mouse. A tiny point will appear on the picture. Next, move the tip of the Pen Tool a little bit along the edge of the sweater and click again. A second dot will be created and the two dots will be connected by a straight line. Continue moving the tip of the Pen Tool along the edge of the outline that you want to select and click in tiny little increments. This will create a "path" along the edge (Figure 4). Continue clicking around the outline of the subject. When you get up to the area of the subject's hair, you can intentionally make your clicks a little irregular so as to better create a fuzzy edge for the hair (Figure 5). Finally, you will have the entire subject outlined. Then, it is time to turn the "path" that you have created into a "selection." To do that, go to the Path tab and then click on the little arrow head (Figure 6). That will bring up the menu (Figure 7). Choose the Make Selection option. After you have chosen the Make Selection option, your outlined subject will have the familiar "dancing ants" around it (Figure 8). |
|||
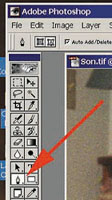
At this point we have roughed in the selection. It is now time to fine-tune the selection a bit. To do this, we switch to the Quick Mask Mode that some folks refer to as the Ruby Mask. Go to the Tool Pallete and click on the Quick Mask icon (Figure 9). When you do this, a red, ruby, mask will appear over the picture showing the area of the image that is now masked or "protected" (Figure 10). We need to do a little work on the top edge of the outline of the hair in order to avoid a paper doll, cutout look. Go to the Tool Pallete and select the Erasure Tool (Figure 11). Then select a brush for the tool that will allow you to make a jagged edge along the hair. Figure 12 shows the brush that I used. By using the jagged-edged brush with the Erasure Tool, I was able to nibble away and remove a little of the ruby mask leaving a jagged edge around the hair (Figure 13). Having successfully fine-tuned the mask, it is now time to switch back to the regular mode. Go to the Tool Pallete and click on the regular mode icon (Figure 14). When you do that, the ruby mask will be removed and you will be back to a regular image with the dancing ants around it (Figure 15). |
|||
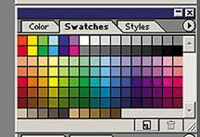
Since the selection is currently protecting the background, we need to change it so that it will protect the subject. So, go to Select and choose Inverse from the menu (Figure 16). Now that the mask has been inverted it is time to set up the colors that we want to use for the background. Go to the Swatches Pallete and click on a nice shade of blue (Figure 17). Then, go to the foreground/background icons and reverse them (Figure 18). Then, go back to the Swatches Pallete and select a solid black color. You now should have a bright blue and a solid black color set up as the foreground and background colors. |
|||
Go to the Tool Pallete and select the Gradient Tool (Figure 19). Then go to the options tool bar at the top of the window and select the round pattern gradient option (Figure 20). Place the cursor near the center of the subject's face and click and drag a line to the upper right corner of the picture (Figure 21). Notice that the dancing ants are still present (Figure 22). In order to better see the picture and make judgments about what we are doing, it is possible to "hide" the dancing ants. The selection will still be valid, but we will simply turn off the appearance of the ants. Go to View to Show to Selection Edges (Figure 23). By clicking on it, you will remove the little check mark that is there and the edges (dancing ants) will disappear (Figure 24). |
|||
With the selection edges gone, we can more clearly see that we didn't mask the top of the hairline closely enough. There is a bit of a light toned edge along the top of the head. We can fix this by shrinking the mask a little so that it will bite in more closely on the subject. In order to do this, go to Select to Modify to Expand. Then set the dialog box for about 8 pixels. The exact number will vary depending on the amount of correction needed (Figure 25). After the selection has been altered, notice how it cuts in tighter on the edge of the hair (Figure 26). Now, go back to Figure 21 and lay in the background gradient again. This time it will come in closer to the hairline. |
|||
With the background gradient correctly laid in, we can fine-tune the appearance. Go to Image to Adjust to Brightness/Contrast. You can make this fine-tuning adjustment to suit your personal preference. In the example, I lowered the brightness a bit in order to darken the corners of the picture and increase the richness of the blue color. Then, I increased the contrast in order to further darken the corners and increase the brightness of the blue. Your preferences may vary (Figure 27). Finally, you can go to Select to Deselect to get rid of the hidden dancing ants (Figure 28). The picture is now finished (Figure 29). If you'd like more help with some aspect of Photoshop, you can send e-mail to me care of editorial@shutterbug.net. |
|||
|
- Log in or register to post comments

