Photoshop's Adjustment Layer Presets Enhance Your Photos Fast (VIDEO)

If you're unfamiliar with Photoshop's easy-to use Adjustment Layer Presets you're missing out on a method for quickly improving your images. This tutorial from the Photoshop Essentials YouTube channel explains everything you need to know so you can start taking advantage of this method today..
The instructor named Steve explains the power of this technique for enhancing all sorts of images, adding that "it's a great way to learn how Adjustment Layers work." Another benefit is that this works its magic non-destructively so you can always go back for a do-over if need be.
In barely six minutes Steve shows you where to find the Adjustment Presets and how to apply one to an image. He also explains how to view the Adjustment Layers inside the preset, and how to change an Adjustment Layer's settings. In addition to making conventional enhancements, this method enables you to easily add interesting special effects to a photograph that needs a bit of pizazz.

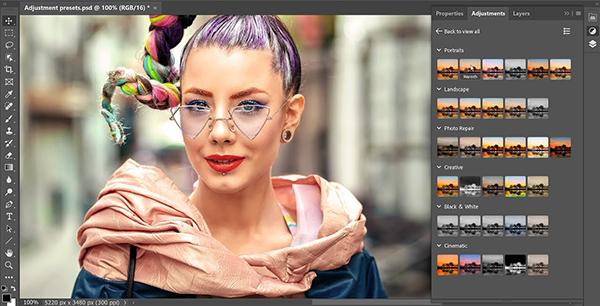
All you have to do to get started is go to Photoshop's Adjustments panel and select Presets. If you don't see this panel in your workspace, Steve shows you how to add it with a quick trip to the Window tab atop the screen. One you're set up you can select from various of Presets. By hovering over each one you'll get a quick preview of how the Preset will affect an image.
Only a few presets are displayed at first, but there's actually a wide variety of choices divided into different categories. Simply click on the More button to see the full multitude of options. And, once again, each has a thumbnail that illustrates the effect it will add.
As you'll see, Photoshop includes 32 built-in Presets divided into specific groups. These include Portraits, Landscape, Photo Repair, Creative, Black & White, and Cinematic. This makes it super easy to select the specific Preset for the task at hand, simply by clicking on its thumbnail.

Once you've made your choice, the Preset appears in the Layers panel as a layered group above your image. The step-by-step process for applying the preset and making modifications is so simple that we'll let Steve walk you through the technique rather than summarizing it here.
Suffice to say that once you're done watching, this is a method that you'll turn to frequently. You can find more simple lessons like this one on the Photoshop Essentials YouTube channel.
We also suggest checking out a tutorial we posted recently from another editing expert, explaining how to save some cash by picking one of the best five free Photoshop alternative image editors.
- Log in or register to post comments


