Multi-Image Flat-Bed Scanner Techniques; Getting Six (Or More) Scans For The Price Of One Page 2
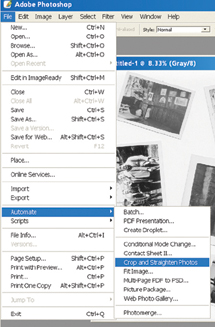
After converting the image to Grayscale it was time to let Photoshop do the magic. I went to File to Automate to Crop and Straighten Photos (#4).
 |
|
|
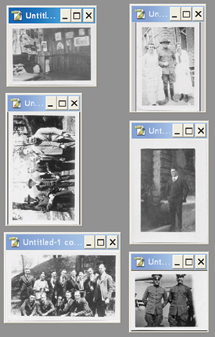
It then takes Photoshop about 4 seconds to run a built-in Action that automatically
cuts each individual photo out of the big scan, straighten and align it, and
place it in an image file all its own as an individual picture (#5). Wow! Is
that slick or what?
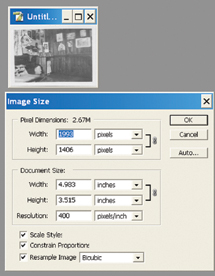
To show you what each image file looks like, I selected one of the pictures
and went to Image to Image Size. Notice in Image #6 that the photo is 4.983x3.515"
at 400 ppi for a total file size of 2.67MB.
 |
|
|
At this stage I have left the file at 400 ppi resolution so that there will be a bit of extra data available to facilitate any later image editing that anyone might want to do with this file. I feel that I get a little better quality of image editing if I perform the editing at a higher resolution as opposed to a lower resolution. Of course, the file should be further reduced to 300 ppi before being sent to an inkjet printer. And, if all you want to do is view the file on a monitor or send the file via e-mail, then the resolution can be further reduced to 72 ppi.
 |
|
|
For more information on digital imaging, you might want to visit my website at: www.colorbat.com.
- Log in or register to post comments


