- REVIEWS
Camera Reviews 
More Reviews Mobile Reviews Photography Reviews - GALLERIES
- VIDEOS
- BUYER'S GUIDES
Master Class
Sharing The Secrets Of The Craft
Some New Additions To A Teaching CD Page 2
I did the same with
another sky. At this point a dilemma surfaced. Which one did I like better?
My solution was to put the three images together as one. And then my real problem
surfaced.
I had done all the work and saved the three of them on a file that was too small
to reprint here in Shutterbug. Ha! The solution came to me. I simply moved the
collection onto a new blank file and ended up with this collage.
Learning To
Control Window Light
In the past when I photographed by window light I turned my subject to get the
light into both eyes. Recently, I started working with a similar lighting pattern
that I get when I use twin main lights. One light illuminates half the face,
while the second light creates the small, modified loop shadow that I've
been using for all my portraits.

I've also found that when I pose someone between two windows I can get
a great specular highlight coming from behind. The window beside the subject
lights one side of their face. The final lighting pattern comes by placing a
reflector where I would normally place my normal main light, slightly above
eye level and to the side of the face. The reflector can only reflect light
if it's turned toward the window and then angled slightly to reflect the
light onto the subject's face. This works beautifully for the 2/3 view
of a face.
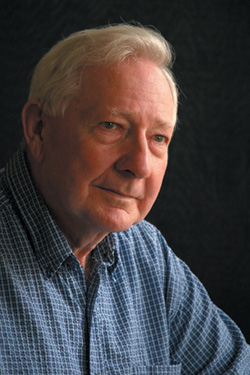
Notice the wide range of tones from the bright specular highlights along the
bridge of his nose to the deep shadows on the right side of his face. Notice,
too, that there is incredible detail throughout his entire face.


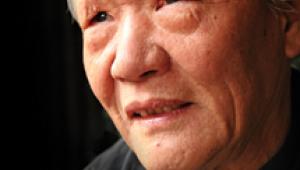
When changing from a 2/3 view of his face to a profile I can't turn his
face more to the window, because that would flatten the light and all the shadowed
area of his face would be lost. What I have to do is to move the camera position
farther into the room and still use the reflector in almost the same position
as before to wrap the light around onto the shadowed side of his face.
For the first picture I had a piece of material on the posing table. It acted
as an additional reflective source, picking up a little more light into his
eyes. For this profile I removed it to keep the photograph more dramatic/contrasty.
I still, however, retained good detail from the highlights all the way down
to the deepest shadows on the near side of his face.
Keep this rule of thumb in mind: If there's no shadow on the near side
of the nose and/or if the ear is in bright light, it's a sure bet that
the face is turned too directly toward the window light. For this profile I
needed to move the background so that it was somewhat behind him. This helped
create the solid background I wanted behind his head. Notice, too, that for
a profile I have the tip of his nose just past the center of the portrait--giving
him plenty of room to look into the photograph.
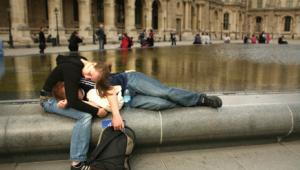
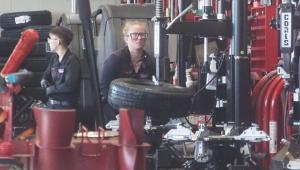
Want Softer
Contrast? Move Your Subjects Away From The Window
To avoid harsh, contrasty lighting you can move your subjects a few feet from
the light source, allowing the light to wrap around more evenly. As you can
see here, the subjects are about 6 ft away from the light source. I didn't
even have to use a reflector; the light was wrapping so beautifully. You can
see where my camera was positioned.
|
| |||||||||
- Log in or register to post comments


![]()
Get the Latest Photo Tips, News & Reviews from Shutterbug!
| Camera Reviews Other Reviews | Mobile Reviews Photography Reviews Columns | News | Features | How-To | Resources |
 © 2025 Shutterbug
AVTech Media Americas Inc., USA
All rights reserved