An HDR Primer; High Dynamic Range Photography For Those Who “Want It All!” Page 2
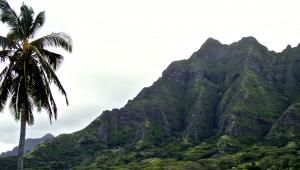
Here's an image working in the Tone Compressor tab to achieve a more natural photographic look. The five exposures (-2 EV, -1 EV, 0 EV, +1 EV, +2 EV) worked together well to bring in detail in the very dark tunnel walls, yet retain accurate exposure in the garden.

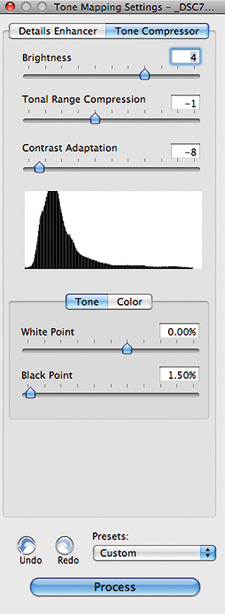
Here are the settings used for this image in the Tone Compressor tab:
 |
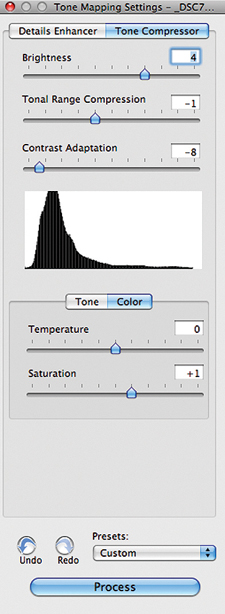 |
The settings are quite simple:
Brightness--Slide it back and forth to taste.
Tonal Range Compression--Slide it back and forth until
you get what you like.
Contrast Adaptation--Looks good on the low side on this
image, but move it around to your taste. All images require different settings.
White Point/Black Point--Set to be higher than zero to
force some of the image to pure black and pure white. Slightly increases contrast/saturation.
Temperature--This is white balance. Moving the slider
to the left is cooler and to the right is warmer.
Saturation--Move the slider around until you're
satisfied.
I'll use the settings in this tab occasionally to achieve a photographic
look. However, 99 percent of my Photomatix HDR processing is done under the
Details Enhancer.
Note: It's important to realize that after saving your
file in TIFF format, you can reopen the file in software and add enhancements,
paint over a mask, etc., treating the HDR image like any other image. Performing
your HDR conversion does not need to be the final step in the process. In fact,
many times, it's the first step in your final image creation.
Details Enhancer
Here are a few HDR examples of images processed using the controls in the Details
Enhancer tab:
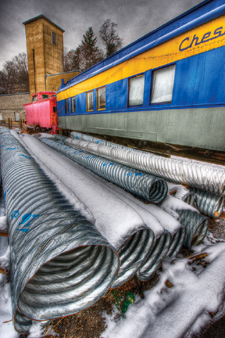
The Sykesville Train Museum and Baltimore Conservatory images were basically
shot with all of the smoothing turned off and Microcontrast maxed out.
 |
|
|
Both were five-exposure HDR merges, -2 EV, -1 EV, 0 EV, +1 EV, +2 EV.
 |
|
|
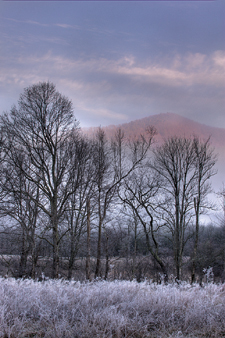
I used the Details Enhancer tab controls to create this natural-looking image. Carefully using Photomatix and color controls in Photoshop made the filter effects invisible.
 |
|
|
This is a four-exposure HDR merge, -2 EV, -1 EV, 0 EV, +1 EV.
Consider this an introduction to HDR-land. However, there is much more to HDR
photography than can be covered in this article. Here are a couple of books
available for those who want to dig quite a bit deeper into the technical aspects
and variations possible using HDR: Complete Guide to High Dynamic Range Digital
Photography by Ferrell McCollough
and Mastering HDR Photography by Michael Freeman, both highly recommended. Also,
Photoshop guru, Ben Willmore, has an excellent DVD, "High Dynamic Range
(HDR) Mastery."
A Photomatix Pro Control Overview
Strength--This controls the HDR effect. Set to High for
more drama and a surreal look and set to the mid range for a more straight photographic
look.
Color Saturation--Set to how you like it.
Light Smoothing--The middle and upper two radio buttons
will be used the most. Try each to see what you like.
Luminosity--This setting affects shadow tones only. Slide
it back and forth to your taste.
Tone Tab
· White point and black point--You can affect your color and brightness
here, but I normally begin by moving these up very slightly to 1/2 to 1 to get
some pure white and pure black in the image.
· Gamma--This affects the overall brightness, unlike luminosity,
which only affects shadow tones.
Color Tab
· Temperature--This is your white balance slider. Move to the left
for a cooler white balance and move to the right for a warmer white balance.
· Saturation highlights and saturation shadows--Moving these around
will alter the color of your image. Again, no formulas or settings that can
be applied universally. Move the sliders to get the look that you like.
Micro Tab
· Microcontrast--I tend to keep this pretty high, set from 7-10.
· Micro-smoothing--I love this to bring in cloud detail. Even if
you can see only a minimal amount of detail in the clouds, turning micro-smoothing
off will greatly bring out any texture present. The tradeoff is that it adds
grain and texture to your skies. Good for creative work, not good for stock
photography, where sharpness and smoothness are benchmarks of acceptability.
S/H Tab
· Shadows smoothing/highlights smoothing--These are fine-tuning controls.
Move to taste. However, if your Strength and Saturation are already set to 100
percent, the effects of the fine-tuning will be minimal or will exaggerate shadows/highlights.
I rarely use these controls.
· Shadows clipping--Blackens shadow areas. I've yet to find
a reason to use this.
TIP: Turning all smoothing off gives you a gritty look with
lots of detail and grain.
Tony Sweet is a professional nature/stock photographer, workshop leader, and a Nikon "Legend Behind the Lens." He lives with Susan and Akira in Eldersburg, Maryland.
- Log in or register to post comments

