Handcolor Your Prints
A Venerable Craft That Is Still Going Strong

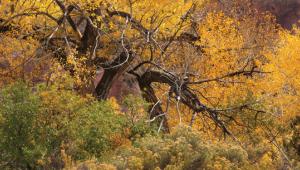
Completely handcolored using oils. The color looks more convincing than some of my commercially printed color prints. Paterson Warmtone paper toned with Acutone Sepia.
Photos © 2003, Frances E. Schultz, All Rights Reserved

From the mid-1950s to the mid-1980s, handcoloring was associated mainly with the days before color film. But it has never really gone away. Handcoloring is far from new: handcolored daguerreotypes survive, as do tintypes. Long after color processes appeared in the first decade of the 20th century (Lumiere Autochrome), handcoloring remained the cheapest and easiest way to get a colored print. Then, as color films and color printing became more affordable, handcoloring languished; as eventually did black and white photography. Not until the 1980s did black and white photography become fashionable again, and so in due course did handcoloring.

Today, handcoloring is back in the mainstream--and very popular. Contrary to what many people think, you don't need any extraordinary artistic talent, even with oils. In fact, it is simpler than painting by numbers, because the medium is transparent, so the detail in the photograph can guide you.

Nor do you need steady hands. I know this all too well, because I have a "benign essential tremor." This hereditary condition isn't serious, but you should hear my mother handing me a teacup, and me taking it! We use mugs nowadays: it's quieter. For handcoloring, I steady one hand with the other. If I can handcolor, pretty much anyone should be able to do it.

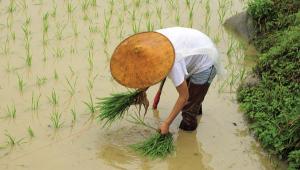
Spot coloring a wedding shot can be very effective. I colored the bouquet, Louise and Tony's skin, her nails, his buttonhole, and his tie. The print is on Paterson Warmtone paper, toned with Paterson Acutone Sepia.

Getting Started
The traditional way to start was with oils, in just three colors: one tube each of red, blue, and yellow. To these you would add a tube each of black and white, and perhaps some "extender," a clear medium to thin, and extend the paint.

With these three basic colors, plus black and white, you can mix just about any other hue or shade. Additional colors are mainly for convenience: for example, if you did a lot of portrait work you might add a tube of Flesh, a tube of Lip, and a tube of Cheek, though people of color might find these names misleading!

Today, rather than buying three colors plus black and white, it is easier to buy a starter kit. The leader in this field, Marshall's, offers an almost bewildering range of colors, tints, and tones.

Paper Surface Options
For oils and colored pencils, the paper for handcoloring must have a "tooth" or "key" to hold the color. Many traditionalists prefer to stick to fiber-based photographic papers: semimatte papers generally color better than glossy papers, even when air-dried to a non-gloss finish. If you want to use glossy paper or you have difficulty making your favorite paper accept oils, use Marshall's "Pre-Color Spray" to give the paper the "tooth" it needs to accept the color.

Although I am a traditionalist, I am not so traditional that I insist on using fiber-based paper. Several resin-coated papers have enough tooth to hold oil colors, and I prefer to use them. One that accepts color very well is Luminos RCR; another is the new Paterson Acugrade Warmtone.

Printing For Handcoloring
Most handcolorists find it easiest to work with prints that are lighter and less contrasty than usual, and many like to tone their prints before coloring. This is however just one approach. You may prefer something else, so be prepared to experiment.

Most ink jet media will not accept any coloring medium, but Marshall's new Ink Jet Canvas is a notable exception. It is also a lot easier to use than true photographic canvases (traditional emulsions on canvas), which are difficult to process because they go floppy in the chemicals. Test any new material before you try to make a first-class handcolored image using scrap prints.

Tools And Techniques Of The Craft
The basic techniques for handcoloring with oil-based photographic paints remain the same as they have been for well over a century. You rarely or never use a brush. The most popular applicator is a cotton bud such as a Q-Tip, but for finer detail a popular trick is to wrap a wisp of cotton around a toothpick or bamboo skewer, and for big areas, cotton balls can be useful. And Marshall's sells applicators.

After printing your chosen image, the first thing to do is to choose the colors you will use. If you don't have a palette, use a disposable plate. Squeeze out a small amount of each color you want to use. Then squeeze out a bit of black and a bit of white. Leave some space in the middle of the palette for mixing.

To mix colors, take a little of the first color on a clean applicator and move it to a clean space on the palette. Then take a little of the second color with another clean applicator and mix it with the first color. Always use a separate applicator for each color or mixed color: if you use one applicator in more than one color, your colors will soon go muddy.

The most basic coloring technique is to take a small amount of color on an applicator and apply it to the print using a light, circular "scrubbing" motion: move the tip of the applicator in tiny circles. This spreads the paint and works it in. Don't worry too much about going outside the chosen area. If you do, simply clean it up with a clean applicator or a vinyl eraser.

Other ways to clean up unwanted color are Marshall's P.M.S. solution, a turpentine based cleaner, or their Marlene, a non-turpentine cleaner. I prefer Marlene as I am allergic to turpentine. Other solvents will work, but I have never felt any need to try them.

To clean up a tiny area, wrap a small amount of cotton around the point of a skewer, dampen it with P.M.S. or Marlene and lift out the unwanted color. Use P.M.S. sparingly because it can cause the color to run. If you want to start over you can use either P.M.S. or Marlene on a cotton ball to remove any paint. If you have let the paint dry, this will not work: you will have to make a new print.

Most handcolorists recommend coloring in the detail first, then the backgrounds. But really, what works best for you is what you should do.

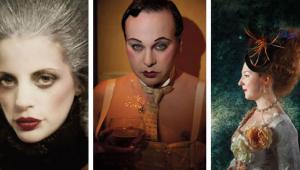
Spot coloring. I used both Marshall's oils and the handcoloring wands, with impasto to make the white flowers stand out. Paterson Warmtone paper toned with Paterson Acutone Selenium.

Handcoloring Pencils, Too
So far, I have looked only at oils, because these are the most traditional medium, and one of my favorites. But you can also use colored pencils. Many brands will work: the advantage of Marshall's is that they have done the research for you. Their pencils can be used alongside or instead of the photo oils, and can be cleaned up or spread with applicators and Marlene, just like the oils.

Again you need a semimatte or matte finish print, and more texture makes it even easier. Pencils can be used over the oils to fill in small details or they can also be used by themselves.

To make the pencil strokes part of the composition, use the pencils dry. This can be very effective. A paper that lends itself well to this technique is Maco Chamois (distributed by Cachet). To smooth out the pencil strokes try a little P.M.S. on a cotton wool ball rubbed over the coloring. Again, be prepared to experiment and develop your own techniques.

A new departure for Marshall's is their handcoloring wands. These are soft-tipped pens charged with photographic dyes, one set of six soft colors and one of six bright colors. These can be used on any
paper surface, even glossy, and are very quick to use.

Fill in tiny details just as you would with a felt-tipped pen. For larger areas, a circular motion tends to work better. I prefer to use the wands for small details, combined with other handcoloring media.

"Embellishments" are metallic or "pearlescent" acrylic paints for final touches. They are opaque, and require discretion: a little can go a long way.

Color Mixing
Color theory is far too complicated to go into here, but in practical terms, red, blue, and yellow can be mixed to make any other color:
red + blue = purple
red + yellow = orange
yellow + blue = green
yellow + blue + red = brown
Add black to darken a color and white to lighten it.

Extender and Drier
The bigger Marshall's handcoloring kits come with two extra tubes: Extender and Drier. Extender is a colorless medium which can be mixed with the oil colors to make them weaker (not lighter).

Drier is mixed with the colors to help speed drying. A lightly colored print will take three or four days, but if you use heavy impasto it can take a week or two. Drier can cut the drying time by about a third.

Keeping "Du-Tubed Colors"
A disposable plastic plate is a very useful palette: if you have not used all the colors by the end of the session, you can cover it with cling-film and freeze it. Remove it from the freezer about an hour before starting the next session.

The Handcolored Wedding
Handcoloring is increasingly popular for wedding photography. The coloring may be applied to a limited area, such as the bride's bouquet, or it can be more literal. Make sure that the bride understands what she will be getting. If she expects conventional colored photos she may not be too pleased with handcolored ones.
Recently a young friend, Louise, asked Roger Hicks (my husband) and me to shoot her wedding. She flattered us outrageously, saying that she wanted to have photographers who she knew and liked and trusted behind the camera. She also wanted us to use our creativity.

Once we agreed, I asked her to do some research. I wanted her to look at wedding pictures and decide what she liked. When I showed her some handcoloring she was pleased with the idea.

Next, I asked her to provide fabric samples of the bridesmaids' dresses, and to give me an idea of the flowers and colors in her bouquet, so I could have the right colors in stock. It was an autumn wedding so the colors she chose were gold and orange. The big lilies in her bouquet were dark orange, so I took yellow and orange filters along to lighten the flowers and make them easier to color.

The shooting began at the beauty parlor. I took pictures of her getting her makeup and nails done, shooting on Ilford Delta 3200. Back at her house I shot the "bride dressing" sequence on Ilford XP2 Super. Roger met us at the church, and we shot both color and black and white. This not only gave Louise and Tony Paul some conventional color shots: it also gave me excellent references for handcoloring.

Finally, we shot an incredible number of pictures at the reception. The pictures ranged from formal set pieces for handcoloring to snapshots of the occasion. The snapshots got more and more experimental at the end of the day!

Thanks to Louise and Tony for their permission to share these pictures with Shutterbug readers.

Retouch Dyes For Handcoloring
Another medium you can use to add color are Marshall's retouching dyes. These are primarily intended for retouching, but can also be used for handcoloring. Colors are water soluble, and are generally easiest to control if you dilute them and build the color up. They can be applied with a brush or with cotton. Often, pre-wetting the area to be colored with a little water and wetting solution can give you rather more control than working on a dry area.

Using dyes for handcoloring is rather like using watercolors for painting. Using oils is more similar to oil painting. Some people have more sympathy for one medium than for the other. You need to experiment to see which suits you best. Mixing the various media can be very effective, too.

Handcoloring Kits
Traditional kits of transparent oils are available with five, nine, 15, 20, and 46 colors. Each includes instructions, a bottle of P.M.S., applicators, skewers, and cotton. Extender is included in all but the smallest kit. The two biggest kits also include a palette, Marlene, Duolac (lacquer), and a tube of Drier.

Among starter and specialist kits, the "Learn to Color with Photos" kit contains nine oils, plus the standard accessories from the small kit as well as three prints to color; "Activity Kits" have five oils, five colored pencils, basic accessories, instructions, and a print to color; the "Portrait Set" has 10 oils, six colored pencils, extender, ccessories, and instructions; and the "Perfect Pair" Ink Jet Canvas and Oil Set comprises five sheets ink jet canvas, five tubes of color, a paintbrush, applicators, and a vinyl eraser.

There are three sets of pencils, the Starter Set (nine pencils), the Deluxe Set (14 pencils), and the Tropical Pencil Set (14 pencils). All sets include a bottle of P.M.S., skewers, cotton,and instructions.

Handcoloring wands
come in two sets of six colors, Soft Lights and Bright Lights.

Embellishments consists of four tubes of acrylic accent paints, silver, gold, copper, and pearl, plus brush, non-toxic cleaner, and instructions.

Manufacturers/Distributors
Brandess-Kalt-Aetna Group, Inc.
(Marshall's)
(847) 821-0450
fax: (847) 821-5410
www.bkaphoto.com

Cachet/Fappco (Maco)
(714) 432-7070
fax: (714) 432-7102
www.onecachet.com

Luminos Photo
(800) 586-4667
www.luminos.com

Paterson Photographic Inc. (USA)
(770) 947-9796
fax: (770) 949-5917
www.patersonphotographic.com

X