Epson’s Stylus Pro 3880; The New 17” K3 Printer
Epson’s 17” Stylus Pro 3800 has been one of the most popular printers in its size for the past three years. With a good combination of price and size, this C-sized printer has filled the needs of photographers looking for the ability to print 17x22” on a variety of media without the bulk or expense of a large format printer.
 |
Since the introduction of the 3800, Epson has made two major changes in their pigment-ink photo printers. The first is the second generation of UltraChrome K3, which replaced the original magenta and light magenta inks with a vivid formulation to improve the color gamut in the blues and purples. The other change is more recent, and so far seen in only two printers—the 7900 and 9900—with UltraChrome HDR, adding green and orange to the mix.
Because the HDR ink set has been out for a while now, I expected new printers from Epson to adopt this version, so I was surprised when Epson notified me of the Stylus Pro 3880 using the K3 ink set.
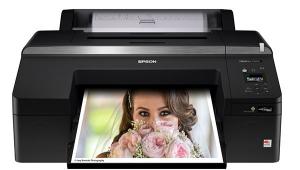
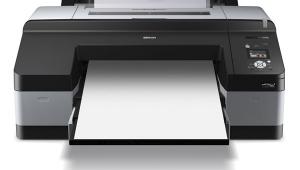
From the outside, you won’t notice a difference between the 3880 and the 3800 that it replaces. Both use the same case and controls. Other than the UltraChrome K3 label adding the Vivid Magenta (#1), the printers look visually identical. In fact, even opening up the ink compartments you’ll see only a “vivid” label on the magenta cartridges to tell you this is a different printer. It’s behind the scenes where the real changes are occurring though. Combined with the new ink, Epson has added AccuPhoto HD2 screening to improve the accuracy of ink placement on the page, giving the images a smoother color and tonal gradation as well as reducing ink use. The print head has been improved as well with more accurate placement and an ink-repellent coating to reduce clogging and maintenance requirements.
 |
|
|
Setup
This is one of the few 17” printers that you can easily set up by yourself. Unlike the 4880 that ships on a palette, the 3880 is much more compact, weighing only about 43 lbs (the 4880 by contrast tips the scales at 89 lbs). Unpacking is straightforward enough, although it’s always a game with me to see how many pieces of tape a single printer can have attached to it—I think the 3880 had about 20 holding various parts in place for shipping. Size-wise, the 3880 is the same width as the HP Photosmart Pro B9180, and only 1” wider than the 13” Canon PIXMA Pro9500.
After unpacking the printer and plugging it in, you’ll be prompted to insert the ink cartridges to charge the system. Although the 3880 holds nine inks (#2), the photo black and matte black inks share a line, meaning they can only be used exclusively. The printer driver will make the switch for you when you select the appropriate paper type—matte papers use the matte black, while coated papers like Ultra Premium Photo Paper Luster use the photo black. This ink swap does take a bit of time and uses up a small amount of ink with each swap, so you’d be well served to cue similar print jobs together to avoid constant switching back and forth. According to Epson, the swap from photo to matte black uses about 1.6ml of ink, while going the other direction uses about 4.6ml.
 |
|
|
Ink costs with the 3880 are one of the primary advantages to moving to a larger printer. With 80ml cartridges, you’re not replacing them as frequently as you would with a 13” printer like the R2880 and its 12ml cartridges. Cost-wise, you’re paying about 75 cents per ml with the 3880 compared to about $1.10 with the R2880.
On the back of the printer are USB and Ethernet ports. I set up the 3880 connected to my router for sharing across a mixed Mac and PC network. Network connections were easily done on both platforms with the EpsonNet Network utility (#3) finding the printer and adding a TCP/IP port.
 |
|
|
Using The Printer
Not much has changed in the printer driver interface—if you’ve used Epson printers in the past, you’ll feel right at home here. Both Windows (#4) and Macintosh (#5) drivers are functionally similar, although the Macintosh driver supports 16-bit output for better color fidelity and smoother tones.
 |
|
|
 |
|
|
As with the previous model, it’s hard to visually see any quality difference between the 1440 and 2880 quality mode settings. You will see a difference in time though—a 16x20” at the highest (SuperPhoto) mode takes about 9 minutes compared to 6.25 minutes in SuperFine mode.
- Log in or register to post comments

