Digital Innovations
Blurring The Lines; Software Solutions For Soft Effects Page 2
 |
|
|
Control Panel Secrets
There are no rules of thumb about how much blur or soft focus to apply to any
image. My best advice, as Emeril says, is to "season to taste,"
but that doesn't mean you can't have a few Photoshop tricks up your
sleeve.
First of all, don't be afraid to yank those control panel sliders to the
extreme ends to see what effect this produces. Even after you apply a filter,
there's always the UNDO command waiting in the wings and I promise you
that no pixels will be harmed while performing this maneuver.
 |
|
|
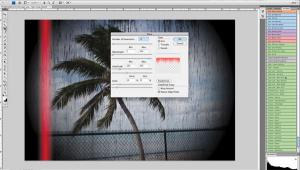
Second, don't forget the FADE option. After applying any filter, you
can reduce its effect by applying the Fade command (Edit>Fade...) that
becomes available only at that time. Use the slider to apply the filter at anywhere
from 1 percent to 99 percent to create the desired soft focus or blurry effect.
Lastly, if all else fails, use a blur/soft focus layer. Start the process by
making sure your image file is as good as it can be, then add a duplicate layer
(Layer>Duplicate Layer). Apply a filter to the duplicate layer, not the background
image below. Then lower that layer's Opacity setting to allow part of
the bottom layer to show through. For even more control you can erase part of
the duplicate layer to let 100 percent of the original file show through. Use
the Eraser tool to erase the blur/soft focus (on the duplicate layer) around
the subject's eyes to allow the sharpness of the background layer to show
through. This is an especially good trick for portraits because the sharpness
of the subject's eyes is critical in getting the viewer's attention,
so this technique gives the impression of sharpness while maintaining overall
soft focus.
- Log in or register to post comments


