The Digital Darkroom
Making Quick Mask Selections

The Darkroom

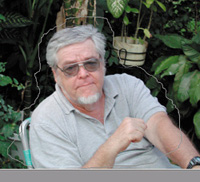
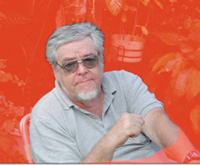
There are many different ways to make selections in Photoshop. Here's one that I find works well with lots of different types of images. For this demonstration, I had a nice portrait of my friend, Earl Eshenauer, but a distracting background. I wanted to move Earl's picture onto a better type of background. Here's how I did it using the Quick Mask mode.

First, I made a rough selection with the Lasso tool (#1). I then selected the Quick Mask Mode (#2). The image on the screen shows the effect (#3). I suggest that you use the Control key plus the "+" key to magnify the image up to close to the pixel level. This will allow you to have more control over your work.

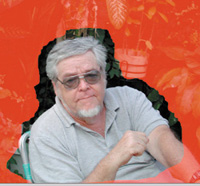
Next, select the Brush tool and a small brush size. In this example, I am using a 35 pixel, round, soft-edged brush. Now, paint in the ruby-colored Quick Mask to cover all the areas that you do not want to be part of the finished portrait (#4).

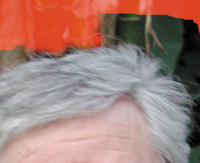
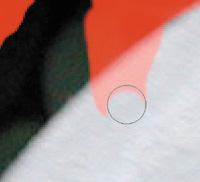
If you have problems around flyaway hair, try setting the Opacity of the brush down to 25 percent or so and using a smaller brush size to sort of fake it around the flyaway hair strands (#5). When you get to a place where you need a little less diffusion to make a bit cleaner-edged mask, you can select a different brush size or a harder-edged brush (#6).

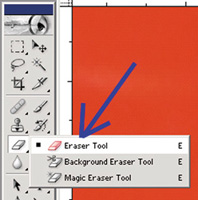
If you make a mistake and paint the Quick Mask in an area where you don't want it, select the Erasure tool and an appropriate brush size and simply erase the unwanted part of the mask (#7 and #8). When you have completed creating the Quick Mask, the picture will look something like #9.

Go back to the Tool Bar and turn off the Quick Mask (#10). Then, go to Edit to Copy to copy the unmasked portion of the image to the clipboard. Now it's time to create a new blank canvas onto which to paste the selection. Go to File to New and create a new canvas. In this example, I created an 8x10 at 300ppi (#11).

Next, highlight the new canvas and go to Edit to Paste in order to paste the selection from the clipboard onto the new canvas. If the image is not the right size, go to Edit to Transform to Scale and hold down the Shift key while you drag the image from one of its corners to make it larger or smaller. When you have adjusted the size of the image, press the Enter key.

Now, to finish the portrait, I selected the background layer to lay in a nice gradient. In this example, I selected a deep blue and a black color. Then chose the Circular Gradient tool (#12). Experiment a little with where you start and stop the Gradient drag-action. Since I wanted the blue highlight to be centered behind the subject's head, I started the gradient by putting the cursor on the subject's nose and drew it into the upper left-hand corner.

Now it's time to do some finishing cleanup work. Start with the hair and a diffused Erasure brush. Magnify the image up to almost the pixel level and start to erase out some of the dark outline around the head by "biting" into the hair edge just a little.

Next, use the Erasure tool and a fairly large, soft-edged brush to blend the bottom edge of the portrait into the graduated background for #13 and the Final Image.

Now, wasn't that easy! If you have problems, you can write to me care of the magazine at editorial@shutterbug.net. If you'd like help with calibrating your computer, monitor, and printer, ask for my CD-ROM on How To Calibrate Your System. It's only $3.


1.


3.


5.


7.


9.


11.


13.


2.


4.


6.


8.


10.


12.


Final Image

X