- REVIEWS
Camera Reviews 
More Reviews Mobile Reviews Photography Reviews - GALLERIES
- VIDEOS
- BUYER'S GUIDES
Beginners Guide: How to Color Grade Photos for Epic Results (VIDEO)

Inexperienced Lightroom and Photoshop users often concentrate on sharpening and exposure adjustments while ignoring the task of enhancing colors because they fail to understand how color grading works. If this describes the workflow you use, today's beginners guide is exactly what you need.
Instructor Mark Dumbleton summarizes today's post-processing tutorial like this: "You're missing out on a powerful editing tool, and in this video I'm going to give you a detailed walkthrough of the Color Grading panel in Lightroom and explain how to implement it to achieve photos with really good results."
Dumbleton is a South African pro who regularly posts in-camera and photo-editing tutorials that are appropriate for novices and advanced photographers alike. We promise that after watching this 10-minute episode the color balance of your images will reach a new level of perfection.
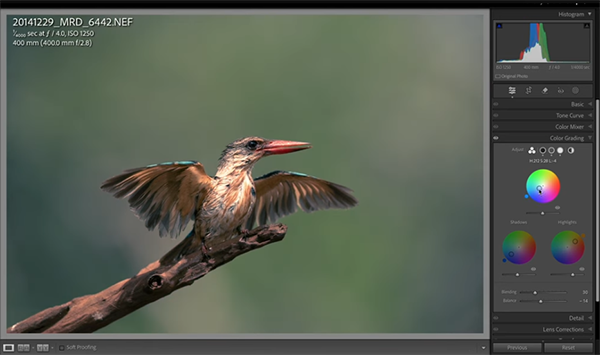
Color grading may sound complicated, but it's actually a simple pocess where you apply colors, refine colors, or change colors in a shot to create images with a specific look. For example, you may want to give shadows a moody bluish tone, warm up highlights, or accentuate reds, oranges and yellow when photographing a sunset.
As you'll see, the process can be a lot of fun as you experiment with the various options that Dumbleton describes. And there's more to color grading than just making prettier photos because it's a great way to create a style of your own that stands out from the crowd. Stick around until the end when Dumbleton demonstrates a "bonus editing trick" he frequently employs in combination with color grading for maximum impact.
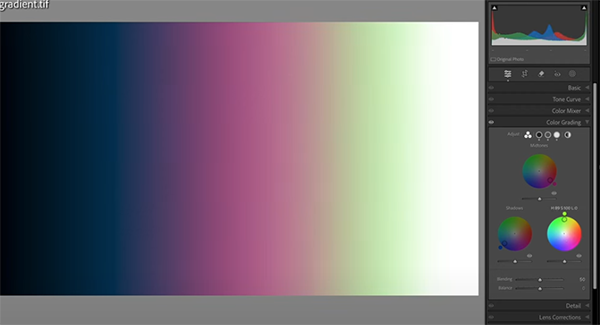
Dumbleton opens Lightroom's Color Grading panel and begins with an overview of what the various sliders are designed to accomplish so that you'll better understand the practical examples that come later. There are clear illustrations as he adds a gradient with blues in the shadows, pinks in the midtones, and greens in the highlights.
Keep in mind that this is merely an example, and your challenge is to apply the various enhancements that follow in a way that's appropriate for the specific image at hand, and the ultimate effect you have in mind. This is a simple method for unleashing your creative vision that's been under lock and key for too long.
There's much more to learn on Dumbleton's instructional YouTube channel for photographers of all skill levels.
And don't miss recent the tutorial we featured with another accomplished pro who reveals five "huge" mistakes made by self-taught shooters that may compromise the quality of every outdoor photograph they capture.
- Log in or register to post comments


![]()
Get the Latest Photo Tips, News & Reviews from Shutterbug!
| Camera Reviews Other Reviews | Mobile Reviews Photography Reviews Columns | News | Features | How-To | Resources |
 © 2025 Shutterbug
AVTech Media Americas Inc., USA
All rights reserved