- REVIEWS
Camera Reviews 
More Reviews Mobile Reviews Photography Reviews - GALLERIES
- VIDEOS
- BUYER'S GUIDES
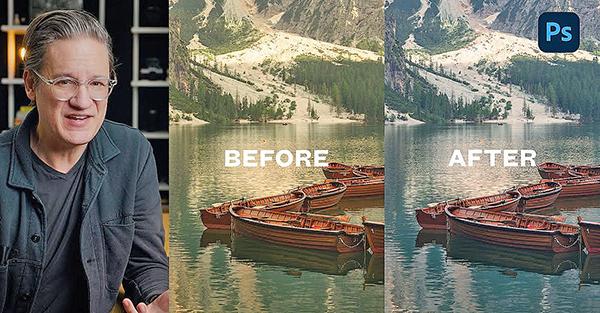
4 Ways to Banish Unsightly Color Casts From Outdoor Photos (VIDEO)
Adobe recently celebrated Photoshop's 35th birthday, and the software has become more and more powerful with every update. That's why is so surprising that that after three-and-a-half decades Photoshop still lacks a simple, straightforward tool for eliminating those ugly color casts that will spoil image quality in a hurry.
Therefore, it's up to us to resolve these unsightly problems with various methods, some of which are easier to accomplish and more effective than others. Today's tutorial from instructor Todd Dominey demonstrates four techniques for fixing this common issue—three of which are fast and super simple, while the fourth is slightly more time-consuming but delivers solid, predictable results.
Dominey is a professional landscape photographer who is very generous about sharing his favorite shooting and post-processing techniques and you can view a list of his preferred gear in the description beneath the video. In the next 11 minutes you'll learn what he considers the best ways to precisely adjust color temperature and rehabilitate images with a color palette that's less than ideal.
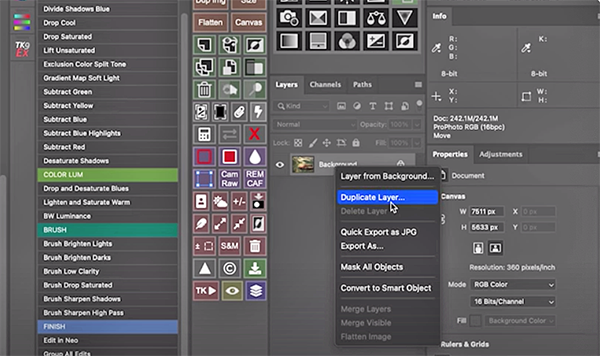
The first simple technique on Dominey's list takes less than three minutes to explain and it's even faster to put into practice. His sample photo is a nicely composed lakeside scene that's far too warm to appear pleasing and realistic. This approach may be familiar if you're accustomed to editing Raw files, and it takes place within Photoshop's Layers panel.
All you have to do is make a duplicate background layer, navigate to Photoshop's Filters panel, choose the Camera Raw option from the dropdown, and follow Dominey's quick instructions. Interestingly, the image isn't technically a Raw file but Dominey explains that we can still use Camera Raw to adjust contrast, add clarity and dehaze, enhance colors, and modify other key attributes.
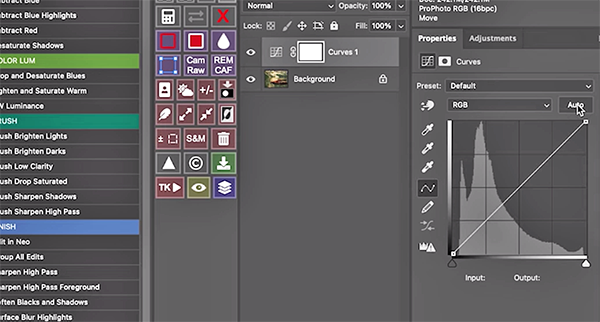
Another method for resolving an unwanted color cast calls upon a Curves layer to make the fix. By using a simple keyboard shortcut and clicking on the Auto button you can quickly adjust contrast, both the white point and black point, and there are multiple options from which to choose.
The lesson concludes by demonstrating two more foolproof techniques for getting the job done, and Dominey explains the best options to choose based upon the characteristics of the image at hand. So choose your weapon wisely and banish those ugly colors once and for all. Then head over to Dominey's popular YouTube channel where you'll find many more instructional videos on common post-processing topics.
Be sure not to miss the tutorial we featured with another image-editing expert who demonstrates how easy it is to enhance dynamic range for vivid photographs with maximum detail and tonal balance.
- Log in or register to post comments


![]()
Get the Latest Photo Tips, News & Reviews from Shutterbug!
| Camera Reviews Other Reviews | Mobile Reviews Photography Reviews Columns | News | Features | How-To | Resources |
 © 2025 Shutterbug
AVTech Media Americas Inc., USA
All rights reserved