I tried this program ones. Understandably when one is not used to a new program that it can take a little time to find your way.
How ever" I do find this program to perform well but find that it is awkward to navigate through and some Buttons e.t.c are a little too small.
Capture One Pro Version 7: Asset Management + Raw Power
Capture One Pro stands as the Raw converter and digital asset manager of choice among many pro photographers, notably those using Phase One backs. But this software also supports many, many other cameras, with profiles for over 250 models plus a wide range of lenses. Version 7 (V7) has some new features of note, so I checked it out to see if an upgrade from 6 is advisable, and if it might tempt users of Adobe Lightroom/ACR. For this test I ran Capture One Pro 7 on a 27” iMac under OS X 10.8 Mountain Lion, with 8GB of RAM.
A New Workflow
Capture One Pro initially opens with a Library window, and V7 makes a major departure from earlier releases in how it allocates digital asset management, and that’s what I’ll focus on in the first part of this review.
In the past, Capture One Pro operated primarily by importing images as a Session, which, for example, could be a photo shoot. Now, while not abandoning Sessions for past users, V7 lets you assemble images into Catalog Collections, or simply Catalogs—a concept familiar to Lightroom users. For me, that yields a much more user-friendly and flexible workflow.
A Catalog in Capture One Pro 7 has the benefit of letting you work on images that are offline (on a remote server or unmounted hard drive, for instance), provided, of course, that you keep the Catalog images on your working computer or otherwise accessible. I keep my Catalog on my computer’s internal drive while working on images stored in various locations.
Opening Dialog & Import Screens

All Photos © Jack Neubart
Build A Catalog Collection
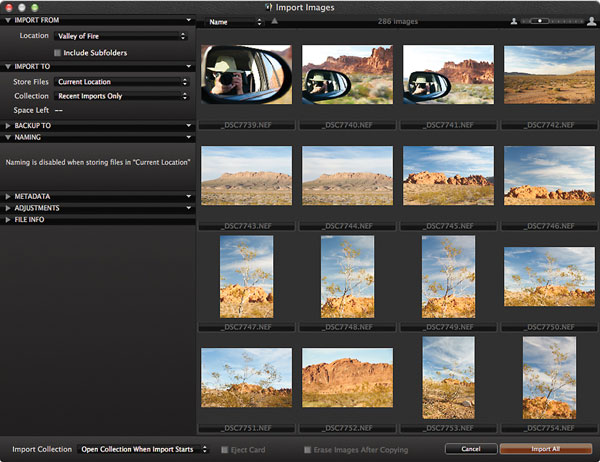
At the same time that you create a Catalog, you import images to build this collection. When importing I opt to use the “Current Location.” That prevents the files from being duplicated during import, saving valuable hard drive space. If you archive files on a remote server or external drive that you don’t use daily, you may want to copy files to your “working” external drive when importing, instead of importing to the Current Location. This allows you to maintain original files intact. Either way, you may choose to import only selected files to streamline the database and browsing. You can always add files at a later time regardless of which approach you take, thereby growing the Catalog over time.
Library Window

You can also add and work with numerous Catalogs (each named as you wish). When creating a new Catalog, opt to open the new Catalog in a new window—I found this works best. Also, to improve performance, close Catalog windows that are not in use. Capture One Pro lets you maintain an image library of virtually any size, although Phase One estimates you may take a performance hit if you exceed 100,000 files per Catalog.
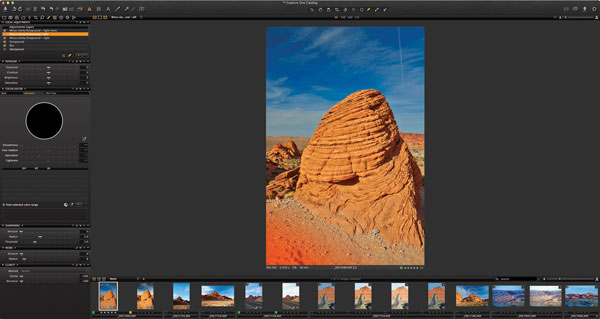
The top tier of the Library palette contains the Catalog Collections housing all imported images, along with a list of recent imports and tethered captures by date. (Tethered capture, where images are saved/displayed on a connected computer as each exposure is made, can be performed with Phase One/Mamiya, Leaf, Canon, and Nikon.) Click on any of these collections to view images, but you might want to wait until you’ve taken the next step before working on any of these files.
Auto Adjust: Version 7 Vs. Version 6


User Collections: The Next Step
The tier below holds User Collections—this is where you work your managerial magic, creating Albums, Groups, and Projects. This takes the shape of a hierarchical tree, with branches you define. Name them, move them around, grow the tree—there’s lots of flexibility here. For instance, you can name a Group “People.” Then add an Album titled “Lifestyle: Living Large,” and others labeled simply “Portraits” and “Kids.” Or name a Project “Prague,” for example, and include Albums of landmarks, people, eateries, etc.
Albums under User Collections are where you should preferably be working on images, although you’re free to do this inside the all-inclusive Catalog Collections or in the original folder (original folders are found at the bottom tier in the Library). There are also Selects Folders—your favorites or selected images ready to be printed or sent to a client. Selects Folders are analogous to Lightroom’s Quick Collections. You can place the same files in different Groups, Projects, or Albums without duplicating anything, since you’re only depositing a reference to those files in each location.
Working With Adjustments

Flexible Search Tools
Search tools in V7 are extensive. You can rate images and filter by ratings. Searches can also be performed by typing in the search words in a text field and/or (and this is new) by checking off criteria, such as keywords, EXIF data, or other image properties. The most efficient way of conducting a filtered search is to first select All Images in the Catalog Collections, unless you want to limit your search to a specific Album or folder. As might be expected, you can’t search for images across different Catalogs.
When creating a list of filters, V7 will, for example, automatically identify and list each focal length used for each image. So, let’s say you want to find fisheye images shot with a Nikon D300 but neglected to add “fisheye” to keywords. Just click on “10mm” and every relevant image is presented. I can also narrow the search further by adding other filters, say ISO. (Note for APS-C camera sensor owners: only actual—not effective—focal length is shown in the metadata.)
You can take this a step further and do an Advanced Search using text fields and ratings, which gives the option to create a new Album or a “Smart Album” containing only the images returned. Smart Albums are purely the product of a filtered search—you cannot drag-and-drop images into them like you can with regular Albums.
Noise Removal + Exposure Boost




Powerful Editing Tools
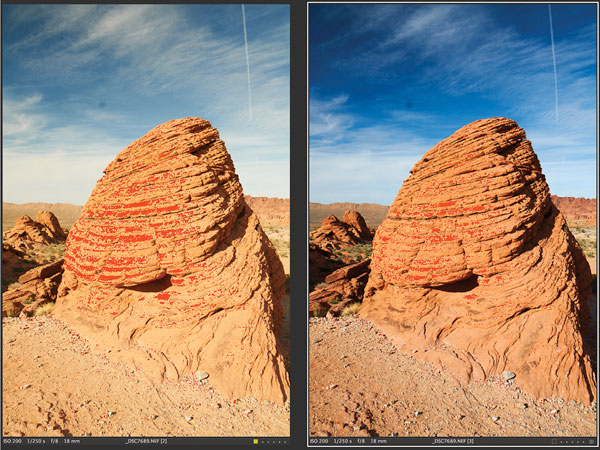
Capture One Pro, like any Raw converter, gives you the tools to perform nondestructive image editing, but V7 has ramped up the process out of the gate, beginning with a revamped image processing engine. You only have to use Auto Adjust to see the improvements over V6.
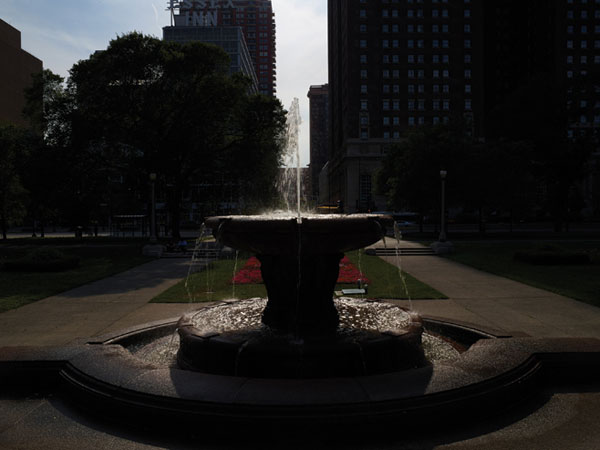
Auto Adjust groups a handful of auto corrections (you select which to apply: White Balance, Exposure, HDR, Levels, plus keystone and rotation corrections) with one click (in the Main Menu or use the “A” icon). It gets a bit aggressive when confronted by scenes where dark tones predominate, attempting to compensate for what it sees as underexposure. Otherwise, you’ll find Auto Adjust works remarkably well. (Note: Canon and Nikon firmware currently does not support keystone/rotation auto corrections in Capture One Pro—but no harm if you leave them checked.)
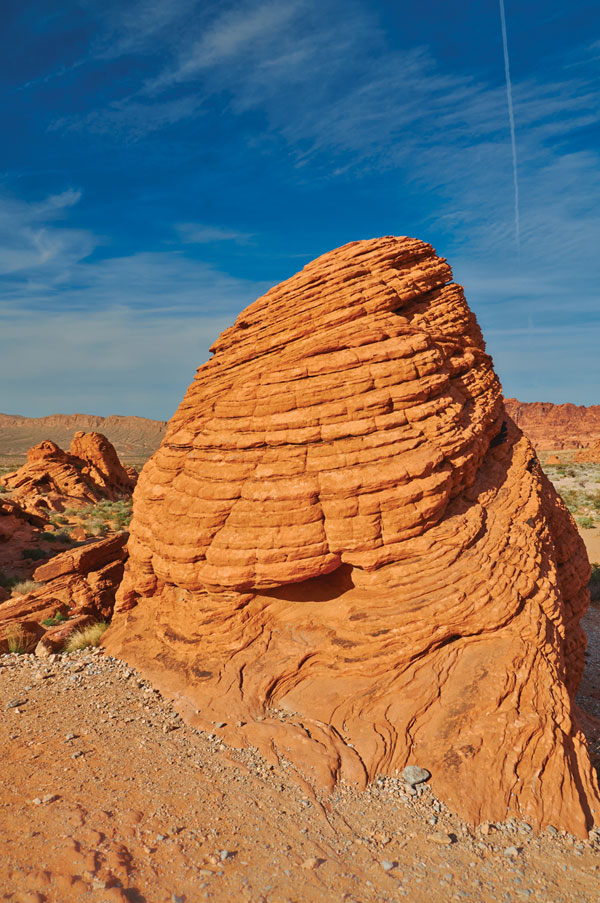
That’s just for starters. V7 provides additional tools with a full plate of color corrections. These of course include White Balance, while adding Color Balance and selected hue alterations/adjustments. For instance, for a more dramatic sky, I would use the color-picker (eyedropper), selecting the tone I wanted to adjust. Then I’d use Hue Rotation in the Color Editor, along with Saturation and Lightness, to render a blue sky to my liking.
High Contrast


Local Adjustments
One very important tool that I relied on heavily in V7 was Local Adjustments. You can add up to 10 Adjustment Layers (only five in V6), beyond the background layer. Use the Auto Mask feature to paint an Adjustment Layer along edges with sufficient contrast—the program automatically removes the overflow (provided there’s sufficient contrast), restricting the mask to the desired subject areas. I used the adjustment mask to fill in shadow detail on several images.
You can also copy and invert a mask. Say you want to direct more attention to the foreground by adding Clarity and Structure. Let’s assume the image has blue sky. Apply a layer with Auto Mask to this area, then copy and invert the mask to make the foreground more pronounced. Examine the mask carefully, so you can remove any excess that Auto Mask does not catch (namely in areas of low contrast). In a few other images, I used Adjustment Layers to soften background and foreground detail (using Clarity in reverse).
There’s also a dust/spot removal tool apart from the masking feature. The duster-offer works well, but I prefer Lightroom’s clone tool over Capture’s spot removal, which requires considerable effort and often fails to deliver a clean result, except where the spot is small and easily defined.
The noise removal algorithms in Capture One Pro 7 have been totally re-engineered. And in side-by-side comparisons of the same high ISO image, with exposure boosted in shadow areas to increase noise, V7’s NR did indeed show much cleaner results than its predecessor.
The alignment tools in Capture One Pro have always been a favorite of mine. I never felt as if I needed an engineering degree to master them. Of course, if you’re using a Phase One back, Capture One Pro can be set to automatically correct keystoning and rotation with just one click (provided you’re working with IIQ Raw files)—and the results are simply amazing.
Using Built-In Styles

Conclusions
Capture One Pro 7 vies for your Raw energy attention alongside Adobe Lightroom 4 and DxO Optics Pro 8, its chief competitors (Hasselblad devotees can add Hasselblad Phocus) for Mac and Windows users. While each application has its adherents, as a long-time Lightroom user who was only mildly enthusiastic about using Capture One Pro with anything but Phase One files, I’ve come to see Capture One Pro in a whole new light.
No, it’s not perfect. Capture One Pro 7 does experience the occasional hiccup and is at times painfully slow, on my setup at least. And I would like lens profiles for all the lenses I own (I’m told this list is growing). Also, Capture One Pro lacks the plug-in support I’ve gotten used to in Lightroom. And it’s missing a history palette and snapshots.
Capture One Pro 7 does offer extensive export capabilities through the use of Recipes that define individual jobs, plus it has full soft proofing support. The enhanced image processing and noise removal algorithms alone make this application a solid upgrade. And digital asset management here means you’re always in control of your images.
Capture One Pro 7 costs $299, however, a free trial is available. For more information and minimum (and recommended) specifications, visit www.phaseone.com.
- Log in or register to post comments


Software is a crucial part of a whole range of scans carried out on a daily basis throughout the world. Without the software the data gathered from the scans would be unable to be interpreted in any useful way. :)
- likes instagram

I tried LR 4.4 tethered to a D8oo, 75mg raw file, with a over-hormoned PC laptop, USB 3, and with the first shot LR 4.4 stuttered and hacked like a old house cat trying to cough up a hair ball!! If I hit the button again LR 4.4 locked up the lap top. The software took ten min just to id the camera once i turned it on and Adobe just ignored me with tech help. $110.00 in the garbage were it belongs. On a professional level using a professional camera for fashion photog. LR is a expensive amateur joke.
With Pro 7 it worked flawlessly...I could fill the cache on the camera before the Pro 7 software would backup on the laptop. After processing my raw files in Pro 7 the results were nothing but amazing compared to CS5.5 PS pro... I actually went back and repossessed my last 3 jobs because of the superior quality of Pro 7 raw processing engine and image editing features.
Pro 7 is professional software designed for professional photographers!!
After using Pro 7 for the past year, I dream that Phase One will one day come out with a program to replace Photoshop and all will be good in the world once again!!

I've been using Capture One for the past two years and I love the workflow, the tools, and everything else-so flexible that allows me to have a total control of my images, the tools are very intuitive, and the processing is so fast. In addition, I used the Capture Pilot so my clients can see the images in their iPAD and tag the images in real time. Nothing can beat Capture One as far as I'm concerned.

After using Pro 7 for the past year, I dream that Phase One will one day come out with a program to replace Photoshop and all will be good in the world once again!!
click here
wwesummerslamx.com


