Wedding And Portraiture
Seeing Pictures, Outdoor Backgrounds Around Every Corner
I arrived at the International Wedding Institute, Hasselblad's annual school for wedding photographers in Tucson, Arizona, a day early to get a feel for things and scout locations for outdoor portraiture. I didn't have to look far. As a matter of fact, I never left the main building of the Westward Look Resort since I saw backgrounds everywhere. The desert offered great cactus gardens, but I saw backgrounds where most people would never think of looking. The first morning there, before going into Bambi Cantrell's class, I walked around the corner of the building to see what was in the distance. True, we were in a flat valley surrounded by mountains. Yet, what really excited me the most was the early morning sunlight backlighting the trees right next to the building. Beyond them the blue mountains jutted up majestically toward the even paler blue sky. I knew that I had found my first shooting location. |
|||
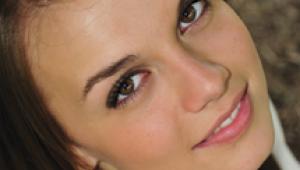
At the same time I noticed that had I arrived an hour earlier, the light would have been a little lower in the sky and not caused quite as many hot spots in the area that I intended to use. So, before the end of the day I asked the group of photographers to meet at 7am the next morning and work with me for an hour before their daily outdoor breakfast. Since no models were planned for that early in the morning, two photographers helped out by dressing as the bride and groom. I began the day by posing the bride on a narrow walkway between two buildings (Photo 1). I selected that area because there were an untold number of cacti, trees, and shrubberies all glowing in the early morning light. Far behind them, of course, were the blue mountains. A Breakfast Treat. As we sat outside having breakfast, I couldn't help but admire the still early morning sunlight backlighting the trees that were surrounding our breakfast area. I couldn't even wait for breakfast to finish. I knew what my 350mm lens would do to that background and hurried over to set it up on my Benbo tripod. |
|||
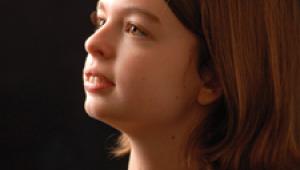
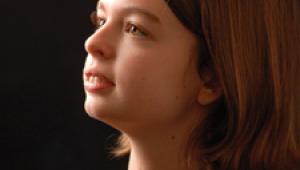
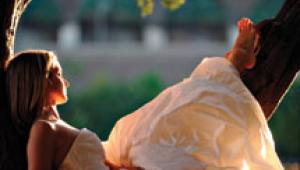
This time I took another of the photographers in the class and quickly did a facial analysis of her. I determined that she would look best at a 2/3 view of her face, turned to the left (Photo 2). So, I positioned her shoulders toward the camera, had her point her left toe to her left, lift her heel and then turn and tip her head slightly toward her higher left shoulder. That 350mm lens had blended what looked like a very busy background to a soft, warm green and gold glow behind her. For the remainder of the class she kept telling me that she usually hated her pictures, but I captured her beautifully in a single shot. No surprise to me! I pointed out to everyone that I had positioned my camera very carefully, so that I could keep the background lighter in front of her face and darker behind her. It was simply experience, I told everyone, knowing where to look for backgrounds and what to look for. You have to also know how the lens is going to see it. A long focal length lens creates magical backgrounds when focused on a close-up head and shoulder portrait. |
|||
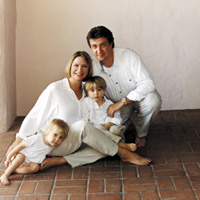
Covered Entrance Ways And Walkways Are Perfect! The day before, Cantrell had taken the class to a covered porch that was leading into the gift shop at the resort. When I finally got out of the gift shop I noticed the spectacular studio it was and why the lighting situation was so perfect. First of all, it was covered overhead, one of my primary prerequisites for outdoor portraiture. Then, it was open on two sides. To our left was the open entrance way (the main light). Behind us (along the length of the walkway) was the fill light. I returned there with the groom (now husband and father, for real) in the exact same spot with his for real family. Everyone was fine, except him. Every time I would try to get him posed exactly as I wanted him, he'd move. So, what did I need him to do? First of all, I needed him up higher than his wife. So, of course, he kept settling down to her level. Then, I needed to pull his head forward to get the highlights on the right side of his face. Plus, he needed to tip his head toward his wife, perpendicular to the slope of his shoulders (Photo 3). |
|||
Plus, I didn't want to have any heads directly above each other, so that was another matter I had to deal with. Eventually, the little girl got a little antsy and started wiggling all over the place. When I finally got her to lay her head on her mommy's leg, it was over. I had the shot I wanted. I had posed everyone to split light their face with the brighter light coming in from my left. I placed a Westcott Monte Illuminator/reflector to my left, wrapping the light around onto the shadowed side of their faces. Just about that time, Tony Corbell, my long-time friend--now Director of Education, Hasselblad, came along and asked me why I wasn't using the automatic exposure capabilities of the 203FE camera. I told him the truth. I was afraid of it. I've been setting my own exposures since the 1940s. Was I gonna start something new now? Well, Tony showed me how to set the ISO of the film in the camera and told me that the camera read the exposure directly on the plane of the film. It doesn't get any better than that, I figured. "Accuracy within 1/10 of a stop," he told me. A Polaroid bore truth to the fact. It was perfect. I was in business and automatic is now for me. |
|||
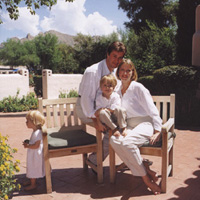
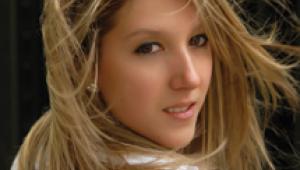
Thank Goodness For Automatic Metering! A good thing, too, because the next try at their family group was set up as backlit in direct sunlight. I had planned to use a flash, but the flash for one reason or another didn't go off. (I know why. I had the camera set at too high a shutter speed and the focal plane shutter won't synch with a flash at that high of a speed.) So, what happened? The camera read the ambient light of the majority of the film area perfectly. I could never have done that on my own. And, you know what? I love the naturalness of the picture with no flash at all. Speaking of "naturalness," I guess you've already figured out that their daughter just wasn't in the mood for another picture. She did her own thing and I loved it. Just look how gorgeous she looks in profile, completely ignoring me and calling her own shots (Photo 4). What a lucky break for me. Because there was no flash added, the light on the parents' shaded faces sort of matched the light on the dark trees behind them, so we didn't lose any detail at all in the background. |
|||
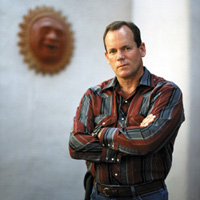
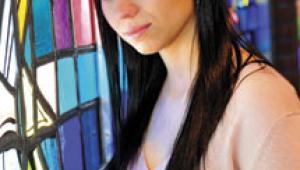
Learning To See Light On Faces All Around You. While returning to the classroom after the family groups, I happened to notice the light on this photographer's face. The light in this picture was exactly what I saw when I stopped in my tracks. I simply pointed my 350mm lens his way, backed off a bit and looked through the viewfinder. I saw the possibilities of including one of the art pieces that were hanging on the wall in the upper left corner of the composition, with him over to the right (Photo 5). It was almost as if the face on the wall was smiling down at him and I loved it. I shot it wide-open, automatic exposure to keep the face on the wall out of focus. Afterward, I stopped the lens down a few f/stops, let the camera figure out the shutter speed and put the wall hanging into focus. I didn't like the picture nearly as well. It sort of divided your attention between the two focal points. Who says you've got to go out into the countryside to find backgrounds? They were everywhere I turned€right next to the buildings. |
|||
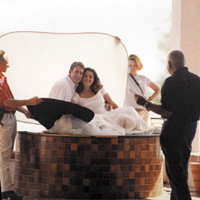
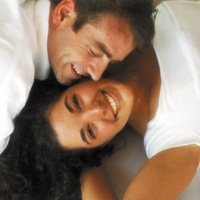
"You've Got To Be Kidding," They Thought! Following closely on the heels of my success with window light at home, and using Westcott's translucent panel for a background, I once again surprised my class with the selection of my next location. I knew from the moment I laid eyes on this spot that I was going to work here. I could duplicate--or come very close to duplicating--the same lighting situation I had created in my home several weeks ago. I had recently used my 35mm camera to photograph the couple sitting on the floor in front of a picture window in my family room. I explained to everyone that what I look for first is overhead cover --no light coming directly from above. Then, I need a broad light source behind the subjects. Finally, a secondary light source coming in from a 90° angle. I saw it there right when I arrived at the hotel and knew that I could create the same magic here (Photo 6). To finish up the portrait sitting I placed the trans-lucent panel on the floor just to the side of the hot tub. I asked her to lay down on her back. Him on his tummy showing his profile. (Photo 7). |
|||
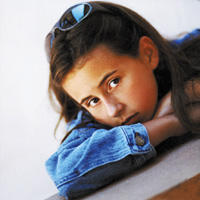
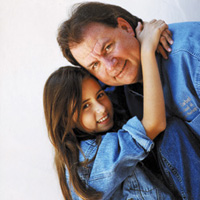
Daddy's Little Girl. Later in the day I knew that I wanted to photograph young Miss Leslie Corbell and her dad, Tony. I figured that the other instructors had probably already photographed her, since she just about stole the limelight from her father. Everyone could see that she was really the director of the whole show, anyhow. But I also figured that probably none of the other instructors felt what I felt when I saw "daddy with his little girl." Once again I went back to the little bench against the plain wall. The way the building was situated I knew that the light source would still be there. I was right. "Kneel down. Put your arms on the bench like this. Now, just rest your chin on your hands and wait for me a minute while I set up my camera." (Photo 8). Everything still on automatic. The camera. The lens. My brain. I wasn't thinking posing. I wasn't thinking lighting. All I was thinking was, "Let me see if I can capture the sensitivity of this little girl." I wasn't looking for a smile. Just eyes and heart. I was happy with this first exposure. "Okay, Tony. Let's bring you together with her." "What are you going to do about my fat chin?" "Just kneel down beside her and stretch your chin over to her. Now, Leslie, put your arms around your daddy. That's right. Cheek to cheek. Squeeze." (Photo 9). (Applause from the class!) The pose was all over in a matter of seconds. Time for lunch. The last day. People were leaving to catch flights. "One more thing. Quick, gulp down your food. I've got just one more location you've got to see." Right outside the room was still another covered area wide-open for the length of the room, a column at the corner of the building to hold up the roof and still another opening between the column and the side of the building. My kinda light. Behind the smaller opening was a beautiful cactus garden in bright sunshine. It was too busy. I couldn't use it. So, I just knew that I would be using that translucent screen one last time at the school. When I held it up in front of the smaller opening between the column and the building it blocked out too much light. "It won't work." I said. Tony: "Wait a minute. Try this." He held up the panel a few feet away from the edge of the building. It blocked the hot, sunny background from getting into the portraits, while still allowing light to come through the panel and around both sides of it. Once again, the 350mm lens, wide-open. Any more questions? I finished the class with a few more hours of business discussions and print critiques. Hasselblad's International Wedding Institute finally closed its doors for another year. Everyone went home exhausted, brain-dead and anxious to put into practice all the information they had absorbed for the last two weeks in class. I was happy, thrilled, and ready for home, too! And now I'm ready to experiment more with my ever-growing posing and lighting techniques. Without having to worry about my exposures any more, I know that I can now concentrate even more on the message in my portraits. So, what is the message you're getting from these pictures? And where are you going to look for your next backgrounds? You should know what to look for by now. For more help you can always
go to www.Zuga.net, the
web site for Gary Bernstein and myself. |
- Log in or register to post comments


