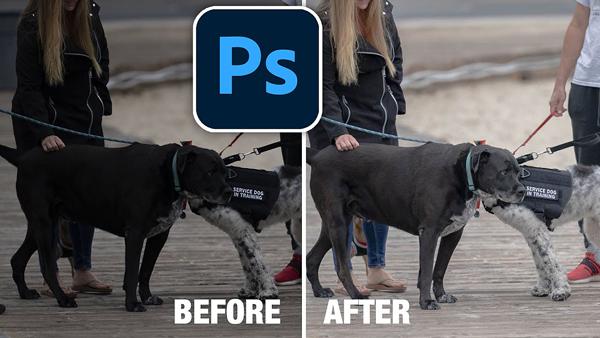
Photoshop Basics: Fix DARK Images With This EASY “Dark Lift” Technique (VIDEO)

Most of us have experienced the frustration of returning from a shoot, uploading our images to the computer, and discovering that some of them are darker than we’d like. There are several ways to recover shadow details in an image, and the method you’ll learn today is one of the easiest and most effective.
Sometimes an image is too dark overall, while in other cases it’s just shadows that lack detail, Today’s episode deals with the latter situation, and it takes less than five minute to explain.

Colin Smith of Photoshop Cafe is known for fast Photoshop tutorials designed to help improve photos during the editing process without complicated or advanced skills. And that’s what he does in the tutorial below, using Parametric Curves to quickly rehabilitate dark shots.
As you’ll see, Smith’s technique works just as well for landscape shots as it does for indoor portraits. The particular tool he employs is only found in Photoshop Camera Raw and Lightroom. To begin, simply open your image in Camera Raw, select Filter in the navigation bar, and choose the Camera Raw Filter option from the dropdown menu.
Before demonstrating his favorite method, Smith discusses the more common approach using exposure sliders, and he explains why this doesn’t always prove to be a satisfactory solution—in part because the brightened shadows often have a “shiny” artificial appearance.

Smith prefers to use Photoshop’s Curves tool because it has the ability to target specific tones within an image, thereby giving you far more control. He then introduces the Parametric Curve option, and demonstrates how easy is it is to use this oft-ignored tool for achieving perfect, natural looking results.
You can find a wide variety of image-editing tips on Smith’s YouTube channel, so be sure and take a look.
And check out another recent tutorial we posted, explaining a simple method for making dramatic B&W conversions from color photos.
- Log in or register to post comments


