How to Photograph Volcanoes: Tips from a Professional Lava Hunter

All Photos © Adrian Rohnfelder
Kamchatka, Eastern Russia: I am standing at the crater rim of the active Tolbachik volcano, taking pictures. Suddenly the volcano spits out a red-glowing lava bomb that is heading precisely in my direction. Luckily enough it doesn’t hit me but lands just by my side. Although afraid at first, I delightedly grab my camera: this is a rare opportunity to take close-up shots from still very hot and glowing cinder bombs.
Volcanic photography potentially is a dangerous job, but anyone facing these dangers will be rewarded with the most incredible pictures from the heart of our planet. My interest in volcanoes began in 2005. I spent three months in Peru and Bolivia. It was by sheer coincidence that I climbed up the active volcano “El Misti” that stands at 5,822 meters (19,101 feet) above sea level. During the climb I was remarkably aware of the simmering power deep down under my feet and it was in this barren landscape that I felt extremely close to nature and the whole, unspoiled planet.
Ever since then, fire mountains and desolate landscapes have fascinated me. I am often asked why I feel so magically attracted to volcanoes. Volcanoes allow me to feel the power of nature in every sense: the ear-battering explosions, terrifying shock waves, falling lava bombs, and the unbearable heat of nearby floating lava—plus the optical spectacle of endless fireworks.


Challenges And Requirements
Being a volcano photographer demands physical, psychological, and technical skills. For starters, some of the most attractive volcanoes are located in the most inhospitable territories. Long treks, heavy backpacks, limited food rations, and rough terrain are often the conditions involved while trying to reach my “hot” destination.
Safety is a paramount issue for me and I try to avoid taking risks, which isn’t always easy considering the potentially spectacular photo opportunities that are being missed. Special protective equipment such as helmets and gas masks are essential. At the Kilauea volcano in Hawaii, for example, the deceptively harmless-looking escaping gases would otherwise lead to death within the shortest time. Other dangers in these fiery places come from unstable crater edges, due to loose materials, and stray lava bombs. In addition to the precautions mentioned above, it is important to spend some time monitoring the intensity and direction of volcanic activity before moving closer. Working out an escape route on solid ground in advance has already proven to be quite useful, for instance at the Etna in Sicily.
If suddenly hell erupts at the volcano, it’s not only essential to find perfect image compositions and camera settings but also to keep an eye on the complete environment. In particularly dangerous situations, companions are highly recommended to take turns in shooting pictures and volcano watching. If these guidelines are followed, taking close-up photos of active volcanoes is not as dangerous as most people believe—I am often reproached as I have a young family. Certainly, volcano photographers are looking for an adrenaline rush but they are definitely not suicidal.


Photo Gear For Crater Hopping
My photographic equipment has a total weight of approximately 17 pounds and consists of a five-year-old Canon 5D Mark II with two fast lenses, a Canon 24-105mm and a 70-200mm. Sometimes I also pack an extreme wide-angled lens.
However, I mainly prefer taking pictures with the 24-105mm lens, which I believe covers an optimal bandwidth. One reason for this is the sensor can easily get ruined by fine ash while changing lenses. The main reason, however, is the permanent danger of missing the perfect shot during a change. I’d rather take a larger lens angle and choose the perfect image section on the computer at home.
As additional protection for the lenses I continuously use a screwed-on UV filter. Further instruments in my luggage are a solid tripod and a remote control for long exposures and shootings in the dark, partially under very windy conditions. For snapshots and recordings during the trek, I also carry a Panasonic Lumix LX7, which fits into my trouser pocket.
Although the Canon 5D Mark II has a dustproof metal body, I always protect it with an additional waterproof bag. I only remove the camera to take pictures and have the equipment professionally cleaned after every trip. Another important tip is to regularly check the ground temperature to avoid shoes and tripods from melting and to protect other equipment from heat damage.


Photo Tips For Volcanoes
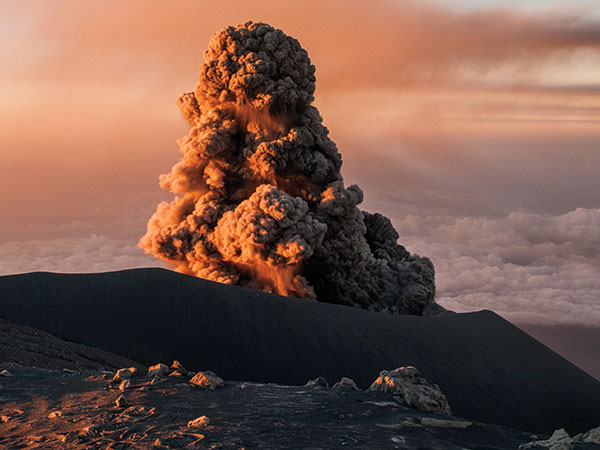
A volcanic firework at night is a popular photo motif. When taking pictures at night the photographer is confronted with various problems. From personal, bitter experience, I recommend taking several manually focused test shootings in the dark in order to meet the optimum focus point even if the autofocus system doesn’t work at night. Another problem is the lack of definition in the darker areas, especially the volcano itself. This is why I plan my trips at a time around the full moon.
The third difficulty lies within the high risk that lights may blow out to white in the very hot and therefore extremely bright areas of escaping lava. Therefore I usually choose the low ISO number 100 when longer exposure times, up to 20 seconds, are necessary, for example to capture magnificent fireworks. Longer exposures in the darkness generate a typical grain. To avoid this I activate the integrated noise reduction already while taking the photo.
As for daytime settings, I usually rely on the semiautomatic system of the camera while I manually set ISO and aperture in order to achieve different messages in my pictures. There is an immense creative scope for this: high ISO numbers up to 800 are used to photographically freeze single lava lumps, while low ISO numbers in combination with a small aperture are taken to reach blurring effects of escaping lava and ash clouds.
Generally, a cloudy sky is beneficial for daytime settings, since bright sunshine makes escaping gases look like a white veil on pictures. As for volcano photography, the best moment for me is the so-called blue hour (dawn/dusk). The hot lava already shows a red glow and there is still enough definition in the darker parts of the picture.
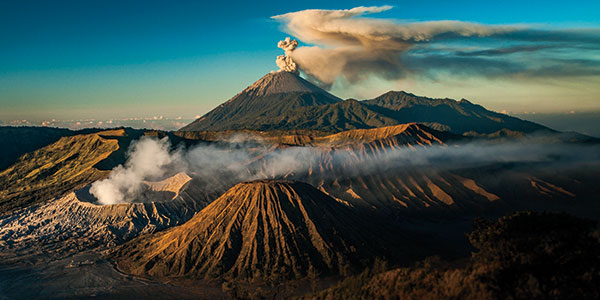
I also want to comment on general image composition. Of course, first and foremost the focus within the creative scope mentioned above is on eruptions and fireworks itself. From my point of view, however, and to gain better knowledge of details, it’s also essential to show some pictures of the eruption in its context. This means the volcano’s surroundings as well as respective proportions, but also wide shots, which show the proportion of the volcano to the discharged ash clouds.

Photo Processing
For photo processing, I use the reliable and powerful Adobe Lightroom. Photo editing for me involves first eliminating image errors such as dust spots and of course the choice of the perfect image section. The next step is adapting and optimizing exposure, contrast, light, shadows, clarity, and saturation until the photograph is reflective of the live experience I had when taking the picture. For me there is no alternative to taking pictures solely in Raw mode. It’s amazing how at first glance invisible information can be coaxed out of Raw image files.
During photo processing one has to consider or at least know that lava only consists of red and orange shades but never of yellow or even white ones. In the last step I take care of noise reduction, either with the usual tools of Lightroom or with Google’s Nik Collection. As for printing, conveying the heat and the glowing effect for me works best on metallic paper.
Volcanoes Worldwide
With all this information at hand, where in the world do you find some of the most attractive and photogenic “hot spots”? The most photogenic “hot spots” are in the so-called Ring of Fire with over 75 percent of the world’s volcanoes. This horseshoe-shaped area extends from Antarctica over New Zealand, Indonesia, Japan, East Russia, Alaska, the United States and Central America to Chile in South America.
More or less easily accessible and therefore highly recommended are the continuously erupting volcanoes at Vanuatu (South Pacific) and the volcanoes in Indonesia and Japan that are among the most active of the Ring of Fire. No less attractive but only accessible by a long trekking are the volcanoes of Kamchatka, Alaska, and Chile.
Europe also boasts some very worthwhile volcano destinations. Apart from the volcanic island of Iceland, there is the permanently active Stromboli, as well as the regularly explosive Etna in Sicily, Italy. One of my favorite “hot spots” is the island of Hawaii with the striking spectacle of the lava ocean entry.
At the end of the day the photos themselves possibly won’t convey the extreme thrill of taking them, but in a breathtaking way they remind us that we all actually live on a great ball of fire.
Adrian Rohnfelder is a travel photographer with a focus on extreme landscapes. During trips to Indonesia, Hawaii, and Guatemala, he developed a special interest in active volcanoes and has recently returned from an adventurous three-week expedition to Kamchatka, East Russia. In 2013 he started his own photographic business as a second source of income. You can see more of Rohnfelder’s work at his website: www.adri.de.
- Log in or register to post comments


