- REVIEWS
Camera Reviews 
More Reviews Mobile Reviews Photography Reviews - GALLERIES
- VIDEOS
- BUYER'S GUIDES
Levels vs. Curves in Lightroom & Capture One (VIDEO)
Levels and Curves are among the most important and basic post-processing tools, but do you understand the difference and when one method works better than the other for optimum results? If not, all your questions will be answered by watching this seven minute tutorial designed for beginners.
This tutorial comes to us from Amateur Photography TV, the YouTube channel of the world's longest running consumer photo magazine—published weekly in the UK since 1884. Today's episode takes a deep dive into Curves and Levels, explaining how each tool works and when to employ one or the other to take your photo editing to the next level.
As instructor Rod Lawton says, "Whether you're adjusting contrast, fine-tuning brightness, or perfecting colors, understanding these powerful tools will give you greater control over you edits. You'll also learn whether or not it's necessary to use both for certain tasks.
This primer describes the ins-and-outs of these tools for users of both Capture one and Lightroom and begins with the former. We encourage you to watch the entire lesson because of the similarities involved, but if you're only concerned with Lightroom just skip to the 4:32-minute mark of the video.
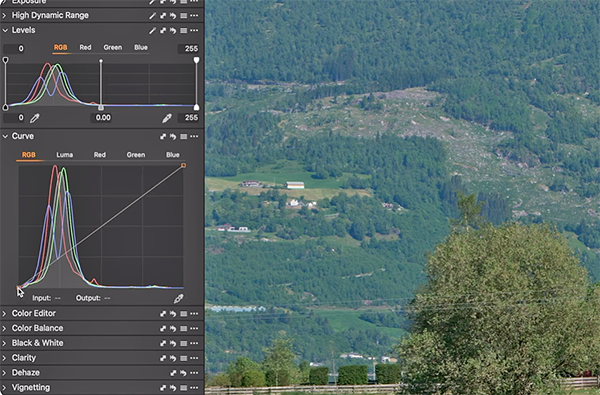
Lawton's demonstration image is a landscape scene that includes a pretty church in the middle of the frame, with some imposing hills lurking behind. It was shot with a telephoto lens on a hazy day, and the problem is a general lack of contrast. Lawton explains that "Unlike Capture One which offers both Levels and Curves adjustments, Lightroom simply has a Tone Curve."
With Lightroom's Tone Curve panel open Lawton asks an obvious question: "Can we use this single panel to achieve the same results we can get from both Levels and Curves Adjustments in Capture One?" His answer is an unequivocal "yes" and he demonstrates the step-by-step process for getting the job done in the final two minutes of the video.
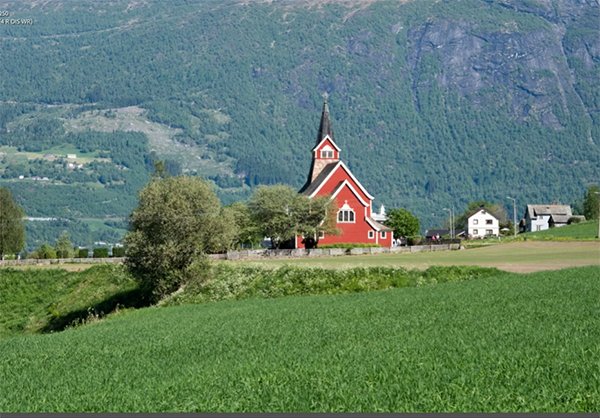
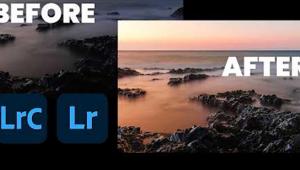
As you'll see by comparing Lawton's before/after images the process is straightforward and very effective. He first drags the Curve down while watching Lightroom's histogram then demonstrates addition controls within the panel.
Lawton describes his process like this: "Instead of chopping off the lightest and darkest parts of the photo like we did earlier with the Levels dialog, we simply suppress the shadows so that the detail is still there but they're darkened down and made a bit deeper." Similarly, you can add another control point and brighten up the highlights without blowing them out.
There's a bit more required to finish the impressive transformation, and Lawton walks you through the simple technique. Once the video concludes take a look at the tutorial we featured from another image-editing expert who demonstrates the difference between Lightroom's "Capture Sharpening" and "Output Sharpening" and which tool to use when.
- Log in or register to post comments


![]()
Get the Latest Photo Tips, News & Reviews from Shutterbug!
| Camera Reviews Other Reviews | Mobile Reviews Photography Reviews Columns | News | Features | How-To | Resources |
 © 2025 Shutterbug
AVTech Media Americas Inc., USA
All rights reserved