Lesson Of The Month
Basic Startups With A Digital Camera

Figure 1.

As photography continues to merge with computers, it has become easier to make great pictures. Advances in technology have made it possible for consumers to own high quality digital cameras, to make excellent prints using ink jet printers, and post and send pictures over the Internet. Just a few years ago, it was an intricate process just to secure a connection between a computer and a digital camera, let alone learn how to operate it. This lesson is designed to illustrate the simplicity of capturing images with a digital camera, storing them on a computer, and making them ready to print or send over the Internet.
Note: As there is a wide variety of digital cameras on the market, keep in mind that many of them have unique features, and that it is important to refer to the instruction manual to understand them.

For our demonstration, we used an Olympus C-2500L digital camera with an Olympus SmartMedia reader/writer (Figure 1), but our instructions would apply equally well to most good digital cameras and card readers/writers. First, we put the rechargeable camera batteries in the charger. It takes about three hours for them to be fully charged (Figure 2, shown below).

This camera has slots for both SmartMedia and CompactFlash cards. Either type of card works for storing and transferring images from the camera to the computer. We used a 32MB SmartMedia card and as you can see it is quite small. Nevertheless, it can hold a number of high-resolution images (Figure 3).

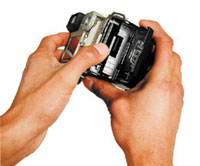
The camera has a door for access to the card slots. When inserting or removing cards, it is always important to make sure the camera is turned off (Figure 4).

The card can only be inserted one way, so refer to the manual to make sure it is oriented correctly (Figure 5).

The card must be pushed in until it clicks in place, and when removing the card, it must first be pushed in before it can be removed (Figure 6). Once it is turned on the camera is ready to take pictures.

When an image has been captured, it may be viewed on the small LCD screen on the back of the camera. If you want to keep the picture, nothing else need be done; if you don't want the image, it can be erased. (It is important to review the manual to understand the different modes of operation of the camera, but once you have done so the camera becomes very intuitive and easy to operate.) Remember that the card can be damaged if removed with the camera turned on. When you want to import the images onto your computer, there are a couple of ways to do it. You can either connect a PC serial cable from the camera directly to the serial port of the computer, or connect a USB card reader/writer to any of the computer's USB ports.

The USB reader/writer is a very simple device to use. Once the software which comes with it is loaded onto the computer, the unit can be connected even while the computer is on. Here, we plugged the reader/writer into the computer's keyboard (Figure 7).

The card can then be inserted into the reader/writer (Figure 8). Unlike the camera you can do this with the computer turned on.
After a few moments the card reader/writer's icon will appear on the desktop (Figures 9 and 10).

At this point you can double click the icon's folders to view the images via QuickTime. This allows you to print directly, but you won't be able to make changes and save to your computer. Instead, it's better to open up the image in a photo-editing program like Adobe Photoshop if you wish to make changes and save.

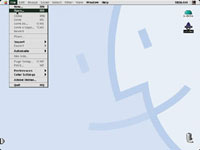
After starting the application, click the dropdown menu "File" and then select "Open" (Figures 11 and 12).

In the dialog box, click to the computer's desktop and double click on the "untitled" disk icon (Figure 13).

Keep opening the folder icons until you get to a list of images (Figures 14, 15, and 16).

Double click on an image and it will open on the monitor screen (Figure 17).

To save the image, click on the dropdown "File" menu again and choose "Save As." Decide which folder you want the image to be saved to, choose a name for the image, and select what type of file you want it to be (Figures 18, 19, and 20).

Now you have an image you can edit, print, or attach in an e-mail. Good luck and happy shooting!

This lesson will be posted in the free public section of the Web Photo School at: www.webphotoschool.com. You will be able to enlarge the photos from thumbnails. If you would like to continue your digital step by step education lessons on editing, printing, and e-mailing your photos it will be on the private section of the Web Photo School. Shutterbug has negotiated with WPS to offer our readers a special 33 percent discount rate of $30 per year. To enroll at this discount just go to: http://shutterbug.webphotoschool.com and fill out the Shutterbug questionnaire which will help us to publish lessons for you in the future.

Technical Equipment

· Olympus C-2500L
· Olympus SmartMedia reader/ writer card
· Adobe Photoshop software
· Macintosh G3
· PC serial cable
· Rechargeable batteries

Figure 2.

Figure 3.

Figure 4.

Figure 5.

Figure 6.

Figure 7.

Figure 8.

Figure 9.

Figure 10.

Figure 11.

Figure 12.

Figure 13.

Figure 14.

Figure 15.

Figure 16.

Figure 17.

Figure 18.

Figure 19.

Figure 20.

X