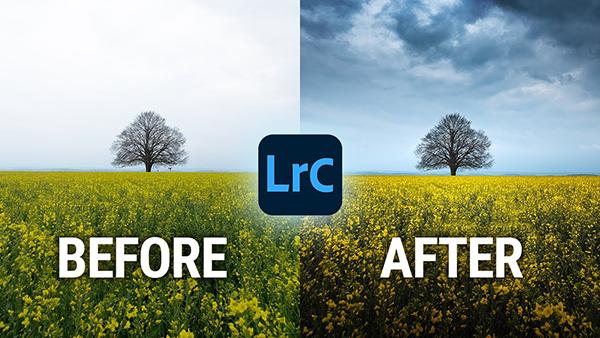
How to Fix Overcast Skies in Photos with Lightroom (VIDEO)

Even if your landscape photo has a lot of things going for it, an overcast or flat sky can make the image look dull. Fortunately, there are a few tricks you can do in Lightroom to make a boring sky in a landscape photo go from drab to fab in no time.
In the below video tutorial, Christian Mohrle from The Phlog Photography shares his simple, step-by-step process on how to fix overcast photos in Lightroom. You can follow along with Mohrle's Lightroom tutorial by getting his free Raw file here.
"For this shot I was struggling quite a bit but, in the end, decided to apply a darker look on it with a vibrant rapeseed field in the foreground," he explains. "Again, most of the editing was done in Lightroom, while I used Photoshop to remove some dust."
#1 Basic Adjustments
"I started by dropping the exposure making the whole photo a lot darker," he notes. "Then, I also dropped the highlights revealing more details and structure in the clouds. To prevent underexposure, I slightly raised the blacks and for a sharp look I added texture and clarity. Finally, I added a bit of vibrance for more saturation."
#2 Local Adjustments
"Here is where the biggest changes were made. First, I used several differently shaped linear gradient masks over the field in the foreground: I made the bottom part darker by dropping the whites, while making the top part of the field brighter. Also, I added more texture and clarity over it to make the flowers a little more interesting.
To make the sky look awesome I used another linear gradient covering all the sky. Here I dropped the exposure, increased the contrast, dropped the blacks and increased the clarity. This brings out the cloud structure much more!
Then, in the center I added a radial gradient making the center part a little brighter by rasing the exposure and the whites."
#3 Color Grading
"Not much going on here. I dropped the green saturation and increased the blue saturation."
#4 Photoshop
"Using the brush tool and clone stamp tool I got rid of a few things. Then, added some more contrast using a levels adjustment layer."
- Log in or register to post comments


