Do-It-Yourself
Build A Monopod Shoe For Sharper Pictures
Contrary to popular belief,
mediocre quality is not the only cause of unsharp pictures. Inaccurate
focusing, sloppy depth of field control, and poor film flatness all
contribute, but the most destructive is camera movement during exposure.
While a sturdy tripod immediately solves this problem, it creates others
by seriously limiting the photographer's mobility and spontaneity,
and at many public events, barring him from taking pictures at all. |
|||
To use a monopod properly,
extend it until the camera is just below eye level, securely tighten all
sections, place the rubber tip against the floor about 18" in front
of you, and angle the column slightly inward. Adjust the head for desired
composition, spread your feet about 18" apart, and bend slightly
at the waist. Gently lean into the column for a rigid, three-point stance,
place one hand on the camera and the other around the top section, relax,
and smoothly release the shutter. |
|||
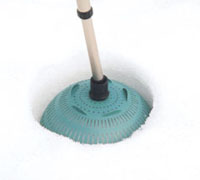
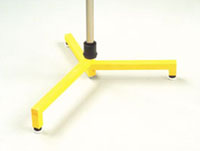
First try increasing the surface
area of the monopod tip by sliding a soft rubber (not plastic) crutch
tip over it. Bring the monopod to a drugstore and find a tight-fitting
tip with a large, flared bottom surface. This may be all that is needed
to stop twisting with smaller cameras. To keep the monopod from "skating"
on hard earth, make an accessory spike by boring a hole through another
crutch tip and fastening a short 1/4x20 carriage bolt through it with
a brass wing nut on the outside. File or grind the bolt end to a dull
point. |
- Log in or register to post comments


