Datacolor Spyder4Elite: Calibrate That Display!
One of the most common complaints about digital imaging is the lack of consistency when going from one device to another—most commonly screen to print. Dark prints are the typical complaint, but color shifts are also a contributor to choice language and lack of hair. Yes, we tweak the image until the sky is that perfect hue of blue, or the skin tones have just the right amount of warmth and vibrancy. When it’s all done, the image is posted online or printed and it looks nothing like what we expected. The image is too dark, skin tones are too red, any number of problems. Where did it go wrong?
In almost all cases, the culprit is an uncalibrated display. Back when CRT displays were the common screen type, color could be wildly different and it was usually pretty easy to detect when the display was at fault. With modern LCD displays that isn’t necessarily the case—color is often close to correct in hue, but luminance, or brightness, is where the problem usually lies.
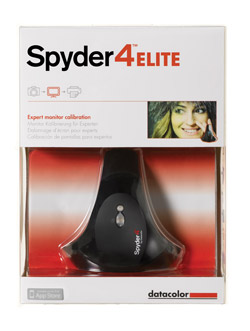
Most LCD displays are very bright when used at the default, out-of-the-box settings. Everybody likes a vibrant and bright display; it catches the eye. But, as photographers, we need to be more interested in what is accurate, not some artificial ideal of color. Particularly if you print your own images, having a realistic brightness on screen will save a great deal of work, ink, paper, and hair from being pulled out.
Both Windows and Macintosh have the ability to be calibrated visually, and while this is certainly better than nothing, there is too much random chance involved with a visual calibration. Your eyes perceive color differently from one minute to the next, and this can translate into inconsistent results. This is where a hardware calibration device, such as the Datacolor Spyder4Elite comes into play.
Comprised of a software package that drives the calibration device, and the device itself, monitor calibration is a tool that should be in every serious photographer’s kit. There are two common types of measurement devices—spectrophotometers and colorimeters. The Spyder devices fall into this second category. Working by measuring the color values flashed on your screen, the Spyder uses a seven-color sensor that works on a variety of devices—everything from projectors to iPads, and of course LCD, LED, CRT, and other displays that you would use with your digital editing.
The Spyder is available in three flavors: the Express ($119), the Pro ($169), and the Elite ($249). The hardware in all three packages is identical, but the software capabilities expand greatly depending on the version you have.
For basic use, with a single display and minimal interaction required, the Express is a great option and will give you much more accurate color than previously seen. For those of us who use multiple displays and have the need to go beyond what the basic choices offer, including being able to fine-tune the gray balance or work with an expert mode for total control, the Elite is an excellent choice.
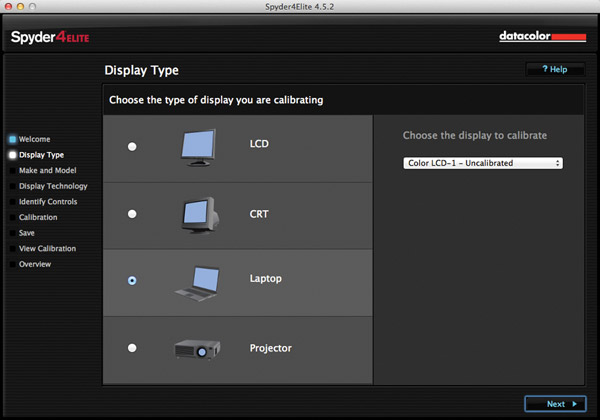
In any case, the process is similar. You’ll begin by starting the software, and when prompted, place the Spyder on your display. Over a period of about five minutes, the display will flash a range of colors in red, green, blue, blacks, and whites. These colors are of specific RGB values. The software reads the numbers coming back from the Spyder and determines how much difference there is between the ideal and the actual measured value. Once this is complete, a profile is created for your display (#1 to #3).


All Photos © Jon Canfield
The Elite gives you the ability to set custom white points rather than limiting you to the typical 5000K, 6500K, and native options found in most products. There is also a custom black-and-white luminance control that will be welcomed by anyone doing extensive monochrome work. You can also opt to use an L-Star workflow and do direct gamma curve editing if needed.
Once you have your profile, you’ll see a results screen that lets you compare the before and after settings. I used a new MacBook Pro with the anti-glare screen that had never been calibrated for my testing. I was surprised at how far off my color balance was. I expected the luminance to be far from ideal, and in fact it was—I had to reduce screen brightness by about 50 percent, from 237 CD/m2 to 123 CD/m2, to approach the ideal level (#4). My original settings were much cooler in tone than the after as you can see (#5 and #6).


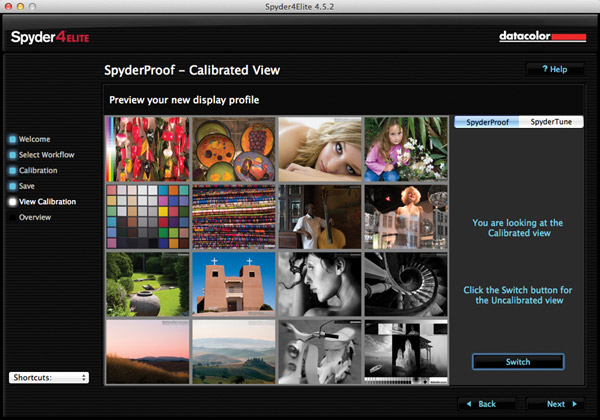
The images in the default screen are somewhat small and difficult to make out in the details, particularly when you’re concerned with specific color ranges. By clicking on any quadrant, and then clicking on any single image in that quadrant, you can see a full-size version that allows you to easily see the details in any sample (#7 and #8).


After running the calibration, I used the Profile Overview feature to see how my new profile compared to the original. You can also see how your display compares to sRGB and AdobeRGB color spaces, which is very useful when printing. The increase in color gamut is very impressive, with the new calibration essentially covering all of sRGB and going beyond it on the greens. As you can see in the screen (#9), the laptop covers 78 percent of AdobeRGB.
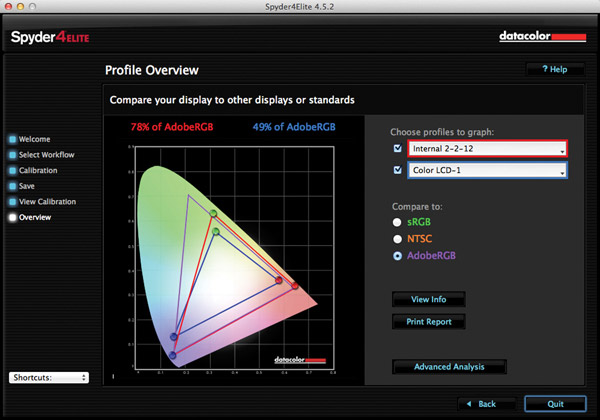
The gamut chart lets you see how much your monitor has changed and how it performs in comparison to sRGB and AdobeRGB, the two main standards for digital photos.
There are also a number of other reports available to you in the Elite version, including tone response charts (#10), monitor ratings (#11), color accuracy (#12), and detailed information (#13).


The new version claims to be 19 percent better in performance. Although I didn’t measure the time difference between the Version 3 and Version 4 devices, the calibration process is faster, and the color profile is larger in volume and more accurate in reproduction.
Of course, calibration isn’t a one-time thing that you do and never think about again. Displays change over time, and you’ll need to recalibrate your display occasionally—how occasional is up to you. The software can be set to remind you periodically, and you can also go back at any time and run what Datacolor calls ReCAL—a quicker check that verifies the accuracy of your current calibration, showing the changes since the last calibration along with a new measurement.
Along with recalibration, if you work in an environment that has frequent lighting changes, it can be helpful to have the ambient light monitoring enabled. To do this, you’ll leave the Spyder plugged in at all times, resting in the provided stand. The software will run a regular check to detect ambient light, and make adjustments to the luminance as needed. It’s not as good as working in a controlled lighting environment, but that isn’t an option for many, and this can help you keep a consistent look to your display.
If you have an iPad, you can also download a free app, SpyderGallery, that serves as a photo viewer. Nothing new here right? After all, the iPad includes the Photos app which is a viewer, so why download another? Because with the Spyder4Elite you can now use the SpyderGallery app in unison with your Mac or PC and calibrate the iPad display. Yes—the iPad display is calibrated for more accurate color! The changes only work within the SpyderGallery app, but if you use an iPad for portfolio presentation, this is a great feature. As you can see (#14), there is a noticeable improvement in color between the normal and calibrated views.
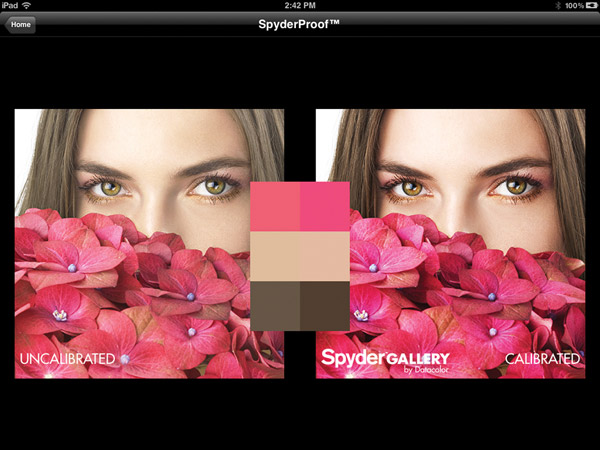
If you use an Apple iPad, you can download the free SpyderGallery app. In conjunction with your computer and a supported Spyder, you can calibrate the display on your iPad and view images through this app.
Conclusion
There is no question that you should calibrate your display. Without it, you have no real idea of how accurate your color is, and what others will see online, or what you’ll see when you print. The real question is what product to use. You can spend anywhere from about $100 to $1500 for the hardware needed to calibrate. If all you need is monitor calibration (you don’t need to create printer profiles), you can rule out the high end. If your needs are basic, the Spyder4Express is an excellent choice. For those who want more control, the Spyder4Elite is an excellent option that will give you everything you need for the best possible color fidelity.
It’s hard to find fault with the Spyder4Elite. The advanced features take a bit of exploring to fully understand, but the online help system is well written and informative, and even without touching help, you can still generate a high-quality monitor calibration that will give you more accurate color.
Requirements
• Windows XP or later
• Mac OS X 10.4 or later
• USB port
• 24-bit video card
For more information, visit Datacolor’s website at: www.datacolor.com.
- Log in or register to post comments


