Creating A Blue Sky
With Photoshop

Figure 1.
Photos © 1999, Darryl C. Nicholas, All Rights Reserved

Many photographs will have a white sky because the contrast range of the film was not great enough to capture the much brighter sky and show its blue color. This is especially true when shooting color negative film. Slide film--with its greater tone range--will usually do a little better job of capturing the blue color in the sky. Still, it is often necessary to add a little blue into the sky of pictures.

In real life the color of blue in the sky is more saturated (darker shade of blue) higher up and less saturated (lighter shade of blue) nearer the horizon. So, when we put the blue back into the sky in a photograph, we use the Gradient Fill tool in Photoshop and lay in a color of blue that is more saturated at the top and less saturated nearer the horizon.

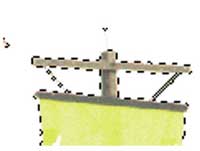
After doing some shooting at our local Renaissance Fair, I used my Nikon LS-2000 scanner to scan some of the 35mm color negatives into my computer. Figure 1 shows one of the images that immediately caught my eye.

Figure 2.

I decided it would make a much better photograph if I cropped it for a vertical and framed in on just one of the two riders. See Figure 2.
Now that the picture has been a little better composed, I noticed that the sky was washed out. It needed some blue color.

If you have a recently scanned photograph that shows some nice blue sky, you can use the Color Picker in Photoshop to select the blue, and thereby obtain the numerical designation it carries. If you don't, you can use the numbers that I have selected below. They should work well in most cases where you need a blue sky.

First set up the Foreground and Background colors in Photoshop. In order to do this, go to the Color selector options and set the Foreground colors to: Red = 69; Green = 123; Blue = 186.

Figure 3.

See Figure 3.

Then, switch the Foreground to the Background, and set the Background colors to: Red = 219; Green = 253; Blue = 255.
See Figure 4.

After you have set the Background color to the lighter shade of blue, switch the colors back so that the darker shade of blue will be the Foreground color.

Figure 4.

See Figures 5, 6, and 7 (below).

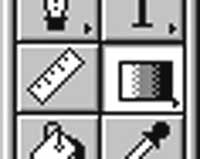
Set the Gradient tool options to: Normal; Opacity: 100 percent; Gra-dient: Foreground to Background; Type: Linear.

See Figure 8.

Next, you have to select the portion of the image that is the sky. You will probably be able to do this with the Magic Wand tool. But, there are several other methods for making a selection.

Figure 5.

Use the Magic Wand tool and select the area of the picture that you want to fill with blue sky.

Set the Magic Wand options to a Tolerance of about 30. You may have to adjust that setting a bit in order to select the area of the sky that you want.

See Figures 9 and 10.

In order to select the small, enclosed areas that the Magic Wand tool might miss, select those additional areas by left-clicking on them while holding down the shift key.

See Figures 11, 12, and 13.

Figure 6.

The selection process (using the Magic Wand) effectively establishes a mask over everything in the picture except the sky. Therefore, whatever you do to the picture after a selection has been made occurs only to the selected area.

When you have correctly selected all the areas of the sky into which you want to fill with blue color, select the Gradient Fill tool and drag a "line" (use the left mouse key) from the top of the picture through the bottom of the area where the sky is to be filled.
See Figure 14.

Do not draw the "line" through the entire picture--only through the area of the sky.

If you have made a mistake, as long as you have not de-selected your selection, you can simply redraw the Gradient Fill line through the image again. Or, you can go to the Edit pull-down menu to the Un-do command.

Figure 7.

After I filled the sky with gradient blue color, I noticed that the rest of the picture was a bit low in contrast and color saturation. So, I went to the Photoshop toolbar, to Select, to Inverse. This inverses the area protected by the selection and, in effect, masks only the sky, while leaving everything else in the picture available to be worked on.

Then, in the Photoshop toolbar, I went to Image, to Adjust, to Brightness/Contrast. I darkened the image a little, and increased the contrast a little until I thought the picture looked better. The blue filled sky remained unchanged while I did this.
See Figure 15.

When the picture looks like what you want, save it.

We frequently use this same technique to create a background for a picture when the original background is excessively cluttered, or would require excessive time to restore with the Rubber Stamp tool. By selecting different color combinations, you can create an endless number of different backgrounds.

If you'd like help with your digital imaging problems, e-mail me at: editorial@shutterbug.com.

Figure 8.

Figure 9.

Figure 10.

Figure11.

Figure 12.

Figure 13.

Figure 14.

Figure 15.

X