luxury nightwear - catalogue, winter, autumn, sleep, elegant, the art of sleep, gorgeous gifts.
Book Excerpt: Fashion Flair For Portrait And Wedding Photography
Fashion Flair Studio Diagrams
I don’t have my lights anchored to a specific place on the floor of my studio; I move them around frequently. I often change the power of the lights, their location, and the modifiers. I don’t restrict myself to formulas. The “formulas” that follow are just guidelines to inspire and guide you. Don’t get caught up in power ratios and number of feet from the subject. You need to do what makes the image look “right” to you. Check out the diagrams for general configurations of lights and techniques I have employed. Whether you want something soft and polished or something dark and dramatic, you’ll find some helpful guidelines by reading on.

Clean and Dramatic: Silver Dish
Using a single silver dish gives you a focused and harsh light source. Here I have the subject right near the background so that the single light hits the background and casts a shadow from her body. Although the image is clean, it is also edgy with its dramatic light. To achieve this effect, I placed the silver dish (the small one that comes with most heads) a couple of feet above the subject’s head. Then I watched the placement of the light carefully to ensure that I had a crisp Rembrandt lighting effect.

Soft and Polished: Softbox Plus Barn Door
These portraits were lit by a softbox and barn doors. The biggest variable here was the position of the subject.


In this photo (above) I used the large softbox (3 feet by 4 feet) as the main illumination, with barn doors to create the soft highlight on the subject’s arm. In this image, I turned the rim light down so it was more subtle and expanded the barn doors so that the light source was broader.
Here (below) I turned the subject away from the main light and closed the barn doors to create a more focused highlight. I was careful about how the highlight illuminated the face. This image becomes more dramatic because the rim light plays a prominent role in defining the face.


Tip
To make a rim light crisper, narrow the opening on the barn doors and turn up the power to two f-stops above the main light. This makes the highlight more defined. To soften the highlight, open the barn doors and reduce the power.
Crisp and Commercial: Beauty Dish (Plus Illuminated Background)
A beauty dish is my favorite lighting tool. I use it for a majority of the studio work I do. It is also frequently employed in catalogue photography. The setup utilized here is typical of a clean, commercial image. I have used a single beauty dish (about head height with the model) and two strobes to illuminate the background and make it white. The light is simple and crisp and works for both men and women.
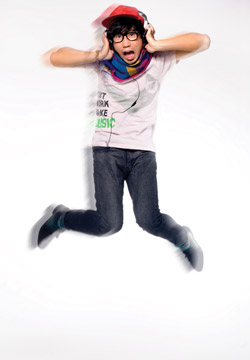

In this image, I added the motion blur in Photoshop. I used Filter, Blur, Motion Blur and then erased the blur from the face and the body, while keeping the feeling of motion to the left of the subject.
Elegant and Surreal: Beauty Dish and Flare
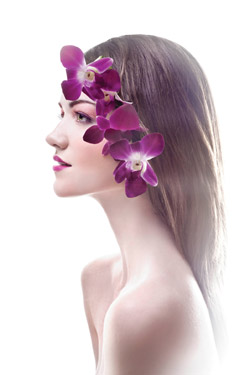
Sometimes breaking the rules is the best way to create striking imagery. In this photo I have broken several “rules” by blowing out the highlights and creating lens flare. Although these are usually things to avoid, in this instance it has given the image a beautiful and surreal appearance. To achieve this effect, place your subject 2 to 4 feet away from a white background. Then illuminate the background with a strobe at full power. This blows out the background and bounces back on the subject and into the camera, creating flare.

Tip
You need to increase the contrast and adjust the saturation of the image in Photoshop when you are finished. By creating lens flare, you reduce the contrast and make the image muddier, which you can fix in Camera Raw or Photoshop.
The main light is a beauty dish above the subject’s head and to the left of the frame (helps define the face). I also utilized a fill card under the chest to eliminate even more shadows. This lighting feels airy and surreal.
Dramatic Short Light: Barn Doors Plus Strip Light
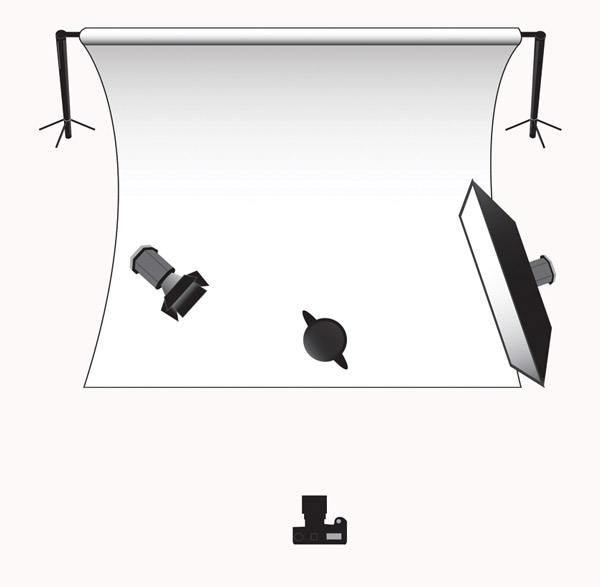
Shadows help make an image dramatic. In this case, the shadows and highlights seem theatrical. Both lights that illuminate the subject are in back-45 positions, leaving the face mostly in shadow. The light that illuminates the subject’s face on the left was barn doors (hence the more crisp, focused light) placed at a back-side angle. The light illuminating her neck (softer highlight) was a narrow strip light placed to the back right of the frame.

Polished but Dramatic: Barn Doors and Beauty Dish
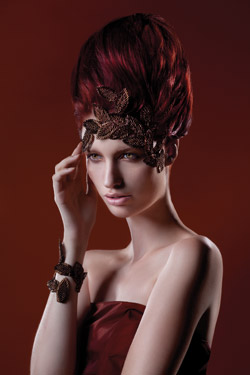
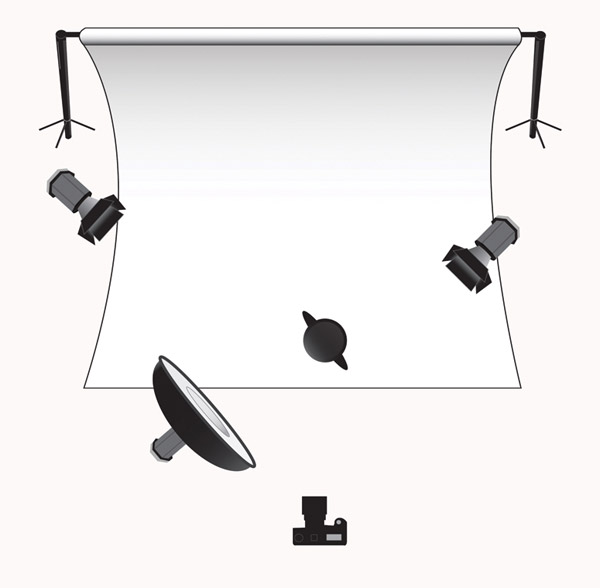
When I want an image to look more polished and clean, I carefully place highlights on it. Here I utilized three lights.
Studio Backgrounds
In the world of fashion photography, most studio backgrounds are neutral. Typically, a white, gray, or black seamless (paper) background is utilized. This is not a rule by any means, but it’s usually the approach I take as well. All but one of the images in this chapter have a neutral background. A neutral background keeps the focus on the subject and the composition, lighting, or styling of the image. If I do use a brightly colored studio background or scene, it is to enhance the goals of my image. Feel free to use any background that suits your style, but remember that less is often more. For portraits, people often utilize brown tone or neutral muslins. You can add texture and depth to a background without detracting from the subject.
The main light was a beauty dish to shape the face. By placing it at a far left angle, I was able to carve out the features of the face by utilizing a shadow to show the jaw line and cheek bones. I then used two barn doors to create highlights on the face. The highlight on the left is subtle (because it is on the highlight side of the face); it simply adds polish to the image. The highlight on the right is more pronounced and gives definition between the subject (her hair in particular) and the background.
Author Bio
Lindsay Adler is a professional portrait and fashion photographer based in New York. For 10 years she owned and operated a portrait and wedding studio distinguished by its “fashion flair” approach to imagery. As a New York fashion photographer, her editorials have appeared in dozens of publications internationally. She regularly contributes to a variety of major photo publications.
In May 2010 she published her first book, The Linked Photographers’ Guide to Online Marketing and Social Media. In 2011 she published her second book, Fashion Flair for Portrait and Wedding Photography.
Each year Adler teaches thousands of photographers through workshops and major national conferences as well as through her educational videos and blog content. You can find her teaching at Photo Plus Expo, WPPI, and dozens of other venues and events. To learn more visit: www.lindsayadlerphotography.com.

Where To Buy
Fashion Flair for Portrait and Wedding Photography (ISBN: 978-1-4354-5884-0, $34.99) is available from Amazon, Barnes & Noble, and other fine retailers nationwide. It is also available at www.courseptr.com.
- Log in or register to post comments


This guide would be extremely helpful for the photographers. In the field of fashion there is huge demand for skilled photographers. You need to represent the apparel and accessories in the most appealing manner to the readers. I recently saw images of amazing punk dresses, I immediately went online to find killer punk dresses at angryyoungandpoor.com.

The job of a fashion photographer is not simple, it is a demanding and complicated task. I work in an ad agency and I remember we were doing a shoot for cheap La Femme dresses, the photographer had to work on every detail to make the picture perfect.


