10 Handy Tips on How to Take the Best Winter Photos
All Photos © Rick Sheremeta
There’s no reason to pack your photo gear away when the first snows of winter start to fly. Winter photography presents some of the most wonderful opportunities to capture stunning subject matter that is not available during other times of the year. With the ground enveloped in a blanket of white snow, even familiar surroundings will take on an entirely different perspective and serve as the background for new and exciting images. However, winter does present certain challenges that most photographers may never have to deal with during other seasons. This article will arm you with 10 tips to make your winter photo efforts more productive, as well as helping you stay warm and comfortable, so that you can better enjoy your winter shooting excursions.
1. Snow Can Trick Your Meter
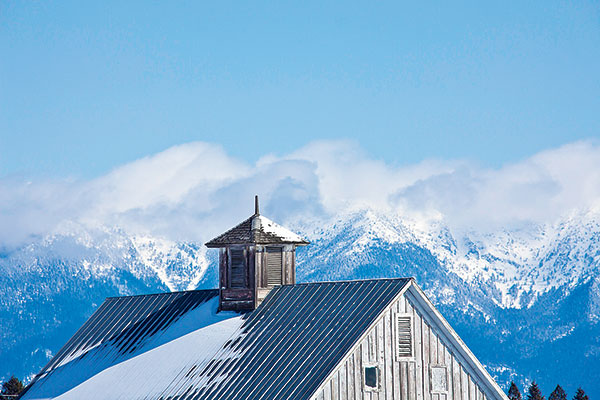
A white snow-covered landscape will definitely influence your meter’s exposure reading, regardless of the camera you’re using. All camera metering systems are calibrated based upon a neutral tone equivalent to a value in the order of 18 percent gray. Therefore, if you rely solely on your camera’s meter to set exposure, you may be sorely disappointed to find that your snowscapes are underexposed, appearing dull gray—while this might be the mood you’re trying to achieve, snow should normally appear white. With an understanding of how your meter works, it’s a simple matter to compensate for the metered reading to obtain the proper exposure. I find that even in the shade or on an overcast day, a snowy scene will need to be overexposed with an exposure compensation of +1 EV. Bright sunlit scenes can require +2 EV for the snow. However, be very careful at going beyond to +3 compensation—at that point things may be blown out and all detail will be lost. My approach for a clear day is to meter the northern sky, if possible, using Manual mode, setting the exposure for 0 to +1 EV depending on how dark or light I want the sky to render. Then, I will meter the snow to see how that compares relative to the guidelines noted above. Figure 1 is an excellent example illustrating this metering technique.
On an overcast day, I’ll simply meter the snow or sky for +1 EV. Of course, you can always spot meter something neutrally toned, such as a gray rock or similar object, to set exposure and then let everything else be exposed relative to that. Remember to do this in Manual mode or else camera settings will change as you reframe your shot. If in doubt, bracket shots by one to two stops over and under your initial exposure. It’s best to do this in one-stop (EV) increments. With experience, you’ll become more confident setting your exposure, so that you’ll need to bracket less. The final determination will of course be made by checking your histogram which you would expect to be skewed toward the right since the snow will be overexposed. It’s always a good idea as well to have “Exposure Warning” set through your camera’s custom functions—any overexposed areas in your LCD preview screen will blink—and while it’s okay to have relatively small very bright areas blinking with overexposure, you sure don’t want the entire snowfield or sky doing so. If it does, the fix is to simply increase shutter speed by one or more stops or EVs, or close down the aperture by the same amount, until the blinking area is within tolerable limits.
Exposure for wildlife will be discussed separately below. And don’t forget flash when shooting in winter. It can be used as an effective tool to highlight foreground objects, provide catchlight, or eliminate undesirable shadows as seen in Figure 2.
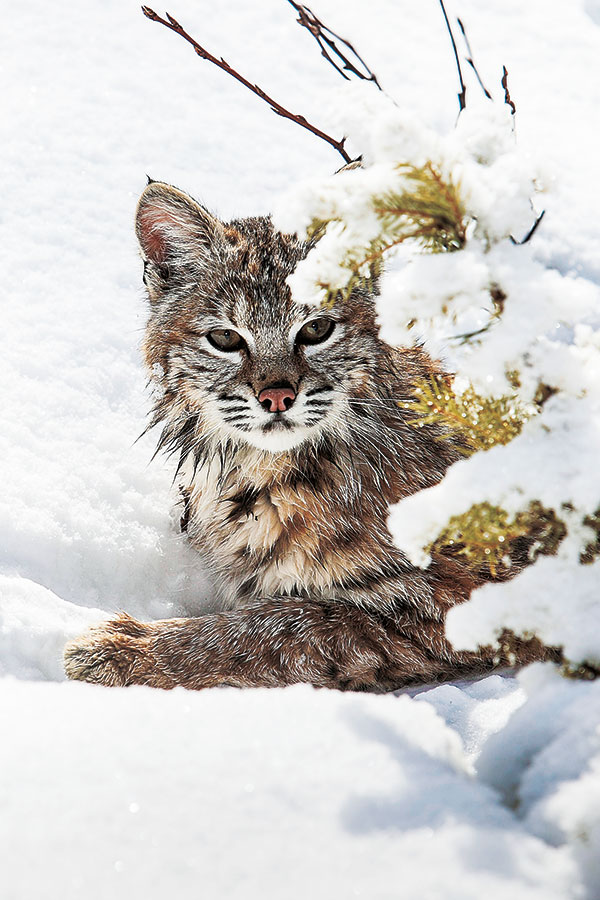
2. Focus Problems
Overcast, foggy, or snowy days can pose problems for your autofocusing system. With low-contrast conditions or when snow is falling autofocus may experience difficulty in obtaining focus—Figure 3 illustrates this point. As a result, the lens will chatter or flutter as it attempts to gain focus—no, there is nothing wrong with the lens, it’s just that it can’t find anything with enough contrast to lock on to. At other times, the lens will want to focus on the falling snow, leaving your subject unsharp or entirely out of focus. Under those types of conditions, it’s best to switch from auto to manual focus. To assist in knowing when focus has been achieved, hold down the shutter button halfway, and once focus has been obtained, the focusing point(s) used in the viewfinder will light up to let you know that you’re good to go.
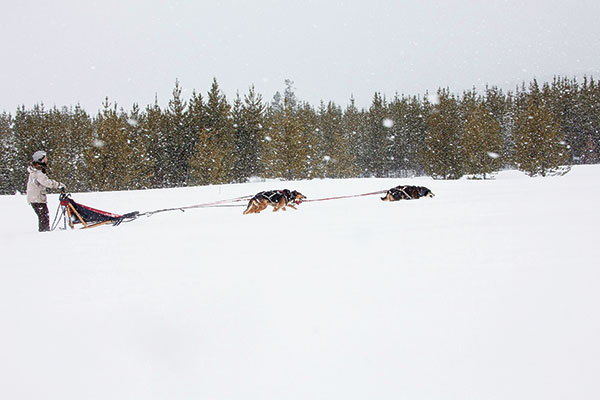
3. What Shutter Speed To Use
As in any creative photographic situation, this is highly subjective depending on the result you’re trying to achieve and the conditions you’re facing. On a calm day, it’s obviously not so much a problem. However, when the wind is howling or it’s snowing, the situation can be totally different—a conscientious decision then needs to be made as to how the scene will be rendered. Fast shutter speeds will stop any movement whereas slow shutter speeds will result in blurred motion. Falling snow is a good example of this—with a slow shutter speed, snowflakes will appear as streaks of white, whereas a fast shutter speed will render them as white dots. So what is fast and what is slow? While gently falling snow on a calm day may require as little as 1/125 sec to freeze motion, during blizzard conditions 1/350 sec will barely be enough—so if there’s any question, it’s advisable to bracket shots using various shutter speed/aperture combinations to find out what works best depending on conditions. Figure 4 shows this effect with falling snow.
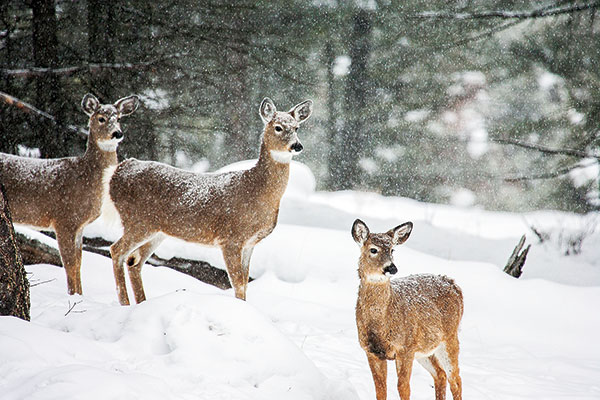
4. Batteries and Cold Weather
There is no question that batteries lose power at low temperatures, and the colder it gets, the faster it occurs. While this applies to all batteries, some do better in low temperatures than others. Avoid alkaline batteries in the cold, as they fare very poorly. The best performers are primarily (i.e., non-rechargeable) lithium cells, followed by rechargeable lithium-ion, NiCd, and Ni-MH. They should all function satisfactorily down to 0˚C (32˚F) or below, though they will certainly have a lower capacity than they do at higher temperatures. The lithium-ion batteries in my Canon EOS 5D Mark II have repeatedly performed very well in the extreme cold of Yellowstone’s winter. The good thing is that even though batteries become exhausted in a relatively short period, the colder they get they will regain their power once warmed back up. The best solution is to have several spare batteries out in the field to switch between your camera and a warm pocket—using a hand warmer in the pocket with the spare batteries will help them recover sooner.
5. Moisture and Cold Weather
A major problem with cold weather photography is moisture. Very cold air is generally very dry, but air in a heated building or vehicle usually contains moisture. So the problem does not occur while outside, but when you bring an ice-cold camera back into a heated area any moisture present will condense onto or inside your gear. For the same reason, this also holds true for placing an ice-cold camera under your coat to protect it: don’t do it. The problem isn’t so much the moisture you may see on the outside of your equipment, but moisture on internal electrical components. As we all know, electronics and moisture don’t mix, so the best thing is to prevent it from happening in the first place.
The problem can be readily avoided by placing your camera gear into an airtight plastic bag such as a self-sealing freezer bag, or simply leaving it in your camera gear bag before you go indoors. Leave it inside the protective bag until everything reaches room temperature. However, if you should happen to get condensation on your camera gear, remove the batteries, and let it sit until all the moisture has evaporated. Unfortunately, this can take some time but the process may be hastened by gently warming your equipment using a hair dryer set on a low setting.
6. Equipment Protection
Today’s modern DSLRs and associated equipment should function just fine, for the most part, in winter’s cold weather. However, plastic camera bodies and components may become brittle in extreme cold, so a little extra caution in handling is advised. Just as in summer when photographing in rainy conditions, it’s imperative to keep wet snow off your gear—dry powdery snow shouldn’t pose a problem at all and will simply fall off for the most part. To that end, a rain cover, umbrella, or even a heavy-duty plastic bag (although they can be stiff and a little unwieldy) will work. Keeping the lens hood attached and pointing your camera down and/or away from prevailing wind direction until ready to shoot will lessen the likelihood that snow will accumulate on the front element of your lens.
If you should happen to get snow on your lens or camera, use a lens brush or something similar to remove it. Don’t try to blow it off with your breath, as that will only add to the problem by adding more moisture. Sometimes a soft chamois or cotton towel can help if things are really wet, but again avoidance is the key.
7. Filters
My number one filter regardless of time of year is a polarizer. I use a polarizer to darken blue sky, add definition to clouds, and get rid of glare. The only caveat is that with a low sun angle in winter, it is easy to over-polarize, thus giving the sky an unnatural appearance. So you may want to go easy or take a few frames with varying amounts of polarization to see exactly what works best. Figure 5 shows the effect to be gained with the use of a polarizer.

Graduated neutral density filters are quite useful when it becomes necessary to equalize variations in exposure between different parts of a scene such as the foreground, or the background and sky. I find that a three-stop (No. 8) graduated gray neutral density filter will work for most all situations that might be encountered.
Another filter, that many photographers use, is a warming filter such as the 81C. The complimentary yellowish color will neutralize the snow’s bluish cast that can occur on sunny days or in the shade. With a digital camera, white balance set for “shade” will provide a similar effect, or you can simply handle it with post-capture adjustment, using your favorite software, in the digital darkroom.
Filters are typically of two types—those that screw directly onto the end of a lens or slide into a holder. The latter may be preferable for winter use when you’re trying to fumble around with heavy gloves.
8. Wildlife
Photographing wildlife in winter can pose even more problems for exposure. When capturing wildlife, the thing to remember is that as the main subject, having the correct exposure for them is the important thing: everything else can be compromised if necessary. When possible, I find that it’s best to spot meter the animal, taking into consideration whether the animal is white, neutral toned, or dark, and setting exposure accordingly, i.e., +1 EV, 0 EV, or -1 EV exposure compensation respectively as starting points, adjusting as necessary after checking the histogram. Again, this will become more intuitive with experience. If you’re not sure, simply bracket exposures and pick the one you like best. When photographing animals, focusing on the eye is paramount. Catching that instant of specular highlight will make the image stand out even further as shown in Figure 6.
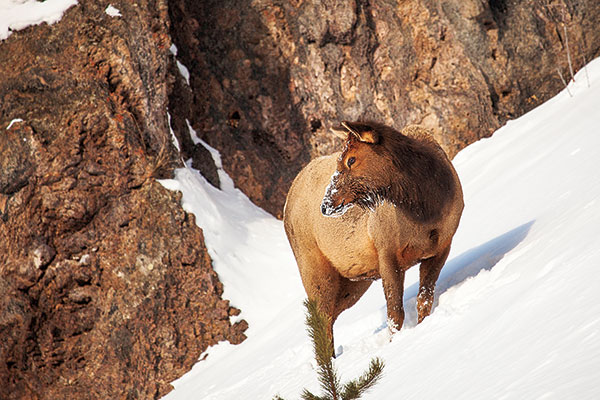
Winter is a very harsh and critical time for wildlife where their ability to conserve precious energy can make a difference in their very survival. It is therefore vitally important that photographers use good judgment and ethical practices so as not to cause wildlife any undue stress that could put them in jeopardy. If an animal exhibits any sign of stress or stops its normal activity on your approach, then you are too close. Maintaining a respectful distance and not approaching wildlife through the use of telephoto lenses will help avoid putting the animal in a “fight or flight” situation, and go a long way toward aiding in their survival. Note that all wildlife shots don’t need to be close-up portraits. It’s often more interesting to take wide-angle shots placing the animal in its wintry environment.
9. Tripod
A good sturdy tripod is an absolute must to ensure sharp images. I prefer lightweight tripods, so carbon fiber is my tripod material of choice. Although generally more costly than its metallic counterparts, carbon fiber is a little more user-friendly than metal, especially against bare skin in cold weather environments.
10. Personal Protection
One of the most important considerations to having an enjoyable and productive outdoor winter experience is to be properly attired. You can have the best equipment and know all the tips and tricks; however, if you’re cold and miserable, you certainly won’t enjoy yourself and your first experience may likely be your last.
Garments that are breathable and can wick moisture away from your body, such as those made from wool or synthetic fabrics like polyester, are recommended. Cotton should be left at home in winter. Outer garments should be waterproof as well as breathable.
Another factor to consider is that it’s always best to dress with several lightweight layers rather than a single heavy layer. In this manner, it’s easy to add or remove layers based on your activity level. The key is to avoid becoming overheated and sweaty, which will eventually lead to becoming chilled.
Hand protection provides yet another unique challenge for photographers since you need to be able to operate tiny camera controls without freezing your fingers. Depending on how cold it is, I may use lightweight fleece glove liners alone or under glomitts (fingerless gloves with attached flaps that can be pulled over fingers and thumbs, transforming them into mittens). When it’s really cold, I’ll also use a waterproof shell mitt as an outer layer or just heavier fleece gloves.
Standing on snow or frozen ground for any period of time can quickly lead to cold feet. Any type of pad, such as an old doormat, will go a long way toward keeping your feet from freezing.
For more on Rick Sheremeta’s photography and his workshops, visit his website at www.alpenglowproductions.com.
- Log in or register to post comments


