Traffic Lights: Long Exposures At Night
One of the first techniques I learned in photography was to use long exposures at night to blur traffic lights. I liked it decades ago, and I still enjoy seeing artful streaks of light superimposed over an urban environment. You never know exactly what the resulting images will look like, and that’s part of the fun. When the background happens to striking, like the Walt Disney Theater in Los Angeles, California (#1), the combination of abstract lights and architecture makes a winning photograph.

All Photos © Jim Zuckerman
One of the advantages we have now is seeing the images we take immediately in the LCD monitor on the back of the camera. Instead of waiting until the film is developed to make any changes in our technique, we can correct problems like poor exposure, the need for a longer or shorter shutter speed, a change in white balance, and a change in depth of field while we are out shooting. This helps you take the kinds of images you want without having to come back and do it a second time.
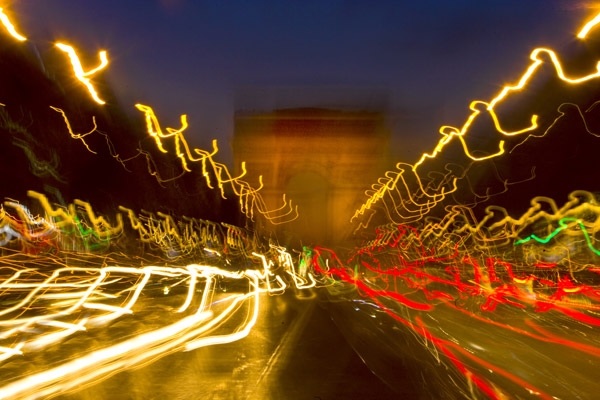
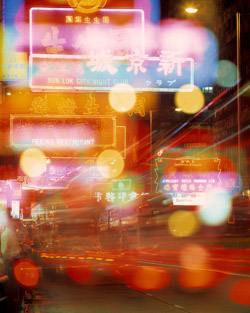
If you don’t use a tripod when photographing at night you’ll be disappointed with your images if you want them to be sharp and of the highest quality. Even though you are essentially creating abstracts, the various elements in the scene—including the lights—must be sharp. If you are only interested in complete abstractions, like the shot in Paris (#2), then no tripod is necessary at all. After you try this a few times, it will probably get old. You will then use a tripod to take shots that show the juxtaposition of a sharp environment with the colorful movement of night traffic (#3). It is interesting to note that our eyes never see streaks of light as vehicles pass in front of us. Only a camera can reveal this abstraction in color and form because it records the movement over time, something that our brain can’t do.

The Technique
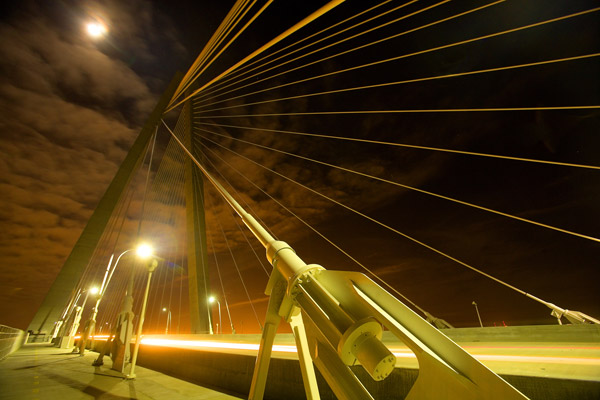
The best approach is to use a low ISO. I choose ISO 100 because this gives me maximum picture quality and a minimum of digital noise. Noise shows up the most in shadows, and at night there are a lot of shadows. That’s why it’s very important to use a low ISO setting. If your camera doesn’t offer ISO 100 as an option, use the lowest setting possible. The only exception to using a low ISO is if the tripod might be impacted from ground movement, such as when shooting on a bridge. In Charleston, South Carolina, I liked the contrast between the superstructure on the Arthur Ravenal, Jr. Bridge and the headlights of cars (#4), but the bridge wasn’t a stable platform at all. I could feel subtle vibration in my feet. Therefore, I raised the ISO to 400 to reduce the length of time the shutter was open. The shutter was open for 4 seconds instead of my usual 10-20 seconds.
I recommend using a Daylight White Balance when photographing traffic lights. Many people use AWB (Auto White Balance), but this makes the tungsten lights white as opposed to golden in color. Personally, I prefer the warmer look. To determine your own preferences, compare daylight with AWB and see what looks good to you. If you want deep blue pictures, like the urbanscape I shot in Bangkok (#5), try using a Tungsten White Balance.

D-SLR Owners: To minimize camera vibration when doing long exposures, it’s best to use the mirror lock-up feature. This can be found in one of the menus in your camera, and it positions the mirror up out of the way of the light path before the picture is taken. When the shutter opens and closes, the mirror doesn’t move until after the picture has been captured as opposed to flipping up and down when you push the shutter. The reduction in vibration helps ensure your pictures are tack sharp.
You should also use the self-timer, a cable release, or a wireless trigger to fire the camera and take the picture. This prevents the camera from being jarred as the shutter button is depressed, and this is one more thing you can do to guarantee your pictures are sharp.
It is essential to turn off the image stabilization feature on the lens. When using most lenses on a tripod or on any stable platform (including bean bags), you will not get sharp images unless the image stabilization is turned off.
Exposure
You would think night exposures are a serious challenge. Contrast is extreme and when there are a lot of brilliant highlights and black shadows in the same shot, camera meters don’t function well because there is virtually no middle gray from which to derive an accurate reading. The picture I took at the Los Angeles International Airport (#6), is a good example. However, the easiest approach is to set the camera on Program mode and take one picture. Study the results on the LCD monitor, and if it is too light or too dark, use the Exposure Compensation feature in the camera to make the adjustment until you like what you see. You can tweak the exposure in 1/3 f/stop increments plus or minus, and I have found that usually you don’t have to go more than plus or minus 2/3 f/stop from what the meter suggests when shooting in most night situations.

Experiment
Try many different traffic scenarios. The more lights you have to work with, the more dynamic the pictures will usually be. I shot traffic with the Roman coliseum in the background (#7), and the 155mm focal length visually compressed the nightlife to give it a sense of excitement. There are lights everywhere in this composition. In a small town in Germany, a passing bus contributed to the artistry of the scene, (#8). Note that you can see through the blur of the bus as if it were translucent.


If an emergency vehicle is racing through the traffic, the flashing lights add to the mix. In Franklin, Tennessee, a historic town south of Nashville, I captured an ambulance with lights flashing everywhere (#9). Chinatown in large cities always has incredible neon lights, and long exposures with traffic lights are an exciting way to capture the ambience. In photo (#10), I took a 10 second exposure—approximately half of the time the lens was focused correctly and then I threw it out of focus for the rest of the time. In this way, I got an image that looks like a double exposure.

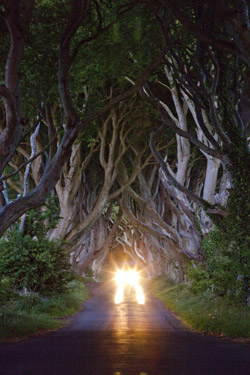
If you live in a rural area with little traffic, you can still create intriguing images. Photo (#11) is an example. A single vehicle coming toward me created a focal point in a country road in Northern Ireland. This wasn’t intentional, though. I took this image using a 30 second exposure so I could get significant depth of field, and during the time the shutter was open, the car appeared and I captured the streaks of light. At first I was annoyed that the car ruined my shot, but when I saw the results I thought the headlights were a bonus.
- Log in or register to post comments


