Wedding And Portraiture
A New Direction For Portraiture
|
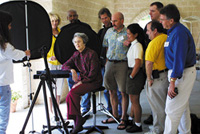
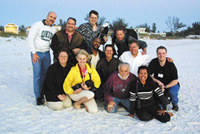
For the past few years there's been a lot of apprehension as to what's happening to the state of classic portraiture. Now, there's an answer. It's growing, maturing, and blossoming out. And, it's also going digital! During a recent class in my hometown of Sarasota, Florida, I had the privilege of expanding on this theory, demonstrating that classic portraiture hasn't been forsaken. It's only being transformed. It's taken a turn for the better. Photographers are once more realizing that people are still enthralled with faces, especially those shown at their best--simply and with a flair for being more "natural" than ever before. Photographers are also realizing that in order to cash-in on today's trend one has to learn technique in order to develop a style. |
|||
With this in mind I finished my five-day class with a day that went from contemporary studio portraiture to outdoor portraiture. From window light to combining ambient light with flash. From bright sunshine to nighttime. All in a single day, and all digital. My camera is Canon's D30. I didn't have to test it before I bought it. I read many reports, but the final decision was based on recommendations from photographers who had done all the testing themselves. I came to the conclusion that this was the camera for me. I didn't have to look any further. I began my adventure for the contemporary look in the studio. I went through a complete bridal session, but didn't stop where I usually finished. Instead, I coaxed my model couple to reactions that appeared to have been totally unrehearsed and unscheduled. I have to believe that photographs like this are a welcome addition to more formally posed images. |
|||
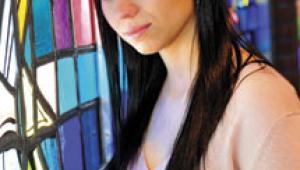
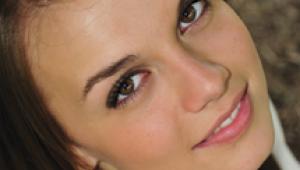
Image #1 was exposed in the digital camera the same way as film. I exposed for the main light, keeping the fill light two f/stops less. The reading of the hairlight matched the main light. I kept the tone of the background light so that I could blend it more closely with her white gown. That way the faces seem to jump out more than if I contrasted her white gown with a dark background. You'd never guess how we lit this portrait, unless I showed you here. Studio Light & Daylight Take a look at Images #2 and #3, for instance. I used split-lighting on her face, adding my Westcott reflector (camera-left) to wrap the light around onto the left side of her face. In order to create her portraits I had to move her well under the roof's overhang so that I could position my camera (represented here by my tripod) to see the exact views of the face that I wanted to photograph. |
|||
As you can see, I used Westcott's Monte Illuminator (silver/black reflector) where I would normally place the main light to put light into her left eye. My first camera position was full face. I followed it up with this 2/3 view of her face, both portraits in the Basic Pose. Both views of her face were made without her moving at all. Only the position of my camera moved. The background for her portrait was the black side of another Westcott Monte Illuminator. I couldn't get along without the two of them. I guess that's why they've got my name on them. The Search For Perfect Light |
|||
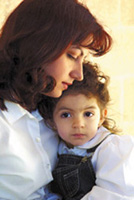
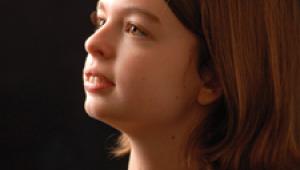
To further illustrate this point I took my class from one side of the building to the other, still staying underneath the covered porch. This was the sunny side of the building, as you can see from this portrait Image #4 of the mother with her daughter. Since her daughter was a little shy posing for me with all the class standing around watching, I let the mother hold her on her lap. We were at the corner of the building. There was an opening close to them to my right and still another farther behind me. The brighter light was coming from an opening to my right, while another opening behind me provided the perfect fill light. By turning them slightly away from the brighter opening I was able to obtain perfect profile lighting on the mother. Someone from my class asked me what kind of lighting I was getting on her daughter. My comeback, "Whatever I can get!" I did use a reflector to get some light back onto her face. The message of this mother/daughter portrait is whatever you want to read into it. |
|||
Window Light Can Use An
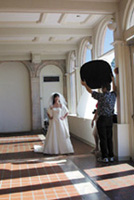
Assist, Too My Westcott translucent panel solved the first problem. By placing it on the floor by the window I was able to cut down some of the light on her gown. It worked perfectly. I then added Westcott's trifold reflector under her chin. This brought up the shadowed area to something that I could accept for this high-key portrait of the bride. This, by the way, is a perfect rendition of Denny's Zuga Green Background, my favorite. |
|||
Notice that the reflector (held up high by her hair) helped to bring out some of the details in her upswept hairdo. It was tilted upward to pick up the window light coming from above, and then tilted downward slightly, just to graze across the dark side of her hair. My Favorite Lens/Lenses€ Classic & Natural |
|||
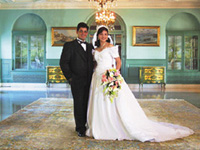
There was light coming into the room from a huge bank of open windows. The light reached all the way in between the columns--a good 20' from the windows. But there was not enough light to wraparound onto their faces. I simply exposed for the ambient light and brought in a bare-bulb Quantum flash from between two of the columns. The flash was two f/stops under the ambient light, so I didn't even consider it being there when calculating the exposure. Of course, there was a second Quantum flash on a low stand behind the bride and groom to backlight her veil. Without that they would have blended in with the background. Window Light, On The Sunny
Side |
|||
I posed her with split-lighting on her face, turning her body toward the camera and her face to the light. All I needed to do now was to use one of my Westcott reflectors to intensify the light on her face and to help wrap the light around onto the right side of her face. A well-meaning photographer/student held up the reflector at eye level, creating shadows that went horizontally across her face. I told him that we needed to raise the "main" light to above her eyes and use it just as if it were an actual light. As you can see in Image #9, once again the reflector was turned up to catch the light and then tilted down toward the bride just enough to have the light bounce off of it onto her face. The results were just what I wanted. Naturally, I put a second Quantum flash behind her to light the veil. Even in this bright light, the extra light was important, don't you think? Before long, time was running out. We had to leave for the beach before we lost the light. One last walk-through and we were gone. On the way out, however, we went through the main room of College Hall. I have always done portraits there using a staircase in the background behind my subjects. With my new thinking, however, I began truly looking in "new directions!" |
|||
Photograph Into A Light
Background Now, facing that direction I read the light on the wall through my Canon D30 and exposed for that automatically. As I recall, I did set the ISO up to 400 for that exposure, since the light level was pretty low. I posed the bride and groom as far away from the background as possible, in Image #10 setting Quantum's flash equal to the f/stop, since there was basically no light on them. Yes, there was a second Quantum flash behind the couple on a low light stand to light her veil. That was also set to match the same f/stop. In order to keep the same tonal values throughout the portrait, the amount of light on my subjects had to match the amount of light on the background. It was as simple as that! |
|||
What's New In "Beach" Portraits?
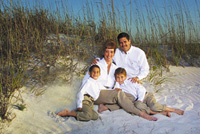
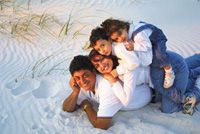
I had a great family group all ready and waiting for me. Clothing was perfectly coordinated and the children were anxiously awaiting directions. I chose a location in Image #11 that would give me the opportunity to put heads at different levels. A small grassy knoll was perfect. At the same time I wanted to position each of them so that they would all get some direct sunlight on their faces. Finally, I wanted to bring them together physically by the way I leaned them onto each other and the way I positioned their hands and arms. There's a lot being said in this family group, even though they're all smiling and looking into the lens. The group was arranged with heads at different levels, everyone posed individually to look good. The exposure was based on getting good color in bright sunshine--1/125 at f/16, ISO 100. Since a good portion of everyone's face was in deep shadow, I used a strong flash, camera-right, to wrap the light around onto the right side of their faces. By bringing the light on them up to the bright sunshine in the background, a straight print produced good color throughout. |
|||
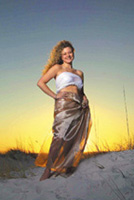
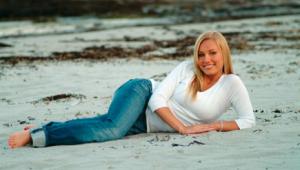
From this shot I turned to another sure thing, posing Diane full-length in the same lighting situation in Image #12. Sunshine skimmed across the left side of her face. The rest was in shadow. Heck, by this time everyone there knew how I was going to light her and why. It was a slam-dunk! The pose was Basic. The smile was genuine. The clothes blended perfectly with the sky and the grasses. And it took only seconds for the whole thing to materialize. A Race Against The Quickly-Setting
Sun |
|||
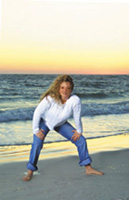
Of course, it took a few snaps before I felt that I had gotten the shot without a face full of hair, as seen in Image #13. Thank goodness for the ground glass on the back of my camera. I saw each image as I was shooting. I saw the color. I saw the excitement that she and all of us were feeling at the time of exposure. It was all there! Hey, this was just too good to let go. I was really pushing! |
|||
I asked our model to wrap herself
in some of these fabrics that I had just gotten from: Backdrop Outlet. |
|||
Saturated With The Color
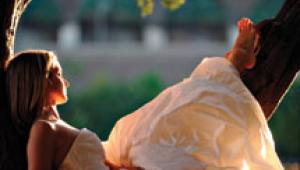
Of The Setting Sun The sun had set, but we were still working. I changed the ISO of the camera to 800. I could still shoot. I measured the ambient light on her through the lens and used a flash that was one or two f/stops stronger. I had another person standing out in the water to my left to backlight her hair with another flash, but we didn't turn on the receiver. Only one flash fired. It was good enough for me. I loved it. I saw Image #16 immediately and knew that I had gotten it. |
|||
The Light' Gone, But I Won
The Race No one could believe that the camera had picked up this quality in Image #17. There wasn't enough light. Where did it come from? From the D30, that's where! Who would have believed that a camera could function so well when there was basically no light to work with at all? We were all happy and smiling, despite being cold and exhausted. It was time to get back in our cars and go for dinner. Although most everyone headed for their cars, a few of us remained behind to make certain that we hadn't left anything on the beach. |
|||
It was over, I thought. Then, I figured, "Let me try one more shot!" This camera at ISO 1600 was behaving as if by magic. I asked my model to run her fingers through her hair and look out to sea. It was just about total darkness. I know that you're not gonna believe me when you look at Image #18, but I'm telling you the truth. The lights were on in all the houses. The stars were all out. The thin sliver of the moon was shining down upon us. And something/someone/somewhere was also shining down upon us. Take a look at what this camera can do, handheld, and virtually without any light! |
|||
So, where did all of these images come from? I couldn't have done any of them at all without my classical background in posing and lighting that I learned from Joe Zeltsman. I have been practicing and teaching ever since. Where is it taking me? In directions that I never dreamed of before! Why? Because digital has now come into my life. I'll never be the same again, and neither will the profession! I don't want to look back. I can't stay still. I've got to go full steam ahead! Wanna come along with me? Check out my web site: www.Zuga.net. Zeltsman's complete course is there for everyone, too, the same as it was for me back in the 1960s. Lucky for all of us, the future belongs to those who merge the past with the present. "The past is prologue." The future is yours. But don't wait too long. It can easily pass you by. |
- Log in or register to post comments

