- REVIEWS
Camera Reviews 
More Reviews Mobile Reviews Photography Reviews - GALLERIES
- VIDEOS
- BUYER'S GUIDES
Using the Object Mask Tool to Target Anything in a Photo (VIDEO)

We often discuss the importance of using masks to make selective enhancements to a photo, rather than just relying upon global adjustments that affect the entire image at once. There are a variety of options available, and this tutorial from the PHLOG Photography YouTube channel demonstrates one of the most useful techniques.
The topic for today is Lightroom's versatile Object Mask tool that simplifies the process for precisely targeting specific elements in a scene without biasing other areas within the frame. German landscape pro Christian Mohrle explains everything you need to know in barely 11 minutes, and we suggest following along by downloading the sample image using the link in the description beneath the video.
Mohrle's beautiful edits always follow a specific sequence, beginning with several of the aforementioned global adjustments to prepare his photo for the selective masking techniques that follow. Today he's working with an HDR image so the first step is merging the five bracketed files. He then changes the profile from Adobe Color to Adobe Standard which provides more control over contrast later in the process.
He then modifies White Balance to warm up the shot, drops overall exposure and highlights to bring out more details in the sky, and slightly opens up the shadows. Other preliminary adjustments include carefully bumping up whites, introducing more texture, clarity, and dehaze, and pumping up colors with additional vibrance.
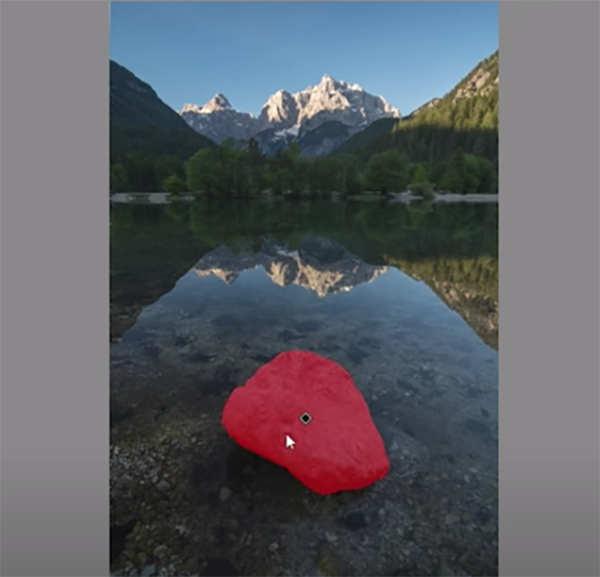
Now that the image is significantly improved, it's time to further enhance the shot with Lightroom's Objects Mask tool. There are two options for leveraging this tool: The default approach uses a brush to select the object to be enhanced—in this case a boulder in the foreground that needs to be accentuated.
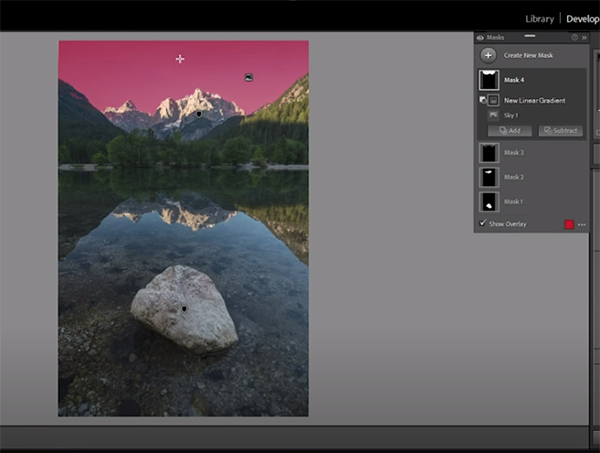
Mohrle turns to the second option for targeting the jagged mountains in the distance, because they're too complicated for the brush. Instead he employs the Rectangular tool and demonstrates how to achieve a precise selection of the peaks and make the necessary enhancements.
Once the masking is finished Mohrle completes the impressive transformation with careful color grading and a bit of judicious sharpening. The effectiveness of this straightforward technique is readily apparent when you compare Mohrle's before/after images.
If landscape photography is your thing we strongly recommend checking out Mohrle's robust YouTube channel where there's much more shooting and editing advice to be found.
And don't miss the tutorial we posted from another post-processing expert who explains what you may not understand about Lightroom's powerful histogram and how to use it for perfectly balanced photographs every time.
- Log in or register to post comments


![]()
Get the Latest Photo Tips, News & Reviews from Shutterbug!
| Camera Reviews Other Reviews | Mobile Reviews Photography Reviews Columns | News | Features | How-To | Resources |
 © 2025 Shutterbug
AVTech Media Americas Inc., USA
All rights reserved