Master Class
The Stuff Dreams Are Made Of
Simple Lighting And A Personal Vision

For many years I've had the philosophy that I don't want to photograph life as it is; I would rather photograph it as I would like it to be. My thoughts continue in that direction, especially in a day and age where many photographers are seeking a "hands-off" style of shooting. My feeling is that people are not objecting to posing for controlled photography--they simply don't want to look posed.

And so I continue my search for adventure, going in a direction that leads to portraits that are simple, yet capture the essence of life and living in times that are stressful enough...without having to cause any more concern to my subjects.

"Allow me, please," I tell the people whom I photograph, "to do my own thing. Let me create for you the most flattering photographs that you've ever had taken." They do, and I do. It doesn't usually take me more than a couple of shots to come up with a winner because I have learned simple photographic technique and know how to achieve it consistently. I don't use a lot of props. I do, however, have the equipment I need to make life simple. That's exactly what I want to share with you in this article.

Photos © 2004, Monte Zucker, All Rights Reserved

Keeping It Simple
In this first picture you see some of my most used props. A posing stool and table, a silver/black Westcott reflector, and a Westcott black/white
fold-out background panel. I use the "Monte/ALM Posing Stool" everywhere I go. It allows me to adjust to peoples' heights and to have a platform on which I can rest my subjects' arms and hands to achieve a good base for their portraits.

I recently received an e-mail from this woman telling me how greatly the portrait affected her. It gave her a whole new outlook on herself, once again bringing back self-confidence that so many of us need to achieve. The portrait was created so quickly and so simply she didn't have a chance to "freeze" or grow stale. She is a Mac person, as so many of us are in digital imaging, and also specializes in working with and teaching Photoshop. Hence, the prop of her laptop.

The lighting for this portrait is simple window light. But as you can see, the subject is pretty far from the window--not right next to it. I've been keeping my subjects as far from the window as practical without losing so much light that I have to go over ISO 400. I often turn the faces of my subjects away from the window, so that the direct window light only highlights the edge of the cheek and the nose. When I start with this kind of lighting I need a main light to get into both eyes and to wrap the light around onto the shadowed side of the face. You can see my reflector (Westcott's Monte's Illuminator) camera-left on the edge of the picture. The reflector is turned toward the source of light. I then turn the reflector slightly toward the subject, so that the light bounces off of them as though they were a mirror. If you turn the reflector toward the subject, it does nothing at all, of course.

The resulting portrait tells the viewer much more about this woman than I could have possibly achieved with anything more complicated. The background in the picture is another Westcott product, a black and
white fold-out panel that is perfect when you want a " no-background" background.

Low Key Or High Key--The Technique Is The Same
Another window light portrait shows how similar one can create a high key or low key portrait by window light. This was as far from the window as I could get and still achieve quality lighting. This time I used the reverse side of the black and white background. I also placed the reflector in an entirely different location.
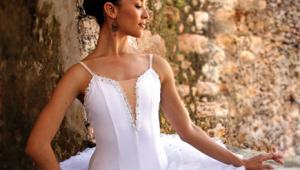
As you can see by the resulting portrait, this time I positioned the bride so that my ideal lighting pattern was already on her face from the available light. I had light in both of her eyes. The side of her face that is toward the camera is in shadow. The reflector, then, didn't need to wrap the light around onto the shadowed side of her face. Here you see it in position to open the shadows slightly and to brighten her eyes. I started using fill light from below when I was shooting for Canon in conjunction with some of their incredible "Explorers of Light" photographers. All the photographs in this article, by the way, were created with Canon's EOS 10D, their 28-135mm IS lens, and Delkin's 640MB memory cards.

A white background pulled back from the light turns a nice neutral gray if it's
about two f/stops under the main light. It doesn't get much easier than this. Why knock yourself out to find a proper background each time you want to create a
portrait when it's so much easier to bring it with you?

Learning where to place the reflector is simple. If the lighting on the face is exactly as you want it, the reflector is used to open the shadows. If you're only highlighting the edge of the face with the window light, then the reflector is placed as if it were the main light.

High Key Portraiture Outdoors
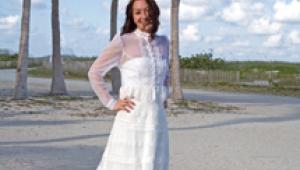
You can create a dream world for yourself and your clients simply by using other props that don't really show up as such in the photograph. Take, for instance, the use of this translucent Westcott background that is another indispensable tool that I take with me wherever I go. Here we are in bright afternoon sunlight using the fold-out background behind the subjects to soften the direct sunlight on their faces.

The sun is not directly overhead. It's being blocked from the lens by the translucent panel. I simply turned my subjects' faces so that they would get the lighting on both of their profiles. Once I achieved that, I positioned both of their bodies at a 45Þ angle to the camera--the way I always do for profiles.

Definitely a dream maker, huh? And look how simple it was to create the atmosphere. No reflectors were needed. The open sky and the sand filled in the shadowed side of their faces.

Outdoors And Under Cover!
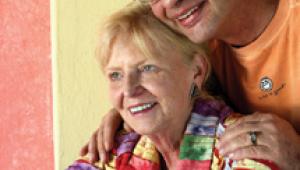
For some time now I've been teaching to photograph under cover and at the edge of the light. That's what's going on here. The couple is on the white side of my black/white background. The translucent panel is blocking the bright sun, just as in the last picture.

No reflectors, no nothing--just light from behind and light bouncing off the bottom, white floor. A little light was drifting down from above the translucent panel highlighting his hair.

What a simple and effective way to achieve a high key portrait.

This is right out of the camera. It took a few exposures to get the right f/stop. I usually work in aperture priority mode. The camera in a situation like this sees a lot of bright white, so it stops down too much to get an accurate reading on their faces. I override it on my Canon EOS 10D by about two f/stops and I get incredible results!

My white balance is set for bright sunshine when I'm in bright sunlight and for shade when I'm in protected areas like this. Please, please stay away from the automatic white balance on a lot of cameras. It'll just get you into all kinds of color mishaps.


Using A Subtle Flash As A Main Light

Incredible results can be achieved by combining window light with flash. I get great results by lighting one half of the face with daylight and using a bare-bulb flash to put light into both eyes and wrap the light around onto the shadowed side of the face.

Now that I'm totally digital it's so exciting to play and learn as you shoot. I can't begin to tell you how easy it is to create "larger and better than life" portraits by combining flash with window light. Here I used my trusty never-without Quantum digital flash and my Canon EOS 10D. In the camera's hot shoe on top I have a Quantum dedicated TTL flash monitor on which I can dial in any degree of flash that I want in conjunction with the ambient light. The flash is on an extension cord so that I can place it exactly as I would if it were the main light in a studio environment. In a situation like this (where I want to maintain the light from the window) I set the flash to be two f/stops under the ambient light. It works almost every time. No need for an exposure meter here.

You can't possibly set the flash as easily and as precisely as you can with this small piece of invaluable equipment. It's available for many digital cameras already and will soon be available for most of the other major digital cameras and backs.

Steady Does It!
Did I forget to mention my tripod? I could never get along without my Manfrotto tripod, distributed by Bogen. It's lightweight, sturdy, reliable, and quick to reposition--everything I ever needed and wanted in a tripod. By the way, the source for most of my equipment (as you probably know by now) is Michael Green with Unique Photo in New Jersey.


Sometimes You Don't Need Any Help...
And sometimes you need all the help that you can get! That was/is me. Here's a picture of me that was created by Jeff Medford at a recent Florida class. He used nothing but available early evening light during our beach shoot. Of course, learning to have his camera at the right place to capture a good 2/3 view of the face helped a lot. He's a pj shooter who wants to better his images by learning what to look for and how to find it. I loved the picture the instant he showed it to me on the back of his camera.

I thought that I wanted my picture to be without any retouching at all, but I quickly changed my mind when I looked at it in Photoshop at 100 percent.

Do I want to look like myself in my pictures? I sure do, but, maybe, with just a little bit of help. Okay, so I did a little work on my face in Photoshop. Hey, I'm no different than anyone else, I want to look good, too!

So, dream your dreams, dream other peoples' dreams, and make them all come true. I'll help you all that I can.

X