Lesson Of The Month
Senior Portraits Using Natural Light
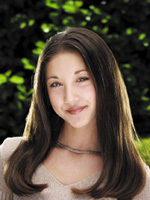
Most people assume that professional portraiture requires expensive camera strobes for good results. Strobes can work beautifully with portraits, particularly when used with softboxes, but they are not necessary in many situations. Armed with equipment to modify sunlight, you can achieve fantastic results. In preparation for this lesson, we brought Gwen, our hair/makeup stylist, on location to give Angela, our 15-year-old model, an elegant look. While Gwen worked on making Angela's clothing, hair, and makeup, we scouted nearby for a location with a good background (#1). |
||||||
We found a large hedge and decided to shoot into the shadow side so that our model would stand out from the background. We set up the tripod and mounted an Olympus E-10 digital camera to it in the vertical position. Once Angela was prepped, our stylist brought her out to the location. It was near noon once we started and the sun cast short, high-contrast shadows on our subject (#2). |
||||||
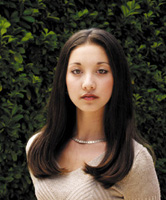
As a starting point, we took a shot without any light modification. We minimized the camera's aperture to f/11 to ensure that both the model and background would be in sharp focus and set the shutter speed to 1/60 sec. We took a shot, set the camera to Playback, and reviewed the exposure in the Playback screen (#3). (One of the great things about shooting digitally is that you can adjust your exposure on the spot thanks to the Playback feature.) Although the exposure was good, the contrast between the shadows and highlights was too great. |
||||||
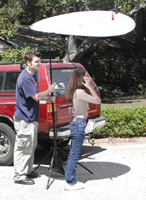
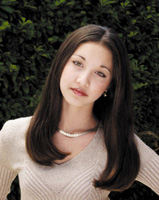
To reduce the contrast, we decided to set up a Photoflex translucent Litedisc overhead to diffuse the sunlight. Since there was a slight breeze blowing, we wanted to stabilize our Litedisc setup. Our assistant, Ross, grabbed a 52" translucent Litedisc, attached it to a Photoflex Litedisc Holder, and secured it to a Litestand with an attached weight bag. Then he positioned the disc so that it was over Angela's head and shoulders (#4). We opened the aperture a half stop and fired off another shot (#5). |
||||||
The resulting shot was greatly improved. The Litedisc had minimized the contrast, yet still revealed the direction of the sun. As a photographer, you could stop at this point and have a great end result. To illustrate additional light modification, we went on to develop the shot further. Next, we wanted to add a reflective Litedisc to bounce light into the shadows of Angela's face and create a catchlight in her eyes. Ross pulled out a 42" soft gold/white Litedisc and positioned it so that the white side was reflecting. As we looked through the lens, we let Ross know where the disc should be positioned. Once we found the right spot, Ross secured the Litedisc Holder to a Litestand weighted with another weight bag and stood to the side where he could make minor adjustments (#6). |
||||||
Since the Litedisc brightened the overall shot, we closed down the aperture half a stop to accommodate and took another shot (#7). Notice how the shadows under Angela's eyes have been greatly minimized, and the reflection of the Litedisc shows up in her eyes. |
||||||
Next we wanted to separate her hair from the background, while giving the shot a sunnier look. So we set up two 22" silver/white Litediscs on holders and stands, and positioned them in the rear so that the silver side of the discs reflected hard light into both sides of Angela's hair (#8). |
||||||
The reflectors helped to give separation from the background nicely, but the hard light revealed the stray strands to the point where they were a little distracting. Gwen came in and worked on her hair while we adjusted the camera settings. We wanted to create even more separation by softening the focus on the background, so we opened the aperture up all the way to f/4, set the shutter speed to accommodate the proper exposure and took a shot (#9). Notice how the combination of the brightly lit hair and the soft focus of the background help to create a greater sense of depth to the shot. |
||||||
Although the shot looked good on review of the LCD, something seemed to be missing. The tonal range of the subject was much more dynamic than that of the relatively static background. So we decided to move to the other side of the hedge where the direct sun gave it more contrast. After previewing the background through the camera lens, we brought the gear over to the other side and set up the same lighting scenario (#10). |
||||||
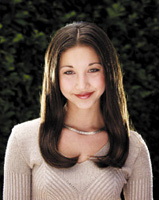
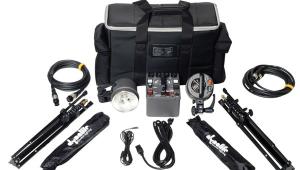
With no change to the camera settings, the result showed that the background was nicely out of focus, but now it seemed to tie in better with Angela's look as in the Final Image. This lesson will be posted in the free public section of the Web Photo School at: www.webphotoschool.com. You will be able to enlarge the photos from thumbnails. If you would like to continue your digital step by step education lessons on editing, printing, and e-mailing your photos it will be on the private section of the Web Photo School. To enroll for WPS just go to www.shutterbug.net and click on WPS Free Lessons. Technical Equipment |
- Log in or register to post comments


