- REVIEWS
Camera Reviews 
More Reviews Mobile Reviews Photography Reviews - GALLERIES
- VIDEOS
- BUYER'S GUIDES
HP photosmart 7960 Printer
The debate between dye sublimation and ink jet printing has always been about the "presence" of the image, the feeling of continuous tone it imparts to the print. For some digital printmakers the dye sub route was the way to go, but ink jetters argued that the problem with dye sub is that you always have to stick to the manufacturer's proprietary paper, usually limited to glossy and perhaps matte stock. So giving up on some of the true feeling of continuous tone with ink jet was OK because the substrate choices were much greater. The various paper surfaces and feel they gave to the image overwhelmed the slight edge most dye subs give over ink jet. |
|||
Another matter was in the image tone, or color, when it came down to doing monochrome, or even neutral black and white prints. Some printers, especially those who handled pigment inks, have a nasty habit of color shifting during dry down or when viewed under light sources different than the one under which the print was made. Metamerism, the odd name for the color shift/light source effect, became a topic of no little debate. But on the other side of the argument was the longevity of pigment ink prints, rivaling that of an archivally processed fiber-based silver print. Printer Breakthrough |
|||
Setup And Ink Sets Direct From Card Printing Color Shift Gone |
|||
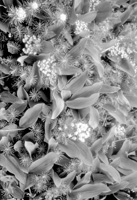
But enough about metamerism,
a topic that will be moot when working with the HP. The prints the first
time out from the HP were right on, with an amazing tonal scale that went
from open shadow detail to slight texture in the highlights. We had made
some prints from the same files using a dye sub (an expensive Kodak unit
from a few years back) and a couple of Epson printers. The HP prints,
with no question, matched the high-end dye sub and showed all the neutral
tonality and gradation one could expect from a very good variable contrast
print made on RC silver paper. |
|||
Profiles And Third-Party
Papers Tweaking The Print |
|||
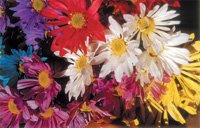
Interestingly, we found that
when we set Image Size in Photoshop with this printer we could get very
good results at around 200dpi. The folks at HP recommend 300dpi, but again
we found little difference in the images we worked with. Be safe and stick
around the middle and you should do fine, but test to see what works for
you. We're not sure what the lowest limit is, but this lets you
get away with larger prints from smaller file sizes, which seems to open
up the possibilities for a 3-megapixel camera. Our usual habit is to work
at 240dpi as the lowest we would go, but at 200dpi with this printer we
were pretty happy. |


- Log in or register to post comments


![]()
Get the Latest Photo Tips, News & Reviews from Shutterbug!
| Camera Reviews Other Reviews | Mobile Reviews Photography Reviews Columns | News | Features | How-To | Resources |
 © 2025 Shutterbug
AVTech Media Americas Inc., USA
All rights reserved