Formal Bridal Portraiture
A Posing Guide For The New Elegance

Photos © 2003 Monte Zucker, All Rights Reserved

The pendulum swings both ways. The world is ready for a return to good portraiture. It's obvious by the signs of the times...the demand, the sales! Fine portraiture has been around for a gazillion years. It will never disappear. Formal studio portraiture is not dead. It has only had a slump. Why? Because so many photographers have been afraid to go there. What a lot of photographers don't realize is that formal portraiture doesn't have to be made in the studio. It can be done on location and/or outdoors. The whole idea is that photographers need to understand the basics of posing and lighting before they can hope to achieve success anywhere.

For that reason I've prepared a series of studio portraits to give you an idea of what you can do with a little study and a lot of practice. The main props that you'll need are a couple of posing stools, possibly a posing table, and the ability to control light. In the studio it's easy to direct light. Window light on location is easy to control, also. Outdoors it's necessary to get under cover, so that the light can come from a specific direction. Other than that there's no reason why every photographer can't take a little time and get big rewards.

Couples today aren't against posed pictures. They simply want pictures that don't look posed. First and foremost, every bride wants a gorgeous picture of herself. She wants her bridal portraits to be the most beautiful pictures she's ever had taken. She wants to remember her wedding gown, her flowers, and her excitement of the day. She also wants to do it with as little fuss and as little time spent as possible. It can be done. It can be done by photographers who have good portrait techniques, who can communicate with their subjects, and who can get the job done regardless of time, temperature, and the weather.

Lighting Setup
My studio portraits are created with five lights: a main, a fill, a hair, a background, and a veil. Why do I use so many lights? Because I care enough to give each client the best that they can get. Can it be done with fewer lights? Of course. But which of the lights would you sacrifice? Does the hairlight work for you? Does the veil light coming through from behind help create a brighter veil? Does the background light add depth to the photograph? They do for me. When I educate brides about what to look for in a good bridal portrait they, too, see the difference and the need to search out the photographer who can give them the greatest memories.

So, here is a typical series that I have in mind when I begin each bridal session. It might not be a bad idea to cut these out, laminate them, and have them by your side each and every time you do a bridal session.

3/4 Length Seated Bride
This is by far the most popular bridal portrait that I take. The bride is seated at a height that allows her knees to slope slightly downward. Her body is at a 45Þ angle to the camera. The height of the camera is around her chest level. The picture is cropped well below the knees. She leans her body forward at the waist toward her knees. Her back arm is extended, anchoring the top of her body to the base of the picture.
The body is turned away from the light. Her head is turned back toward the light. The main light reaches both eyes. A small shadow is created below and to the side of her nose. The arm holding her bouquet is slightly bent. The flowers are directed toward the lens. I'm careful to have her hold the flowers at the top of the bouquet, so as not to cut her arm from view.

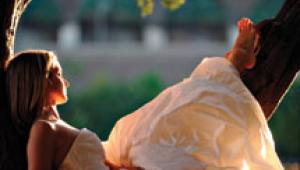
Exposure is for the main light. The fill light is two f/stops less. A light is turned toward the background. Another light is behind her back, directed toward her body and through the veil. This light is just bright enough to light the veil without it losing detail. A hairlight is highlighting the top of her head.

In almost all of my portraits I tone down the bottom and sides of the portraits by creating an extra layer in Photoshop. To do this, go to Curves; bring down the highlight side to the middle of the graph and then mask the head and shoulders 100 percent (the rest at a lower percentage to suit taste).

Same Pose--2/3 View Of The Face
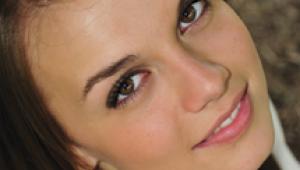
With only a few minor/major changes the portrait becomes a 2/3 view of her face. In order to turn her face that much the body must turn much more toward the camera--almost straight into the lens. Then, to retain the same light pattern on her face the light has to move with her head. Whereas in the first picture the light was approximately a 45Þ angle to the camera, the light now is at an approximate 90Þ angle. Notice that with her head turned toward the side I've allowed a little more space in front of her than behind her. Also, the background is lit a little brighter in front of her, slightly darker behind her.

Bride With Arms On Table
A good close-up for showing great detail in the bodice of the gown and a good view of her engagement ring is a must-do. I bring a posing table up to the bride, placing it at a height so that when her hands and arms are on the table they come just below the level of her bust line. The bottom of her dress is brought up to cover the table.

The lights don't have to move from the previous portrait. The camera raises to the height of her shoulders, midway between the top of her head and her hands. To create a high/low shoulder the bride leans forward toward the table, while I bring her right elbow forward. This lowers her right shoulder. A slight tilt of the camera toward her higher, left shoulder adds even more of an angle to her body. Her ring hand is placed over the wrist of her other hand. This brings out her elbows to form a pleasant base for the portrait.

Hands Up To Her Face
By raising the posing table up just a few inches I can bring her ring hand up to the side of her face, the wrist bent slightly inward. Her other hand is brought up to rest in the palm of her left hand. Notice that I'm showing the sides of her hands, fingers going upward, both wrists bent inward.

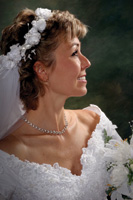
Profile
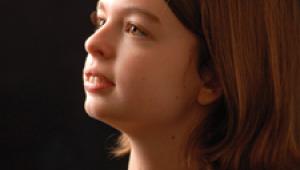
Once again her body turns to a 45Þ angle to the camera. The main light moves still farther back toward the background and turns toward her. It is now actually approximately at a 135Þ angle from the camera. A gobo (Westcott's Monte Illuminator--silver on one side and black on the other) needs to be placed between the light and the camera to prevent the light from flaring into the lens.

The camera lowers slightly to achieve a slight separation between her chin and her shoulder. Her eye is brought slightly toward the near corner, so that the camera sees the pupil of her eye. The edge of her profile is just past the middle of the portrait. She needs plenty of space in front. I'm also careful to bring out her left elbow, creating the base of the portrait all the way to the edge of the picture.

2/3 View Of Face--Lighting Still In Profile Position
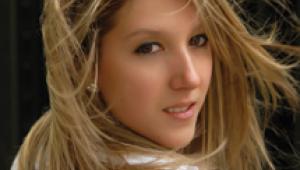
With the light still in profile position it's sometimes fun to bring the head back to the 2/3 position; catch the edge of the nose with the direct light and then let the reflector (camera right) help push that light around onto the shadowed side of the face.

Once in a while I'll have a woman's face at the 2/3 angle and have her eyes come back to the camera. It looks much better for women than it does for men. The exposure has not changed since we began the series. The lights are always the same distance from the subject, so the exposure doesn't vary.

The height of the camera for head and shoulder portraits is slightly above her eye level. This emphasizes the face and lessens the body mass. Of course, you have to look through the lens all the time and adjust the face up and down to look natural when viewed through the lens.

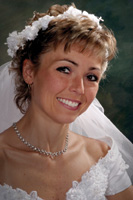
Full Face--Light In Profile Position Still
This portrait of the bride smiling through her veil works well with the main light still in profile position. The light is less likely to pick up distracting folds in the veil when it's coming from this position. The reflector (camera right) is still pushing the light around onto the right side of her face.

3/4 Length Bride And Groom Together
The couple is seated on two posing stools sufficiently apart from each other, so that they can both lean toward each other without crowding. Her head is straight up and down. His head tips toward her. It usually works out that she's in a full-face camera position, while his head is in a2/3 position.

His arm goes around her, but I place her inside hand on his left hand. Her left shoulder is under his arm. This allows her to keep her body at an angle to the camera to show the entire front of her gown. When she puts her arm around him she's too apt to turn her right shoulder too straight into the camera. We miss the front view of her body and gown. The height of the camera is around their bust level. The picture is cropped well below their knees.

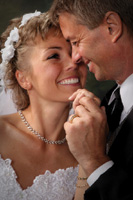
Couple Looking At Their Rings Together
The light is moved around to profile position to avoid lighting his left ear. It is split lighting on the bride's 2/3 position and good profile lighting on the groom. His profile is directly over her face. There is no space between the two faces. Her body is turned more toward the camera, so that we can achieve the 2/3 position of her face without straining. He holds her hand just below the level of her bust.

Close-Up Of Hands And Rings
All you have to do is come in closer for this picture of hands and rings. It doesn't get any easier than this. Notice carefully the positioning of the hands. The profile lighting hasn't changed from the previous picture. Just a touch of the bouquet is enough.

He Touches His Lips To Her Fingers
He brings her hand up to his lips. He doesn't pucker up his lips to kiss her fingers. She looks down and slightly out to the side, so that her eyes don't appear to be closed. He looks down at her fingers. Again, the camera height comes up to above their eye level.

Fun Picture--Seemingly Totally Unposed!
A very popular picture from this series is this follow-through from the previous picture. He lowers her hand slightly, they touch noses and you can get all kinds of fun, "photojournalistic" expressions. Nothing could be easier!

You don't have to do all of these portraits every time you photograph a bride and groom. I, personally, do take all of these pictures and sometimes more. A few of them are large in the albums for the couple and their parents, while some go two or three to a page. These photographs can be made on location indoors or outdoors, whatever your preference or the couple's. The thing to remember is that each and every bride and groom are entitled to nice portraits of themselves, regardless of what they think about formal portraiture.

Monte's Gear
I'm doing almost all my bridal portraits with a Canon 10D camera, 28-135mm IS lens. The memory cards I use are Delkin's eFilm PRO 640MB. My lighting is by Photogenic, using four heads. I use their 800 ws PM08 power supply with four light heads. I recently heard that Photogenic is coming out with a new lighting system. This old version has worked perfectly for me for umpteen years. The new system is called PhotoMasterII. You can adjust the light heads by ratio (I use the 3 to 1 ratio) or by increments of partial f/stops. It's multi-voltage. You can use them practically anywhere in the world. The top of the new pack is angled, so that you can see digitally how your lights are set from practically anywhere in the room!

I like Photogenic's light heads because they are lightweight and fit into small Mini Apollos by Westcott. I use two in the Mini Apollos and two behind the bride to light the background and her veil. The two Apollos are both on Westcott boom arm stands, allowing me to place the lights where necessary without my having to worry about getting the light stands in the picture. Of course I use the Monte Illuminator. It's a Westcott silver/black reflector and/or gobo.

I wouldn't think of shooting portraits without a tripod. The tripod that I have found most practical for moving around quickly is the Manfrotto Carbon One 443. Camera cases are my passion. They must work for me and with me. I use two different styles. I love my Porter Case.

It carries all my camera gear in a case that converts into a cart. As a cart it carries big loads through the airports, etc. I also just found Tenba's DB-17C backpack a fantastic way to carry all my camera gear, plus all my laptop gear. It's a foolproof way of keeping everything packed and ready to work at a moment's notice. Perfect for going out on location, whether at a fancy hotel or a sandy beach!

X