Exposure Tips
Exposure Tips
Sunsets And Sky
by George Schaub
There’s something magical happening in the sky all the time—if we only bother to look. Whether it’s sunrise, sunset, or a front passing through, the sky offers an amazing diversity of light, color, and subject matter. However, photographs of the sky sometimes disappoint—they might come out too light, too dark, or simply don’t communicate the glory that inspired you to raise your camera in the first place.
One way to ensure great sky shots is to make an exposure that gets all the color and tonal values properly recorded. In some cases this might mean working to get a full gamut of values; in others it might require you to select more restricted tonal ranges that serve the scene and how you want to depict it. From there you can enhance the photo even more in processing.
 |
|
|
Brilliant Color: Sunrise and sunset can offer brilliant color and light. They become the subject with other parts of the scene, such as this silhouetted mountain, playing a supporting role. The best way to meter a scene such as this is to ignore the supporting actors and make a reading right from the light. In this scene a center-weighted metering pattern was used; the camera was raised to bring the bright light into the center, the exposure was locked and then the framing was recomposed to incorporate the mountain silhouette.
 |
|
|
Panoramas: The low-hanging clouds on this flat plane were prime panorama subjects. The final photo is composed of four overlapping frames. When shooting panoramas make the first shot to check exposure, then switch to Manual Exposure mode to keep each subsequent frame the same exposure. This eliminates any obvious stitching borders when the images are merged.
 |
|
|
Light’s Effect: Sometimes the best exposure is made by following the light and reading where it lands. The dark sky is not the subject; the effect of the last rays of light on the mountaintop is. Here the sky plays the supporting role. This exposure was made by spot metering the mountain and locking exposure, allowing the other values to land where they may.
 |
|
|
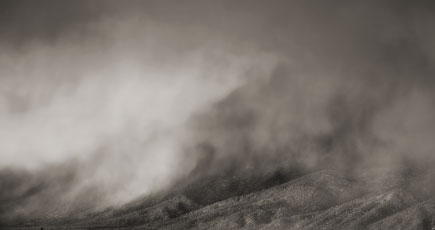
Winter Mists: The issue here is not to allow the bright mists of this lifting winter storm to become overexposed. This photo, processed as monochrome, was exposed with a center-weighted metering pattern with the reading made by framing the mists in the viewfinder, locking exposure, then recomposing.
 |
|
|
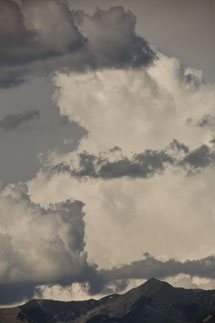
Storm Clouds: A 500mm lens compressed this stormy sky to add to the drama. But the haze caused some loss of contrast, not uncommon when using a very long telephoto lens. Exposure was made with a center-weighted metering pattern in the framing you see here, but the contrast setting in the camera was placed to +1 to try to cut down the deleterious effect of the haze.
 |
 |
||
|
|
||
 |
|||
|
|||
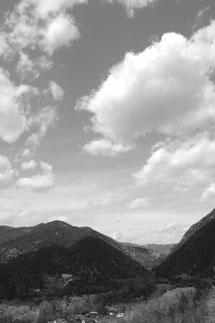
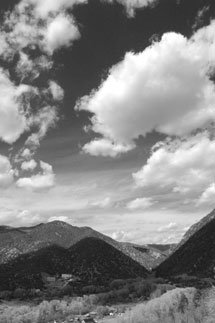
Monochrome Rendition: If you are photographing in Monochrome mode you can alter the tonal appearance of the sky by using various Filter effects. These effects emulate what you would get if exposing black and white film and placing various color filters over the lens. Here is the same exposure with no Filter effect, a Blue Filter effect, and a Red Filter effect.
- Log in or register to post comments


